Chapter 2 Individual Operations
54
Chapter 2
Individual Operations
16
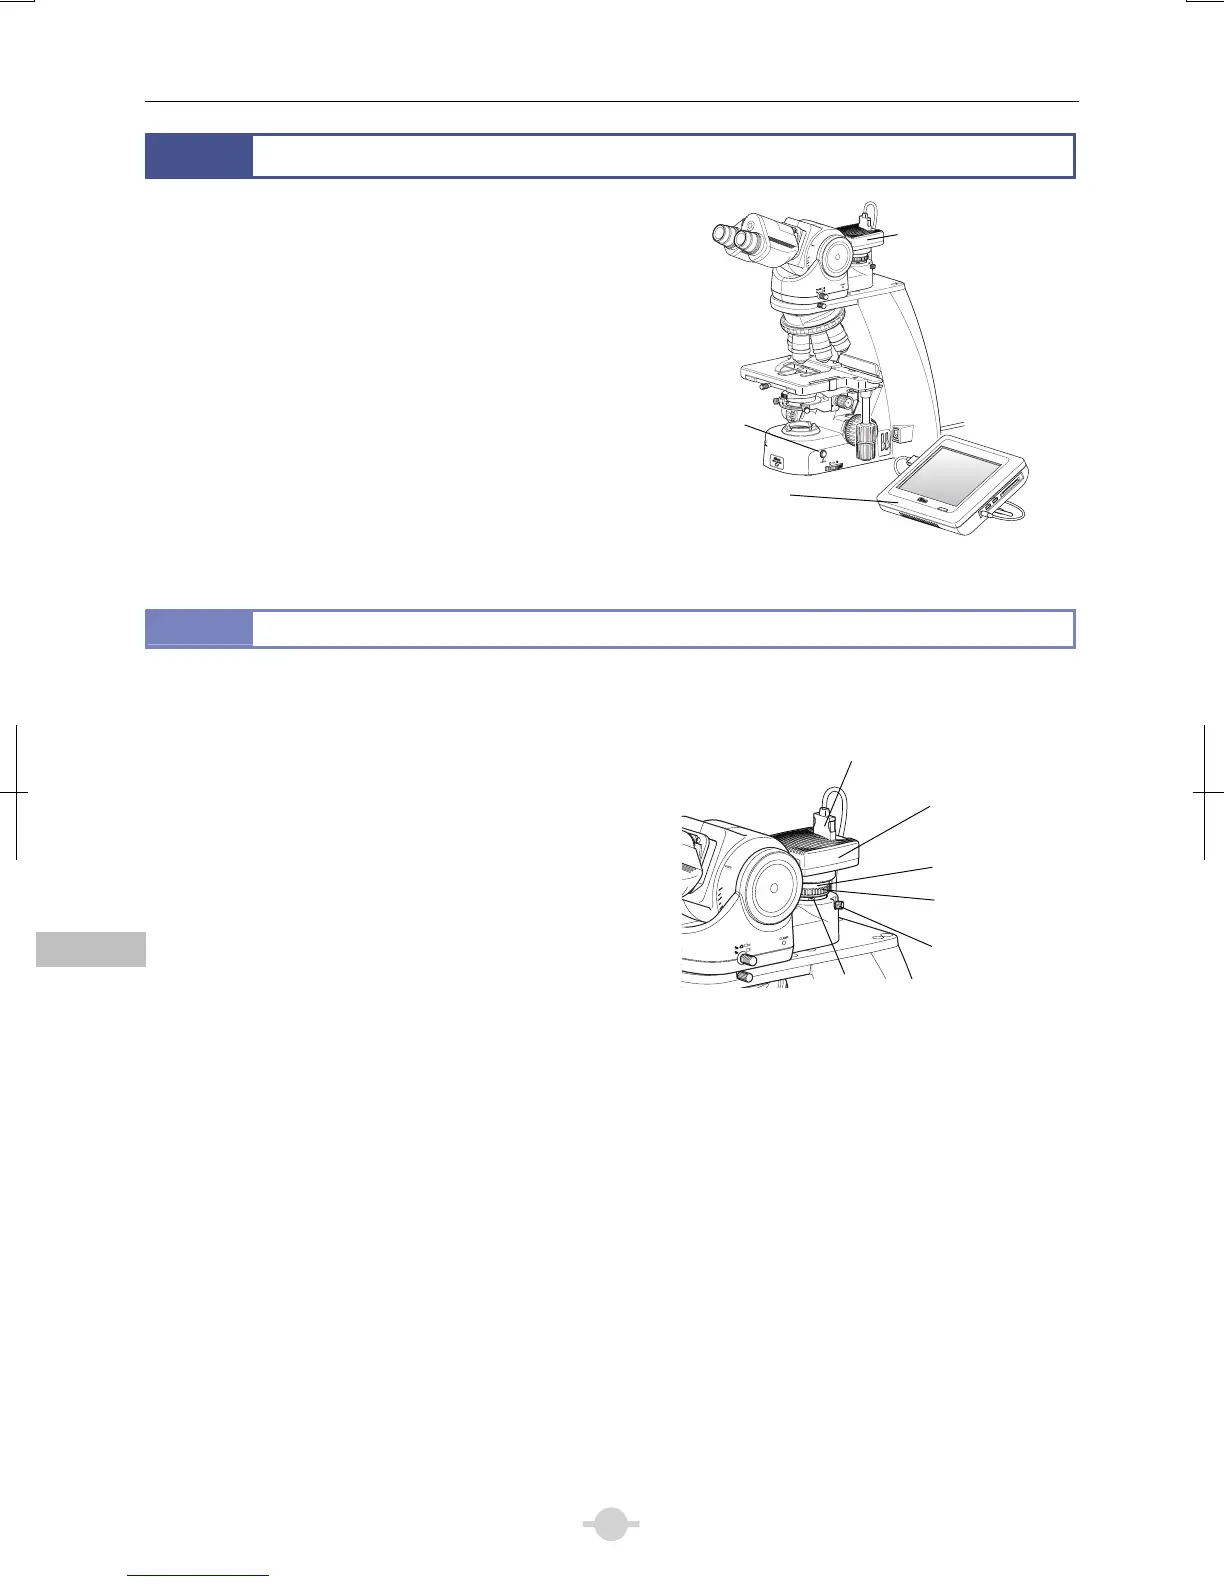
Capturing Images
When the DS-U3 or DS-L3 DS Camera Control Unit is connected
to the microscope, you can use the Capture button on the base o
the microscope to capture digital images with ease.
When using a tube that allows for light distribution to the
binocular section and the camera port, images can also be
captured while in an observation posture from the binocula
section.
CLAMP
TORQUE
ND4
ND8
OUT
IN
Photomicroscopy
16.1
Photomicroscopy
The photomicroscopy procedure is described below. Also refer to the instruction manual provided with the DS-U3, DS-L3,
or the camera's control software for the details including the camera settings.
In addition, when using the DS-L3, you must configure at least the following information:
• Folder for data storage.
• File name for saving the file
• File format and file size
• Date and destination of data
(1) Adjust the illumination of the microscope correctly, and
adjust the focus onto the specimen image.
(2) Adjust the installation position of the camera head
based on the stage movement direction.
Loosen the attachment guide fixing screw on the C mount,
and adjust the camera position and rotation. The movement
on the monitor should be in the opposite direction of the
stage. (When the stage is moved in the direction from left to
right, the image on the monitor should move from right to
left.) After making the appropriate adjustments, tighten the
screws firmly.
Adjusting the camera head
attachment position
(3) Focus the image.
If the image viewed through the eyepiece appears to be in
focus but the image on the monitor is out of focus, turn the
camera fine focus adjustment ring on the C mount until the
image on the monitor is in focus. Note that such out of focus
situations may also indicate incorrect diopter adjustment.
Make sure you have made diopter adjustments as well.
(→Chapter 2 “4 Adjusting the Diopter”)
(4) Center the camera.
Turn the right and left camera centering screws to align the image through the eyepiece with the image on the
monitor.
(5) Select the camera scene mode suitable for the microscopy method.
(6) Adjust the camera’s white balance.
To adjust the white balance, press the WB button while capturing an image of a clear section of the specimen slide.
(For fluorescent photomicrography, it is recommended that you adjust the white balance under normal bright-field
microscopy conditions before capturing images.)
Camera cable
connecto
Camera head
C-mount
Camera fine
focus adjustment
ring
Camera
centering screws
two
ttachment guide
fixing screw
Camera head
Capture
button
DS camera
control unit
(DS-L3 in the figure)
 Loading...