BODY 7 - 18
DASH
DESCRIPTION
The dash consists of an upper panel assembly and
a lower panel assembly. Inside the dash is located
the PSDM (standard equipment) and the
Heater/Defogger unit (optional equipment).
DASH UPPER PANEL
DESCRIPTION
The upper dash panel is constructed of molded
plastic. It contains cup holders for both driver and
passenger sides, and a locking glove compartment
in the center. The panel is secured by two Torx®
head screws through the lower windshield support,
and by Velcro® strips where it mates with lower
dash panel.
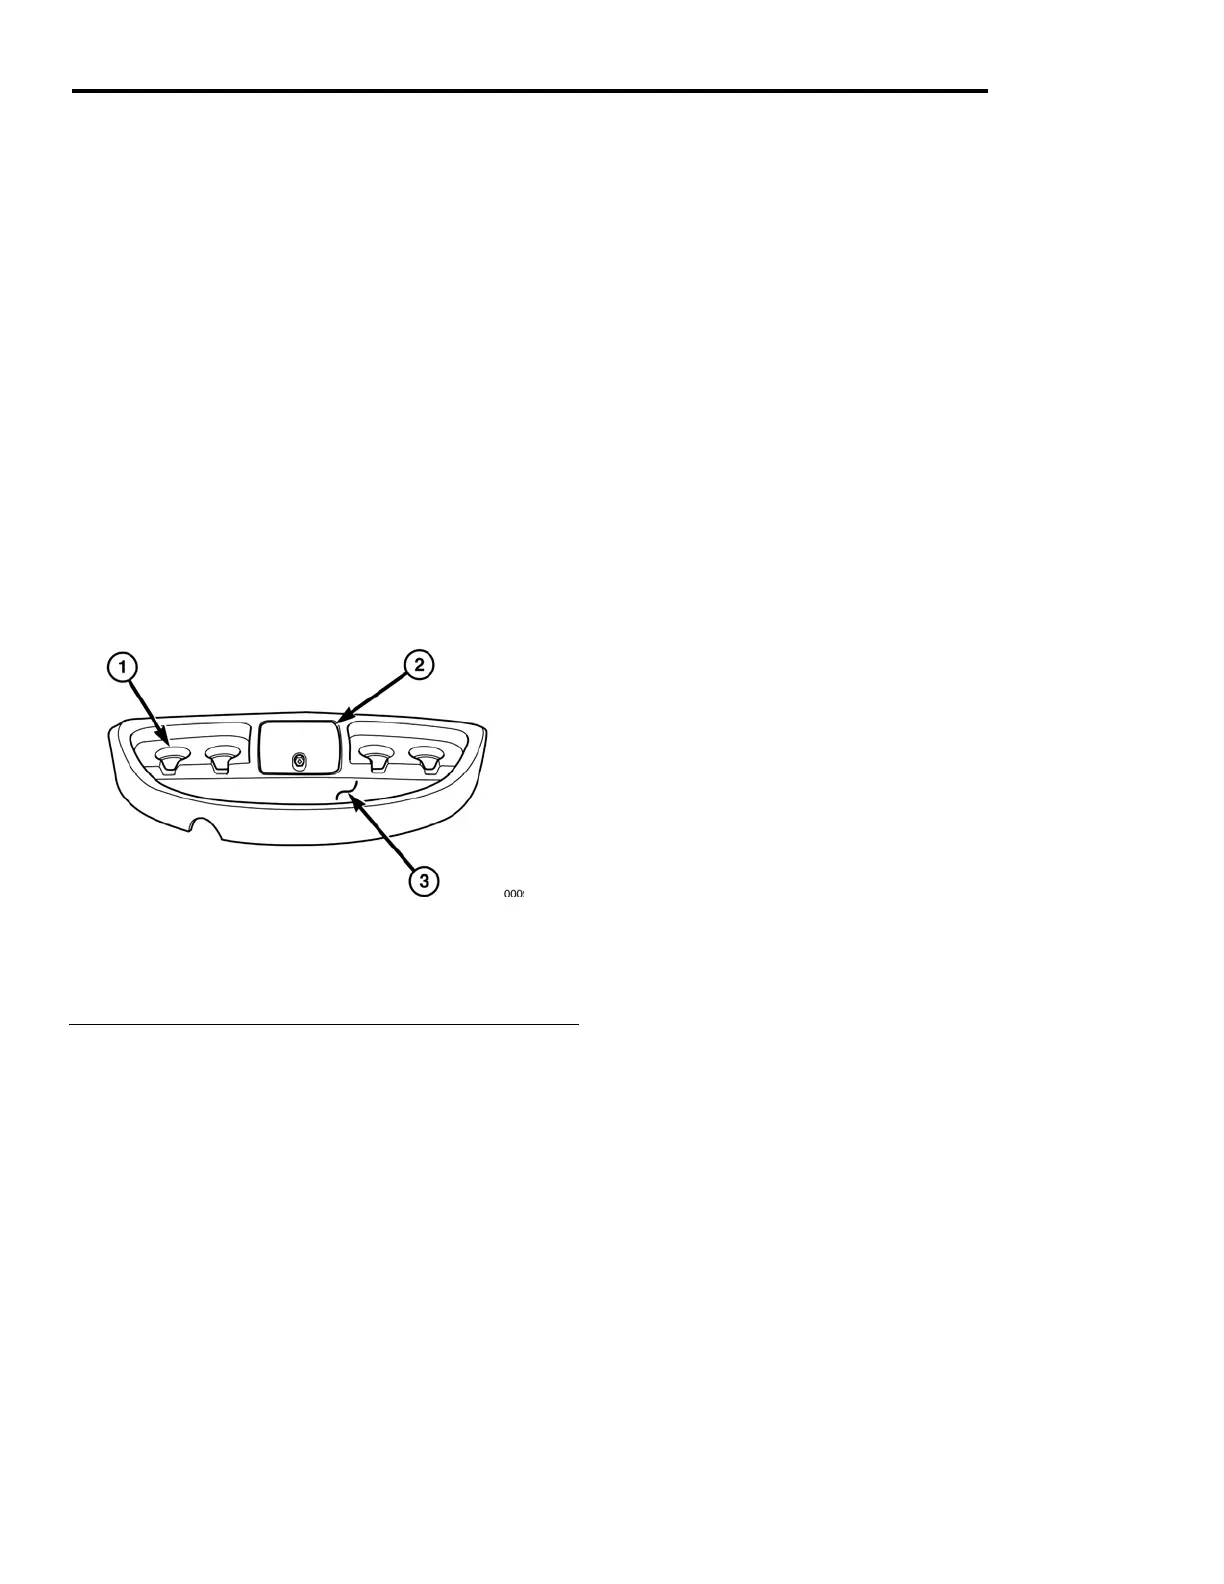
Fig. 14 Upper Dash Panel
1 - Molded cup holder(s)
2 - Locking glove box door
3 - Storage tray
REMOVAL
1. Open hood.
2. Remove the two T27 Torx® head screws
located immediately below the windshield
toward the outer edges.
3. Lift upper dash assembly out, taking care to
disconnect any electrical connections.
4. Disconnect the heater ducts at heater assembly
(if equipped).
NOTE: Take care not to scratch steering
column/instrument pod covers.
INSTALLATION
1. Connect heater ducts at heater assembly (if
equipped).
2. Connect electrical connections, if any.
3. Position upper dash assembly on lower dash
assembly.
NOTE: Take care not to scratch steering
column/instrument pod covers.
4. Attach upper dash to lower windshield support
with two T27 Torx® head screws.
NOTE: Take care not to cross-thread bolts, or
jack nuts on dash panel will strip.
5. Close hood.
November 2007 GEM Service Manual
 Loading...