62 ESP-LX+ & LXi+ Installation, Programming, & Operation Guide
Install Battery
The 9-Volt rechargeable nickel metal hydride (NiMH) battery
supplied with the controller provides power to maintain the
current time and date during a power outage. All program
information you have entered is maintained independently of
battery power. So if a prolonged power outage outlasts the life
of the battery, you will only have to update the time and date
after power is restored (your program is the default).
NOTE: Memory of the time and date is retained by a
battery which is to be disposed of in accordance
with local regulations.
The battery also lets you program the controller with the face
panel detached from the cabinet power supply.
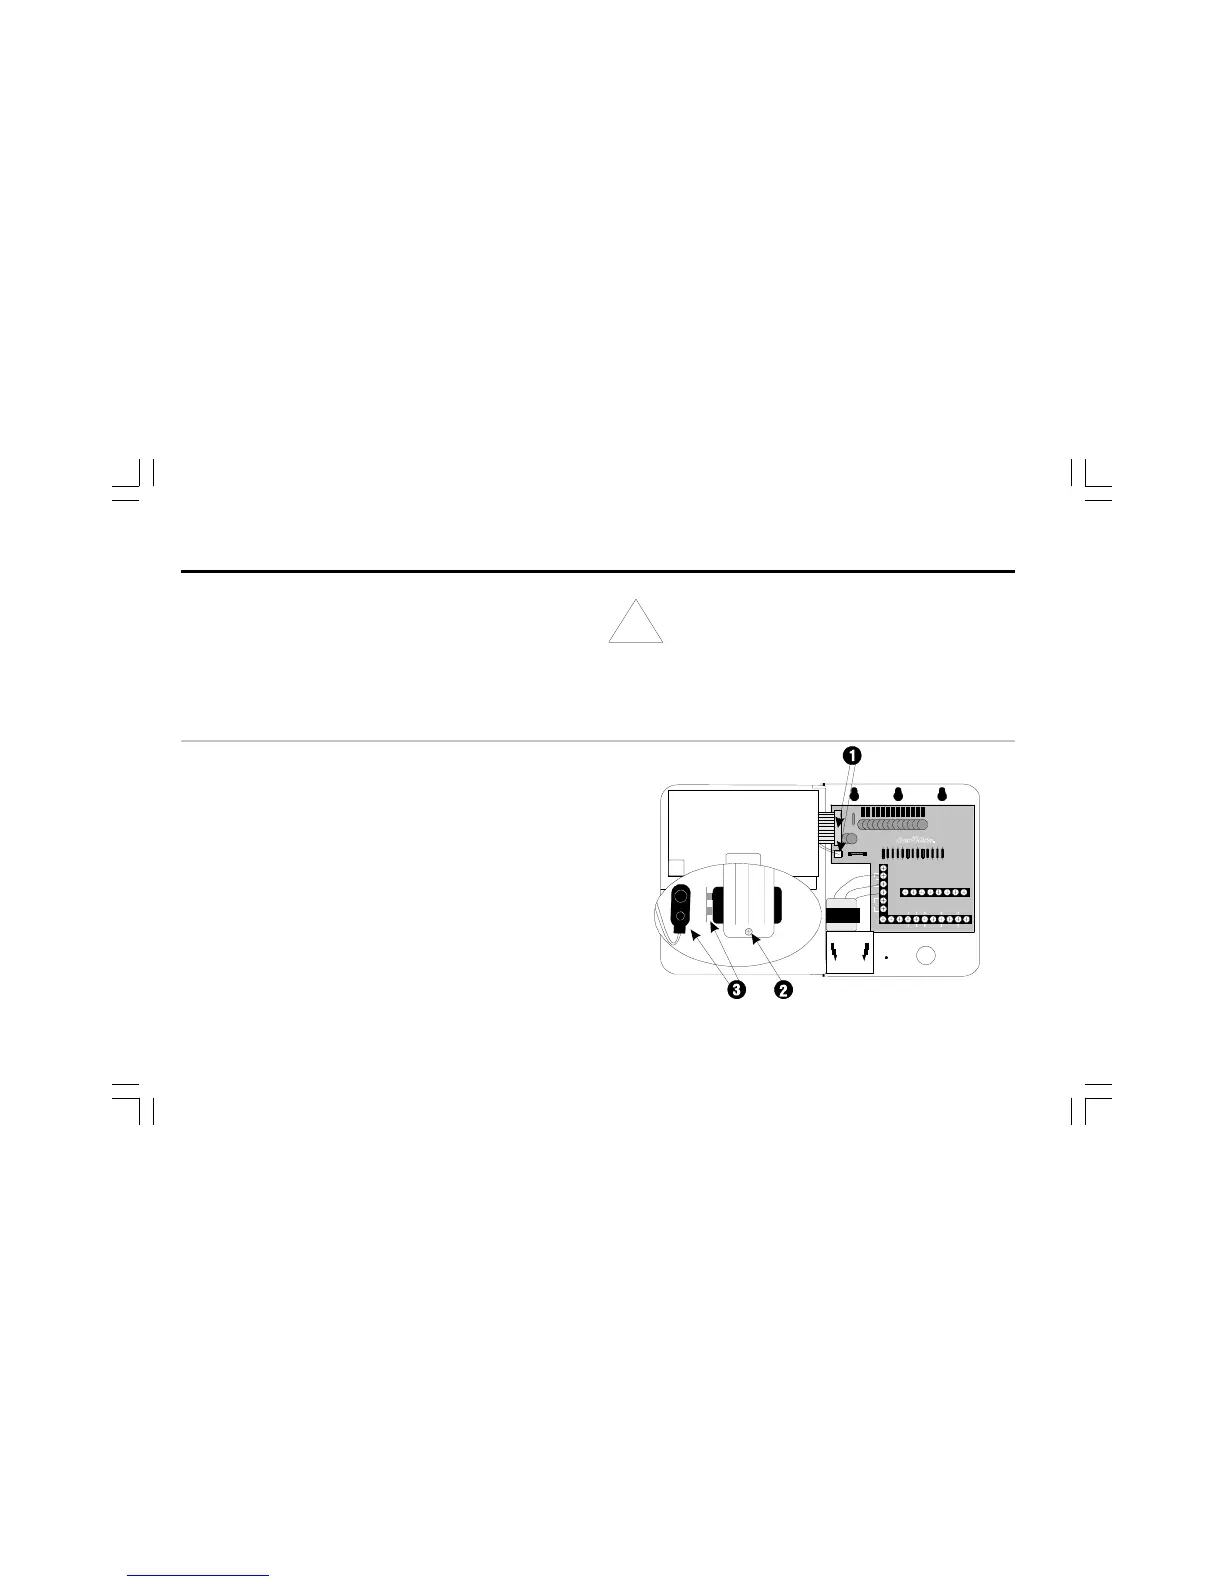
➊ If you have removed the face panel and cabinet door for a
new installation, reinstall them now. Be sure to connect the
ribbon cable and two-wire harness from the face panel to
the controllers circuit board, as described on page 48.
➋ Loosen the screw on the battery cover, and slide the
battery out of its compartment. If you are replacing a used
battery, discard the old battery properly. The replacement
battery must be a 9-Volt rechargeable NiMH battery.
➌ If the battery has a protective cover installed over its
terminals, remove the cover. Then connect the two-wire
battery clip to the terminals.
 Loading...