4.Mast.
5.Deck.
6.Gateway.
7.Bulkhead.
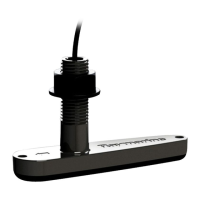
7.3Removingthemountingplate
Thewindtransducerissuppliedwiththemountingplatefitted.Themounting
platemustberemovedbeforeinstallation.
1.Unscrewthethumbscrewfromthefrontofthebasebyturningit
counter-clockwise.
Thethumbscrewiscaptive,soitcannotberemovedcompletely.
2.Pullthefrontofthemountingplatedownwards.
3.Pullthemountingplatedownandforwardstoremoveitcompletelyfrom
thewindtransducer.
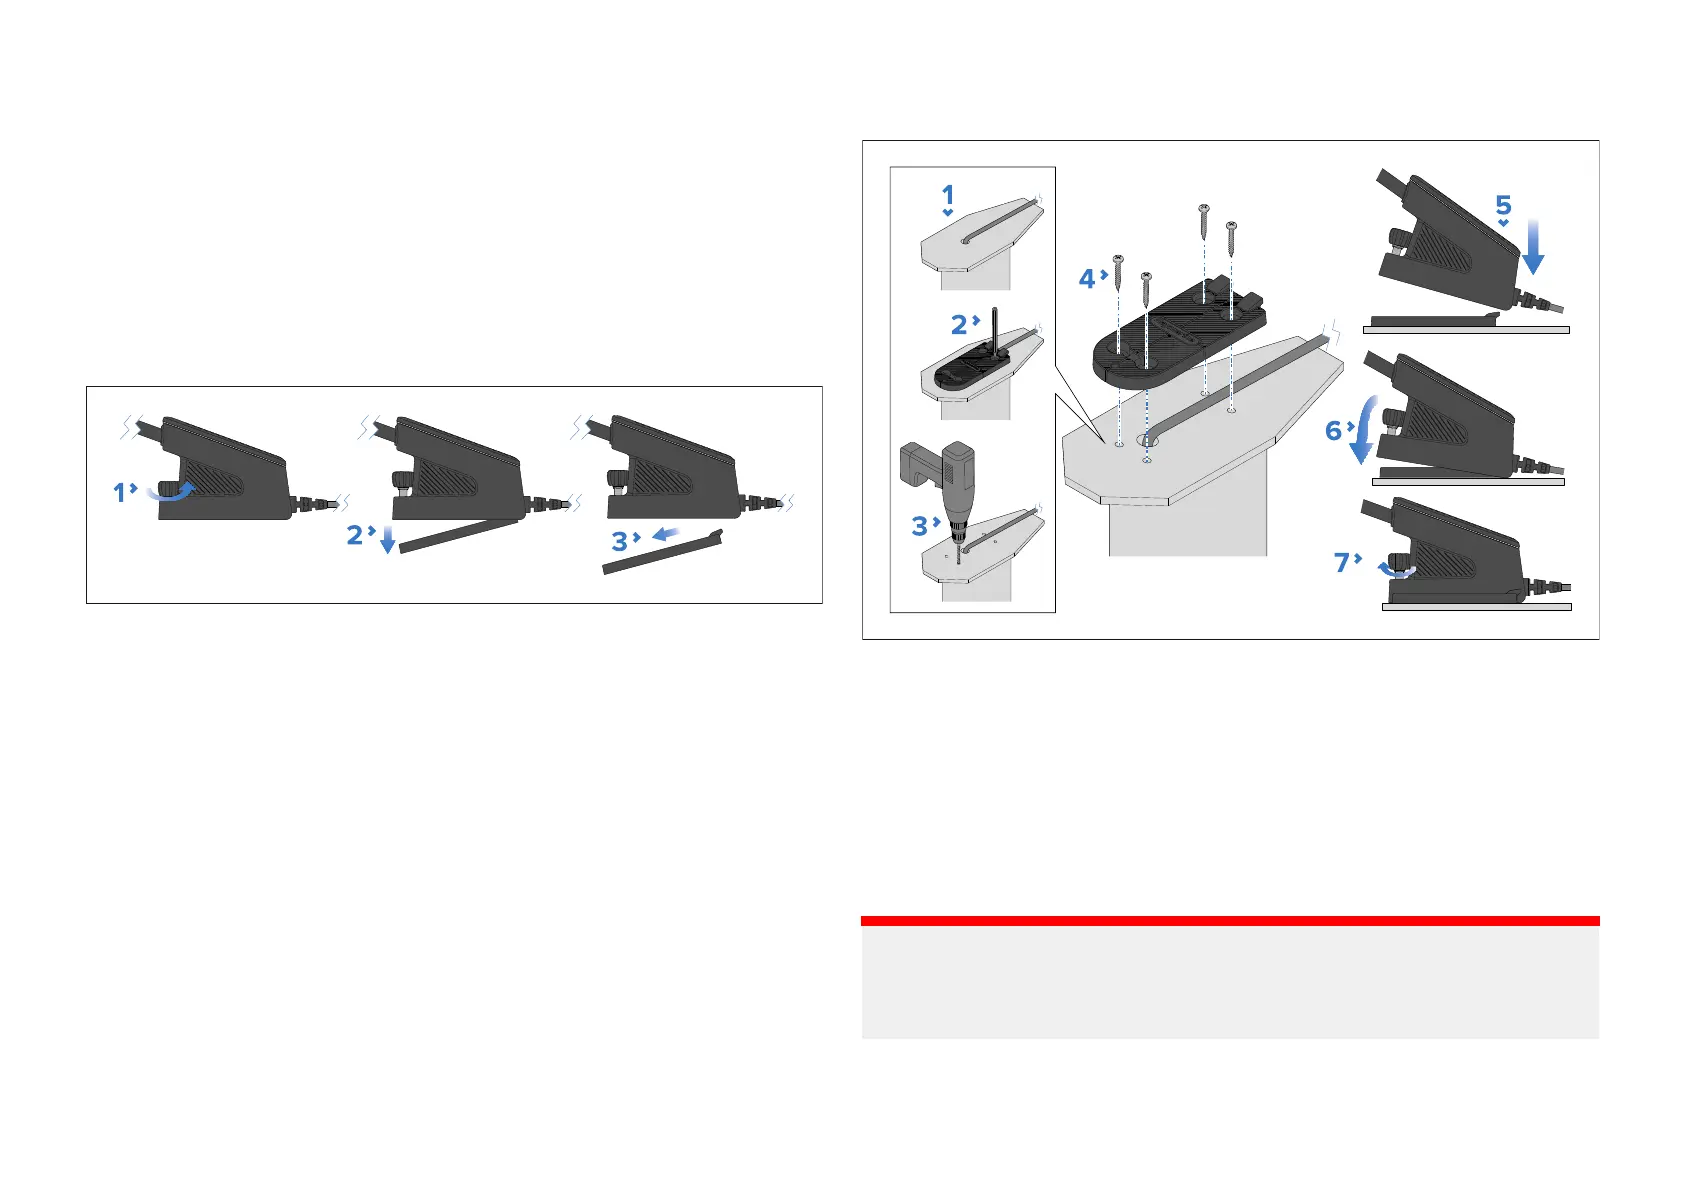
7.4Mountingthewindtransducer
Procedureformountingthewindtransducer.
Pre-requisites:
•Ensureyouhavefollowedthelocationrequirementsguidancewhen
choosingyourmountinglocation.
•Theunitmustbemountedonahorizontalsurface.Ifthemountingsurface
isnothorizontal,createawedgepiecetomakethesurfacehorizontal.
•Ensurethattheprovidedfixingsaresuitableforthemountingsurface
materialandthickness.
1.Routethemastcablefromthetopofthemasttothegateway’sintended
location.
Whenroutingthecablethroughthemast,theprotrudingcableshould
befittedintothecablechannelprovidedonthebottomofthemounting
plate.
2.Useeitherthemountingplateasaguideorusethesuppliedmounting
templatetomarktheholelocationsonthemountingsurface.
3.Drill4pilotholesatthemarkedlocations.
Important:
Pilotholesizesmustbesuitableforthematerialtypeandthicknessof
themountingsurface(e.g.:a4mm(
5
⁄
32
in)drillbitshouldbeusedwhen
mountingonanaluminiumsurface).
4.Securethemountingplatetothemountingsurfaceusingthefixings.
24
 Loading...