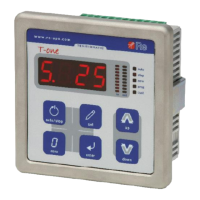
T-one ULS
Rev. 06/18 10/26
Quick start-up
This section describes the installation and test procedures that must be carried out if you wish to set the
instrument up quickly.
A more detailed description of how each function works is given in § Detailed description of programming
functions (page 16).
Installation
1. Fit the T-one ULS regulator.
2. Make the electrical connections as illustrated in § Electrical connection diagrams (pages 12-13).
3. Connect the instrument to a power supply.
Adjustment mode
4. Press the enter key and keep pressed for about one second, to enter the programming environment;
the display shows F.1.
5. Use the up key to select function 4.
6. Press the enter key: the word “CAL” flashes on the display for a few seconds; then, the calibration
functions needed for the quick start-up of the instrument are given in sequence.
Note: During calibration the instrument can not perform the states switch, neither by frontal nor by
remote, except for PRIORITY STOP.
Calibration functions
7. F.30 appears on the display: use this function to set the analog input from which the “reference
diameter” will be acquired
press enter and the function value set is displayed;
using the up or down keys set the value to 0 to use the AIN1 input (0÷10Vdc) or 1 to use the
AIN0 input (4÷20mA);
press enter to confirm and up to move onto the next function.
8. F.31 appears on the display: use this function to set the position of the decimal point in the diameter
displaying;
press enter and the function value set is displayed;
using the up or down keys set the value to 0 to have not the decimal point (0000), 1 to have one
digit after the decimal point (000.0) or 2 to have two digits after the decimal points (00.00);
press enter to confirm and up to move onto the next function.
9. F.32 appears on the display: use this function to set the maximum diameter value;
press enter and the function value set is displayed;
using the up or down keys set the maximum diameter value;
press enter to confirm and up to move onto the next function.
10. F.33 appears on the display:
position the reel with the maximum diameter on the unwinder/rewinder, position the diameter
sensor correctly and calibrate it, if necessary (if using the US3 sensor, see the relative user
manual);
press enter, the word “YES” flashes on the display for a few seconds if the gain calibration was
successful;

 Loading...