RIGOL Chapter 5 Disassembly and Assembly
Service Guide for DS1000E, DS1000D Series
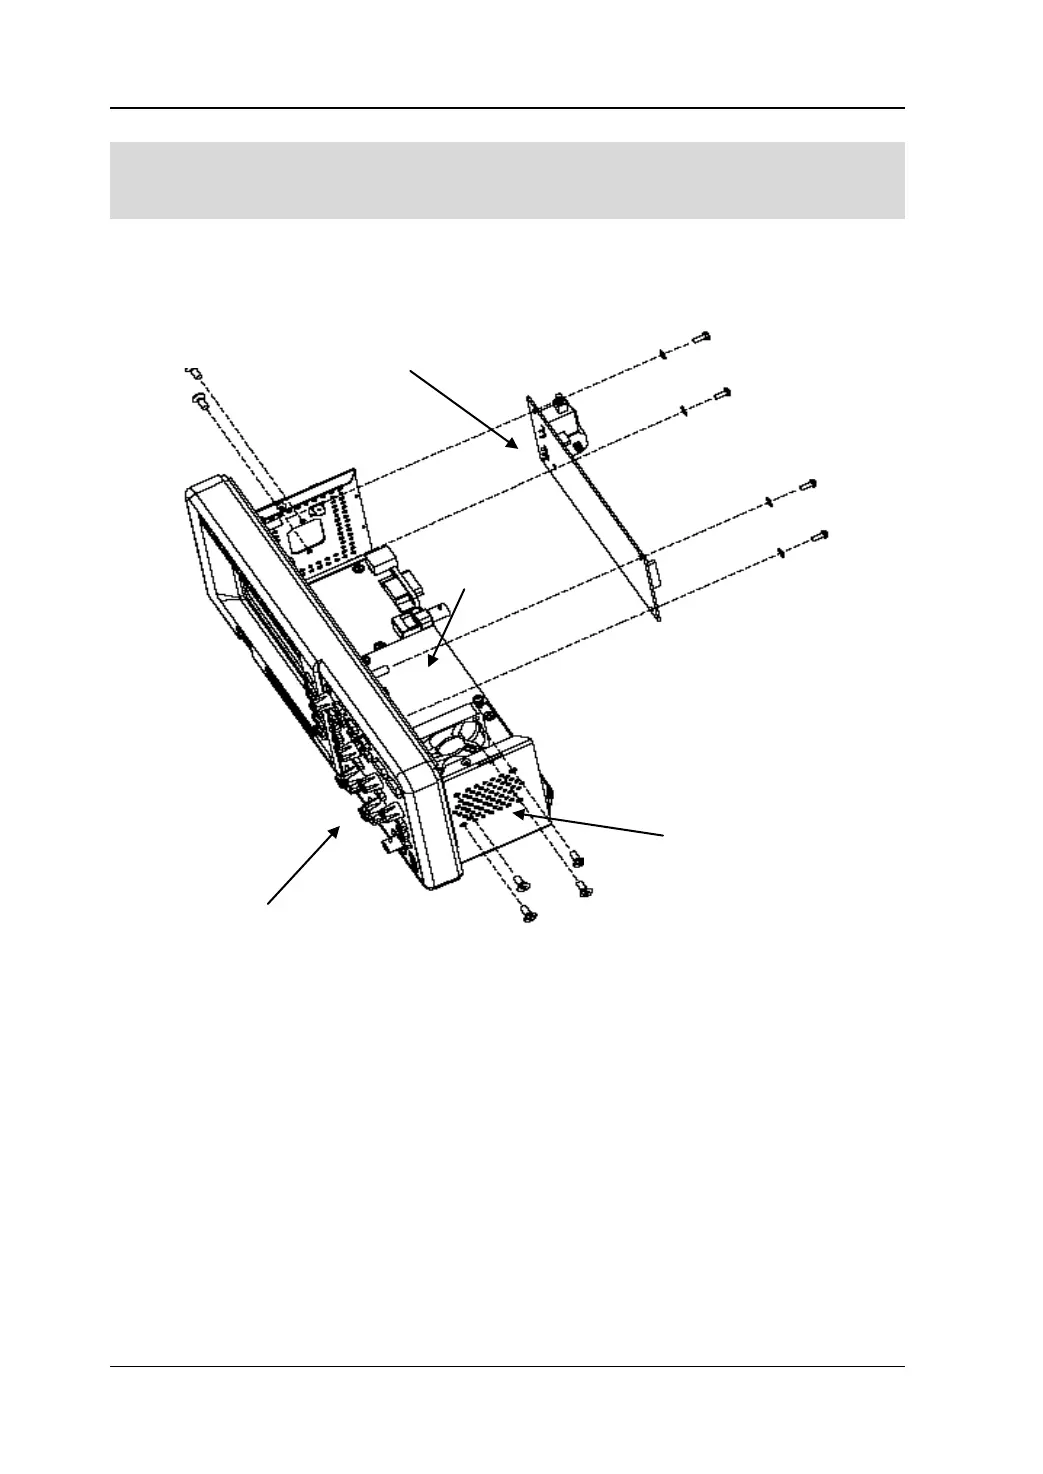
Disassemble and Assemble the Power Board and
the Fan
Figure 5-4 Disassemble and assemble the power board and the fan
Parts Explanations:
⑤ Small bolts for fixing the power board (M3*6 Pan head Torx recess composite
machine screws): 3
⑥ Big bolts for fixing the power board (M4*8 Pan head Torx recess machine screws):
1
⑦ Bolts (M3*8 Pan head Torx recess Drilling tapping screws) and nuts (M3 hexagon
nut with locking plate) for linking up the power board and shell: 2 pairs
⑧ Bolts for fixing the fan (M5*8 Pan head Torx recess machine screws): 4
Disassemble steps:
1. Pull out the power line 12pin from the J2 interface of mainboard and the power
⑧
⑦
⑦
⑤
⑥
⑤
⑤
 Loading...