Users Guide
49
When you have finished, go to the next screen. You can move freely back and forth
between the two without losing data.
The selections are made as normal on the console; tap on
the table you wish to change and use the dial. In some
cases, when a number is highlighted in green, it will be
possible to change it just by tapping on the one you desire.
On the right of five of the parameter selectors, you will see
that the system indicates the maximum and minimum you
can select. The system can automatically rectify the values
entered when you change any of those that these depend
upon, to set them within the limits.
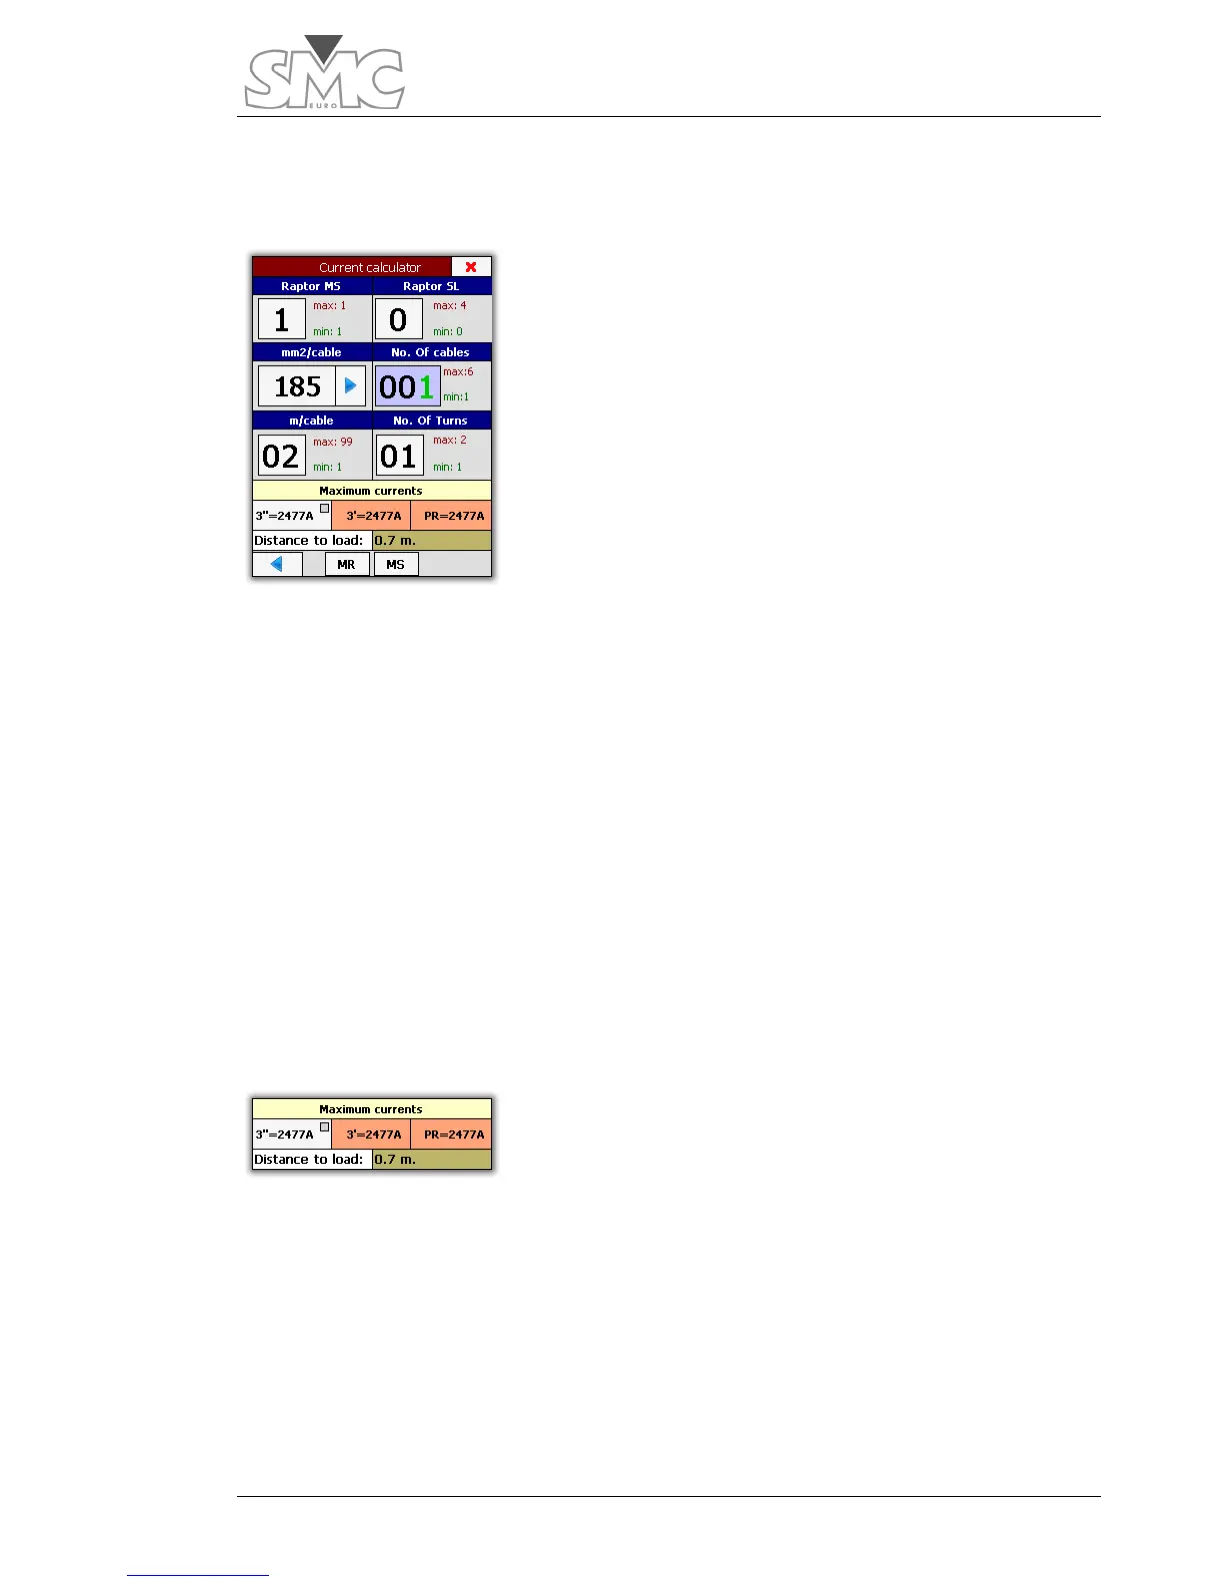
At the top, you must configure the number of Raptor-SL
units you wish to use. For the moment, the number of
Master units is fixed.
The cross-section selector of the cables mm2/cable permits, when by pressing the blue
triangle, shifting between the standard in mm2 and the American standard AWG. The
cross-section you must enter is the cross section of each one of the cables, not the total in
case you are going to use several in parallel.
The No. of cables selector enables you to define how many of them you will use in
parallel. You will see that the maximum indicated varies depending on the cross-section.
If you use the ultra-flexible type of cable that can be supplied as an option with the
Raptor system, you must reduce this maximum by 10% as it is thicker than normal.
The m/cable selector must be used to indicate the length of the cables to be used. The
system uses this information to determine how many turns it can carry out and also the
distance to load, apart from calculating the current. The configuration of Raptor-SL units
is taken into account to determine the length consumed in turns.
The results of the calculation.
Maximum currents. This shows the result in maximum
currents in three work regimes: 3 seconds, 3 minutes and
permanent regime.
The maximum current indicator fields supply another type of information, apart from the
current value.

 Loading...