Recording
36
4 Select [COPY] by turning the SEL/
PUSH EXEC dial, then press the dial.
5 Select the number of the picture profile
to be copied to by turning the SEL/PUSH
EXEC dial, then press the dial.
6 Select [YES] again by turning the SEL/
PUSH EXEC dial, then press the dial.
If you decide not to copy the settings, select
[NO].
7 Press PICTURE PROFILE.
To reset the picture profile settings
You can reset the picture profile settings by
picture profile number. You cannot reset all
picture profile settings at once.
1 Press PICTURE PROFILE.
2 Select the number of the picture profile
to be reset by turning the SEL/PUSH
EXEC dial, then press the dial.
3 Select [SETTING] by turning the SEL/
PUSH EXEC dial, then press the dial.
4 Select [RESET] by turning the SEL/
PUSH EXEC dial, then press the dial.
5 Select [YES] by turning the SEL/PUSH
EXEC dial, then press the dial.
If you decide not to reset the picture profile,
select [NO].
6 Press PICTURE PROFILE.
b Note
• If you adjust all of the iris, shutter speed and gain
manually, you cannot obtain the effect of [AE
SHIFT].
• If you adjust the iris manually, you cannot obtain the
effect of [AT IRIS LMT].
• If the object is so bright that the aperture value set in
[AT IRIS LMT] is not appropriate, the shutter speed
may reach 1/2000 automatically.
• If you adjust the gain manually, you cannot obtain
the effect of [AGC LIMIT].
• If you select [CINEFRAME 24] when the shutter
speed is slower than 1/30, the shutter speed is
automatically set to 1/60.
• If you select [CINEFRAME 30] when the shutter
speed is slower than 1/15, the shutter speed is
automatically set to 1/30.
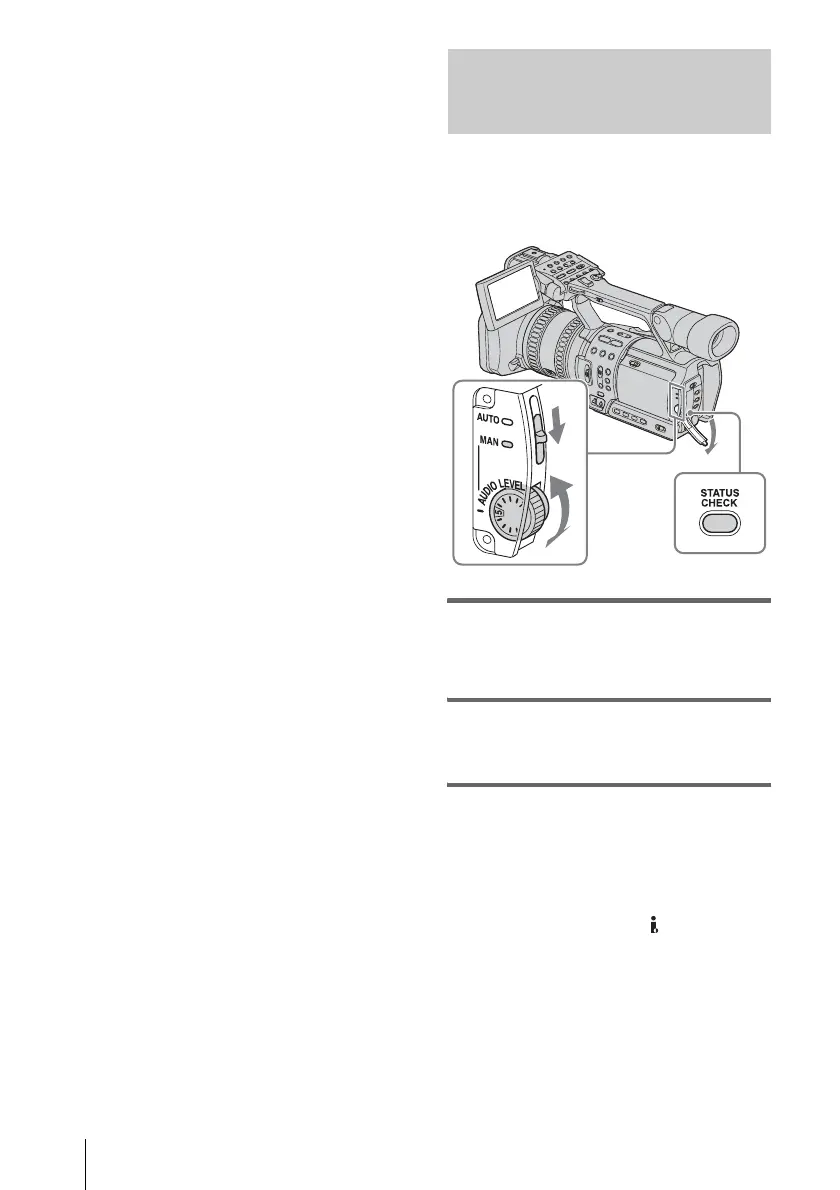
Adjusting the audio recording
level – Microphone volume level
You can adjust the microphone volume when
recording. Checking the volume with
headphones is recommended.
1 Open the cover and set the AUTO/
MAN switch to MAN.
The audio level meter appears.
2 During recording or in the standby
mode, adjust the volume by turning
the AUDIO LEVEL dial.
To restore automatic adjustment
Set the AUTO/MAN switch to AUTO.
b Note
• You cannot adjust the volume of audio input from
the AUDIO/VIDEO jack or the HDV/DV jack.
z Tip
• To check the audio setting information in greater
detail, press STATUS CHECK (p. 24). You can also
check the microphone volume during automatic
adjustment.
 Loading...