EasyManua.ls Logo

Sony Handycam NEX-VG10 User Manual

Sony Handycam NEX-VG10
168 pages
To Next Page IconTo Next Page
To Previous Page IconTo Previous Page
Page #130 background imageLoading...
Page #130 background image
73
GB
Table of
contents
Sample
images
Menu Index
You can create a Blu-ray Disc from AVCHD format movies imported to a computer
using the supplied software “PMB.
To creating a Blu-ray Disc, you must install [BD Add-on Software].
Click [BD Add-on Software] on the installation screen of “PMB,” and install this plug-in
according to the on-screen instructions.
1 Turn on your computer and place an empty Blu-ray Disc on the Blu-ray
Disc drive.
2 StartPMB.
3 Click [Calendar] or [Index] to the left of the screen, and select the date or
folder of the high definition image quality (HD) movies you want to write.
4 Click (Disc Creation) at the top of the screen t [Create Blu-ray
Disc (HD)].
5 Follow the instructions on the screen to create a disc.
Install “PMB” beforehand.
Your computer must support the creation of a Blu-ray Disc.
Connect your computer to the Internet when you install [BD Add-on Software].
BD-R (non-rewritable) and BD-RE (rewritable) media can be used to create a Blu-ray Disc. You cannot
add contents to either type of disc once it has been created.
It may take a long time to create a Blu-ray Disc.
You can create an AVCHD disc from AVCHD format movies imported to a computer
using the supplied software “PMB.”
1 Turn on your computer and place an empty disc on the DVD drive.
2 StartPMB.
3 Click [Calendar] or [Index] to the left of the screen, and select the date or
folder of the high definition image quality (HD) movies you want to write.
4 Click (Disc Creation) at the top of the screen t [Create AVCHD
Format Discs (HD)].
5 Follow the instructions on the screen to create a disc.
Install “PMB” beforehand.
Still images cannot be recorded on an AVCHD disc.
It may take a long time to create a disc.
Creating a Blu-ray Disc
Notes
Creating an AVCHD disc
Notes
Continued r

Table of Contents

Other manuals for Sony Handycam NEX-VG10

Question and Answer IconNeed help?

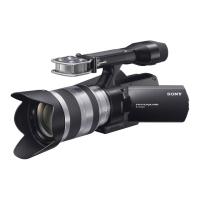
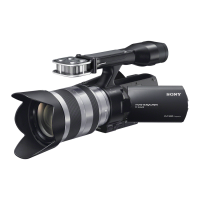
Do you have a question about the Sony Handycam NEX-VG10 and is the answer not in the manual?

Sony Handycam NEX-VG10 Specifications

Optics and Lens IconOptics and Lens
filter diameter67 mm
focal length (photo)27 mm-300 mm
focal length (video)32.4 mm-360 mm
minimum focus distance1 ft (wide end) - 1.6 ft (tele end)
angle of view76°
maximum aperture (wide end)F3.5
maximum aperture (tele end)F6.3
minimum aperture (wide end)F22
minimum aperture (tele end)F40
lens weight18.5 oz
LCD Display IconLCD Display
lcd type3.0" Xtra Fine LCD, 180° swivel
angle adjustmentOpening: 90°, Turning: 180°
brightness controlManual (5 steps)
Imaging Sensor IconImaging Sensor
effective picture resolution14.2 megapixels
imaging sensor size23.4 x 15.6 mm
pixel gross14.6 megapixels
Power IconPower
battery typeType V Battery
supplied batteryInfoLITHIUM NP-FV70
battery chargerAC-PW10AM
Weight and Dimensions IconWeight and Dimensions
weight (body only)620 g
weight (with battery, lens, and media)1.3 kg
dimensions (W x H x D)97 x 132 x 294 mm

Summary

Important Safety Instructions

General Safety Warnings

Precautions to prevent fire, electric shock, and injury during operation.

Read This First: Safety and Operation Notes

Preventing Malfunctions and Damages

Handling the camcorder to avoid damage and ensure proper function.

Notes on Recording and Playback

Key considerations for successful recording and playback operations.

Battery Preparation and Charging

Charging the Battery Pack

Step-by-step instructions for charging the camcorder's battery pack.

Battery and Power Operations

Attaching and Removing the Battery Pack

Procedures for inserting and removing the camcorder battery.

Using AC Adaptor as Power Source

Connecting the camcorder to a wall outlet for continuous power.

Attaching and Removing Lenses

Attaching the E-mount Lens

Step-by-step guide to mounting the supplied E-mount lens.

Initial Camcorder Setup

Turning On and Setting Date/Time

First-time setup for camcorder date, time, and area.

Using Operating Buttons and Controls

Adjusting Display Settings

Memory Card Operations

Inserting and Ejecting Memory Cards

Instructions for inserting new cards and removing them safely.

Compatible Memory Cards

Information on supported memory card types and capacities.

Recording Movies

Starting and Stopping Movie Recording

Basic steps to begin and end movie recording.

Recording Still Images

Taking Still Images

Procedure for capturing still photographs with the camcorder.

Recording Functions Overview

Lens Adjustments

Using the zoom ring, focusing ring, and zoom lock switch.

Exposure Mode Settings

Program Auto (P)

Automatic adjustment of aperture and shutter speed for versatile shooting.

Aperture Priority (A)

Control aperture for depth of field; shutter speed is automatic.

Shutter Priority (S)

Control shutter speed for motion effects; aperture is automatic.

Manual Exposure (M)

Manual control over both aperture and shutter speed for precise exposure.

Playback and Image Deletion

Viewing Recorded Content

How to navigate and play back recorded movies and still images.

Deleting Images

Procedure for selecting and deleting unwanted recorded images.

Playback on a TV

Computer and Software Setup

Installing and Disconnecting Software

Importing Images to Computer

Transferring Images via USB

How to connect and transfer recorded images to a computer.

Troubleshooting Power and Recording Issues

Recording Issues

Troubleshooting for no display, shooting start failures, and memory card issues.

Recording Time Information

Precautions for Use and Storage

Environmental Precautions

Advice on suitable environments for camcorder use and storage.

Menu Structure Overview

Menu Settings: Shooting Options

Menu Settings: Color and Playback

Menu Settings: Setup Options

Troubleshooting Common Issues

General Troubleshooting Steps

Primary steps to take when experiencing problems with the camcorder.

Using the Operating Buttons

Control Dial and Navigation Buttons

How to use the control dial and directional buttons for selection.

Navigating the Menu

Display Contents (DISP)

AF/MF Select Function

Gain Adjustment

ISO Sensitivity Settings

Exposure Compensation

White Balance Adjustment

Program Auto (P) Mode

Aperture Priority (A) Mode

Shutter Priority (S) Mode

Manual Exposure (M) Mode

SteadyShot Function

Drive Mode Settings

Flash Mode Settings

Rec Mode for Movies

Image Size Settings

Creative Style Options

Metering Mode Settings

Flash Compensation

DRO/Auto HDR Settings

Deleting Images

Protecting Images from Accidental Erasure

Movie Audio Recording Settings

Red Eye Reduction Feature

Date and Time Setup

Area Setting

Image Sensor Cleaning Mode

Reset Default Settings

Format Memory Card

Formatting for Stable Performance

Recommended procedure for formatting memory cards before first use.

Recover Image Database

Creating Discs Using a Computer

Troubleshooting Battery and Power Issues

Battery Pack and Power Issues

Solutions for battery attachment, power loss, and charging problems.

Camcorder Power-On Issues

Steps to take if the camcorder fails to power on.

Troubleshooting Recording Issues

No Display on Viewfinder/LCD

Solutions for when the screen remains blank during operation.

Shooting Start/Stop Button Not Working

Troubleshooting if the START/STOP or PHOTO buttons are unresponsive.

Troubleshooting Memory Card and Other Issues

Memory Card Operation Issues

Solutions for memory card not operating, inserting, or recording.

Other Common Issues

Addressing fogged lens, unclear viewfinder, and image display problems.

Warning Messages and Solutions

Incompatible Battery and Card Messages

Resolving issues related to battery compatibility and memory card errors.

Processing and Display Errors

Troubleshooting messages related to processing, display, and data recovery.

Handling Specific Error Messages

Using Camcorder Abroad and TV Viewing

Memory Card Usage and Precautions

Battery Pack Information

Battery Charger Operation

Cleaning the Camcorder and Lens

Related product manuals