Ceiling Installation (Front Projection)
,-
.
~",
-:
.
-;
>:>':,:/,':
,...., .
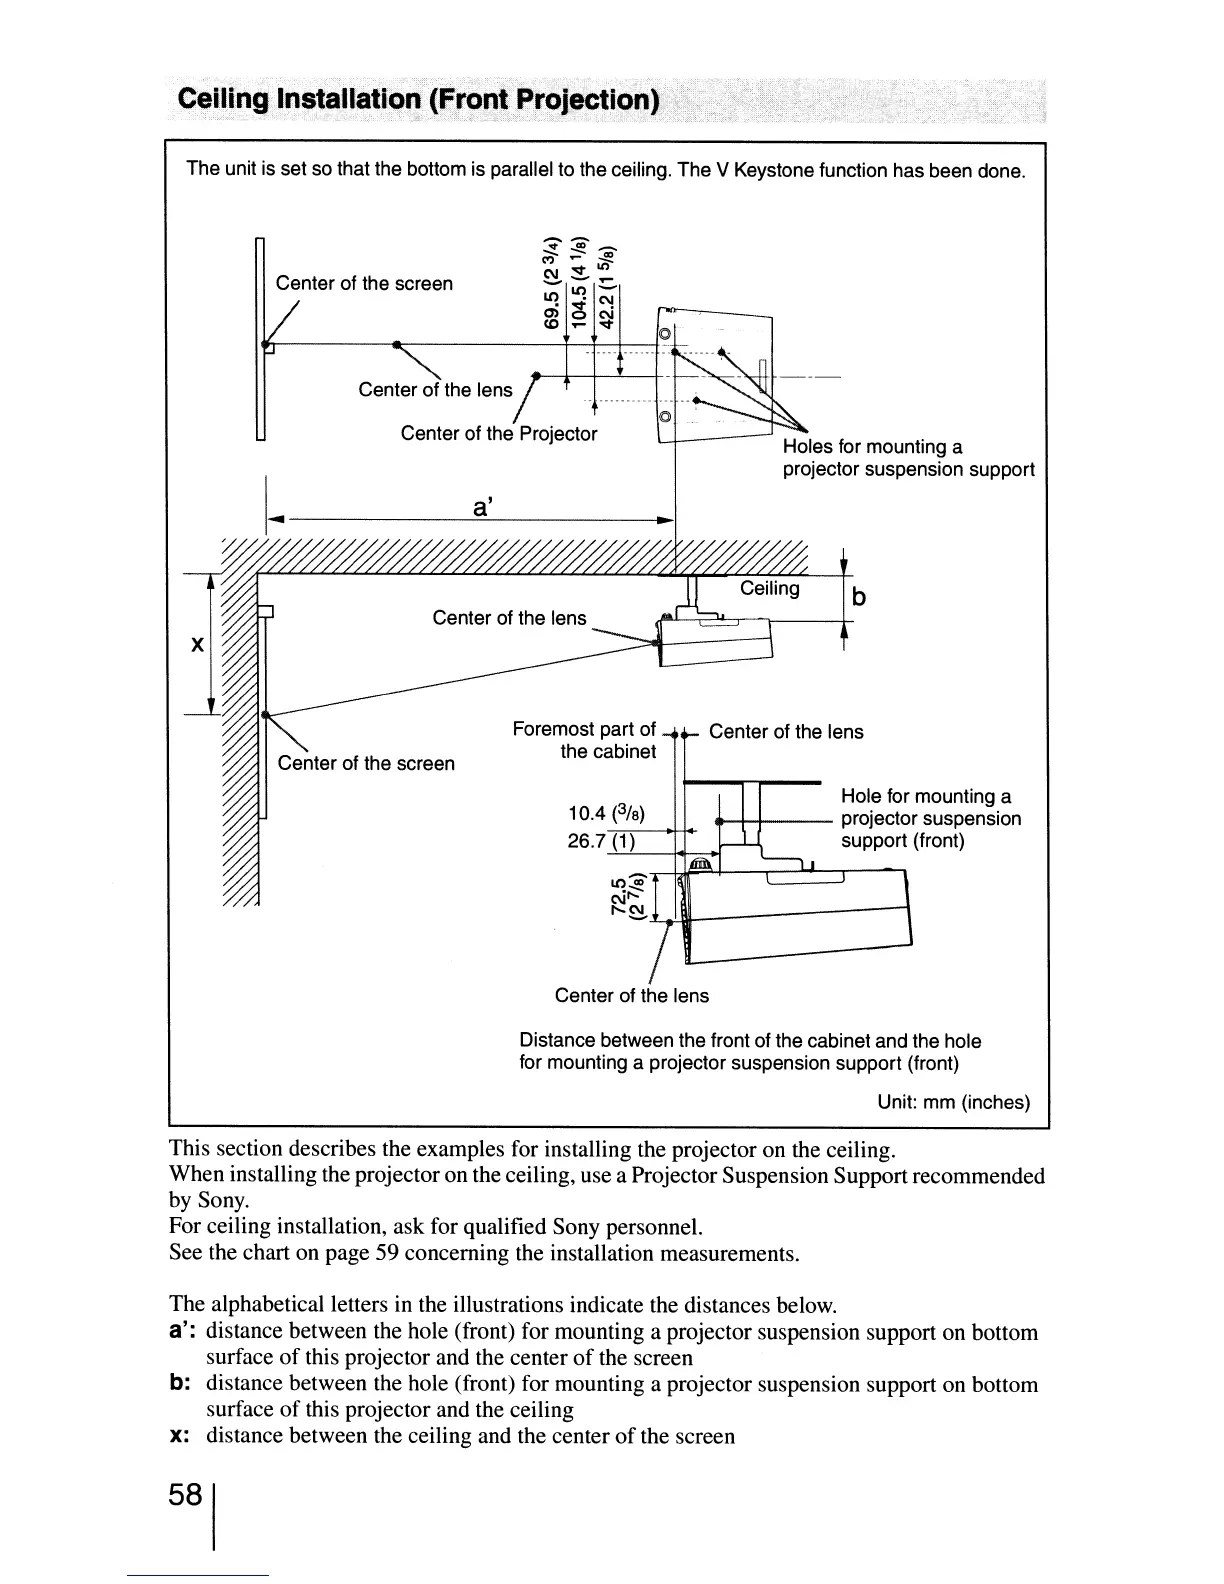
The unit is set so that the bottom is parallel to the ceiling. The V Keystone function has been done.
Holes for mounting a
projector suspension support
Center of the lens
lJ')'Ci)tlr~-L=~::::r-,
.;::-
~~-Ulil--------,
Hole for mounting a
10.4
(3/
6
)
.-t-t---
projector suspension
26.7--,-(1--!.)_--t+=+t
support (front)
Foremost part of
the cabinet
Center of the Projector
I
a'
....
----------=..:;-------
..
~I
~~~~'-"-"-"-"--~~~--+-b
x
Center of the screen
Center of the lens
o
I
*'-----
,-----------1--+-+----t
Center of the lens
Distance between the front of the cabinet and the hole
for mounting a projector suspension support (front)
Unit: mm (inches)
This section describes the examples for installing the projector on the ceiling.
When installing the projector on the ceiling, use a Projector Suspension Support recommended
by Sony.
For ceiling installation, ask for qualified Sony personnel.
See the chart on page 59 concerning the installation measurements.
The alphabetical letters in the illustrations indicate the distances below.
a': distance between the hole (front) for mounting a projector suspension support on bottom
surface
of
this projector and the center
of
the screen
b:
distance between the hole (front) for mounting a projector suspension support on bottom
surface
of
this projector and the ceiling
x:
distance between the ceiling and the center
of
the screen
58
 Loading...