Online version - not for reprint
73MS 270, MS 280
In the case of problems with the
carburetor or fuel supply system,
also check and clean or replace the
tank vent – see 12.5.
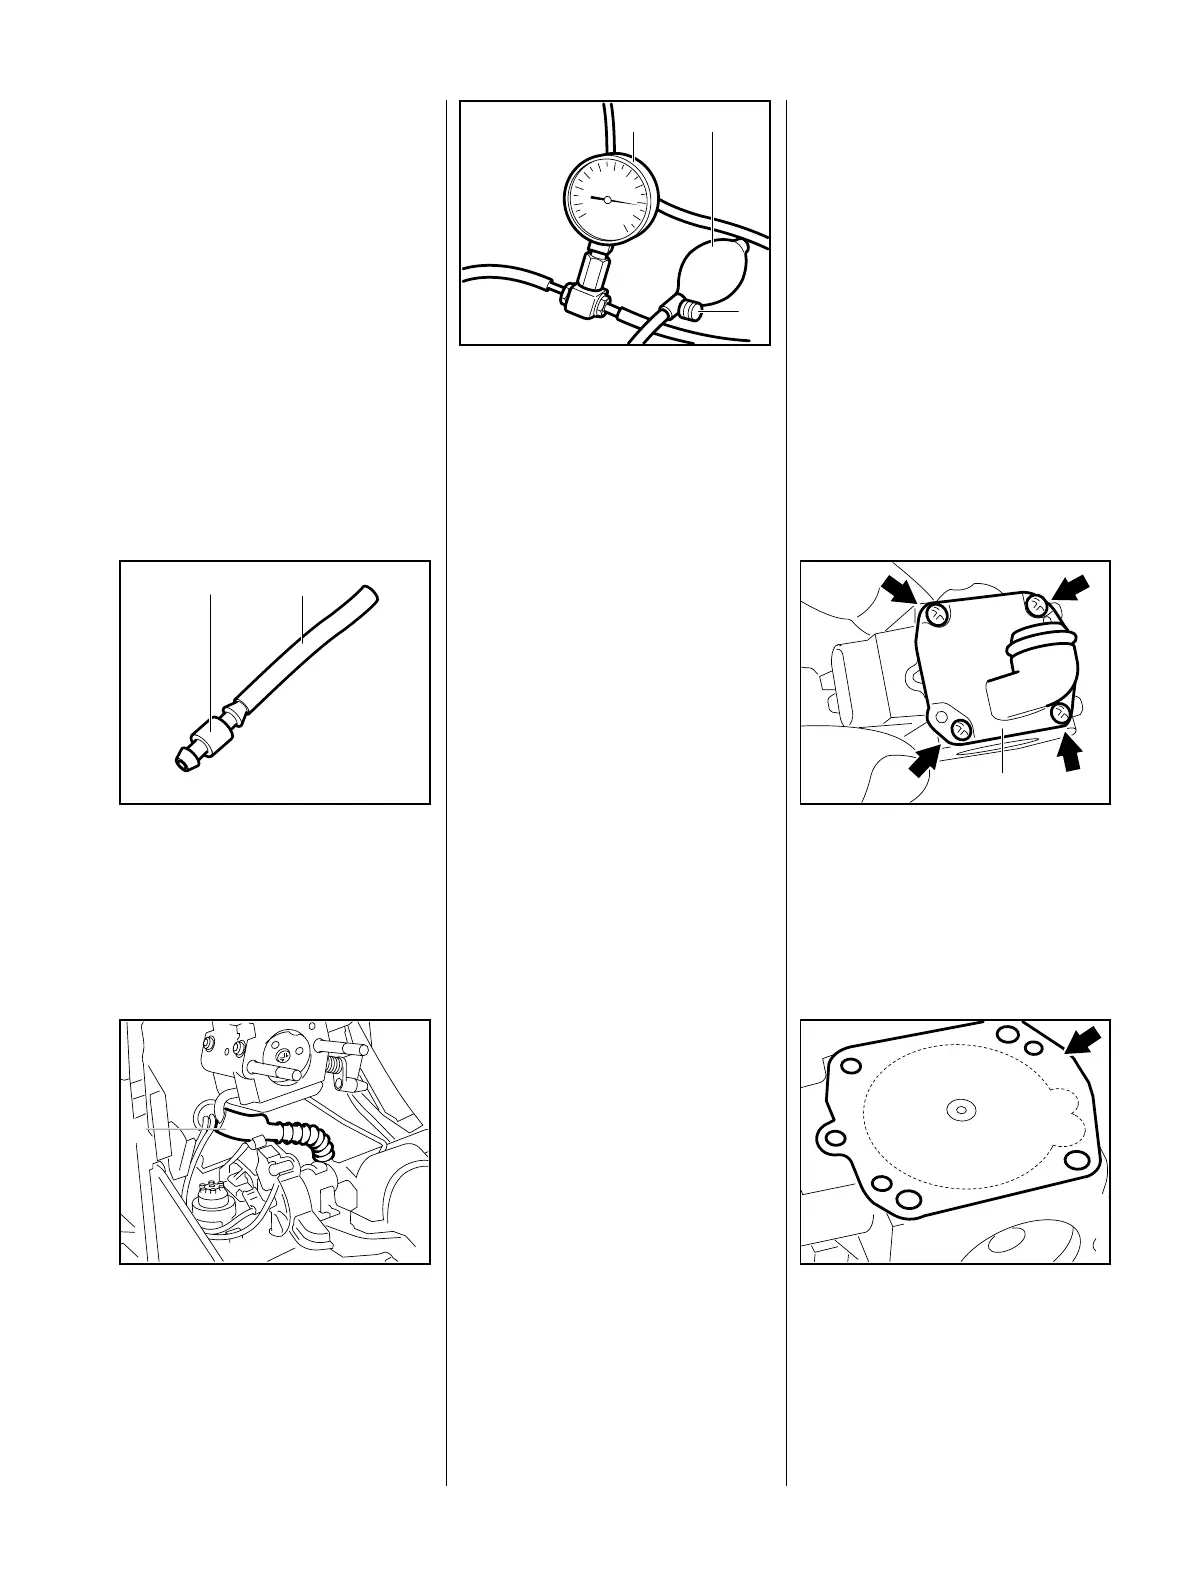
The carburetor can be tested for
leaks with the carburetor and
crankcase tester 1106 850 2905.
– Remove the filter base
– see 12.1.
– Remove the carburetor
– see 12.2.1.
Push the fuel line (1)
1110 141 8600 onto the
nipple (2) 0000 855 9200.
VA
143RA172
2 1
Disconnect fuel hose (1) from the
carburetor.
– Push the fuel line with nipple onto
the carburetor’s elbow connector.
VA
146RA136
1
– Connect the tester's pressure
hose 1106 850 2905 to the
nipple.
Close the vent screw (1) on the
rubber bulb (2) and pump air into
the carburetor until the pressure
gauge (3) shows a reading of
VA
249RA012
2
1
3
approx. 0.8 bar (8 kPa).
If this pressure remains constant,
the carburetor is airtight. However, if
it drops, there are two possible
causes:
1. The inlet needle is not sealing
(foreign matter in valve seat or
sealing cone of inlet needle is
damaged or inlet control lever
sticking). Remove to clean
– see 12.3.2.
2. Metering diaphragm damaged,
replace if necessary
– see 12.3.1.
– After completing the test, open
the vent screw (1) and pull the
fuel line off the carburetor.
– Push the fuel hose onto the
elbow connector.
– Install the carburetor
– see 12.2.1.
Reassemble all other parts in the
reverse sequence.
– Remove the carburetor
– see 12.2.1.
Take out the screws (arrows).
Remove the end cover (1).
VA
146RA142
1
Remove the metering diaphragm
and gasket (arrow) from the
carburetor body or end cover.
VA
146RA143
12.2.2 Leakage Test 12.3 Servicing the Carburetor
12.3.1 Metering Diaphragm
 Loading...