CHASSIS 5-7
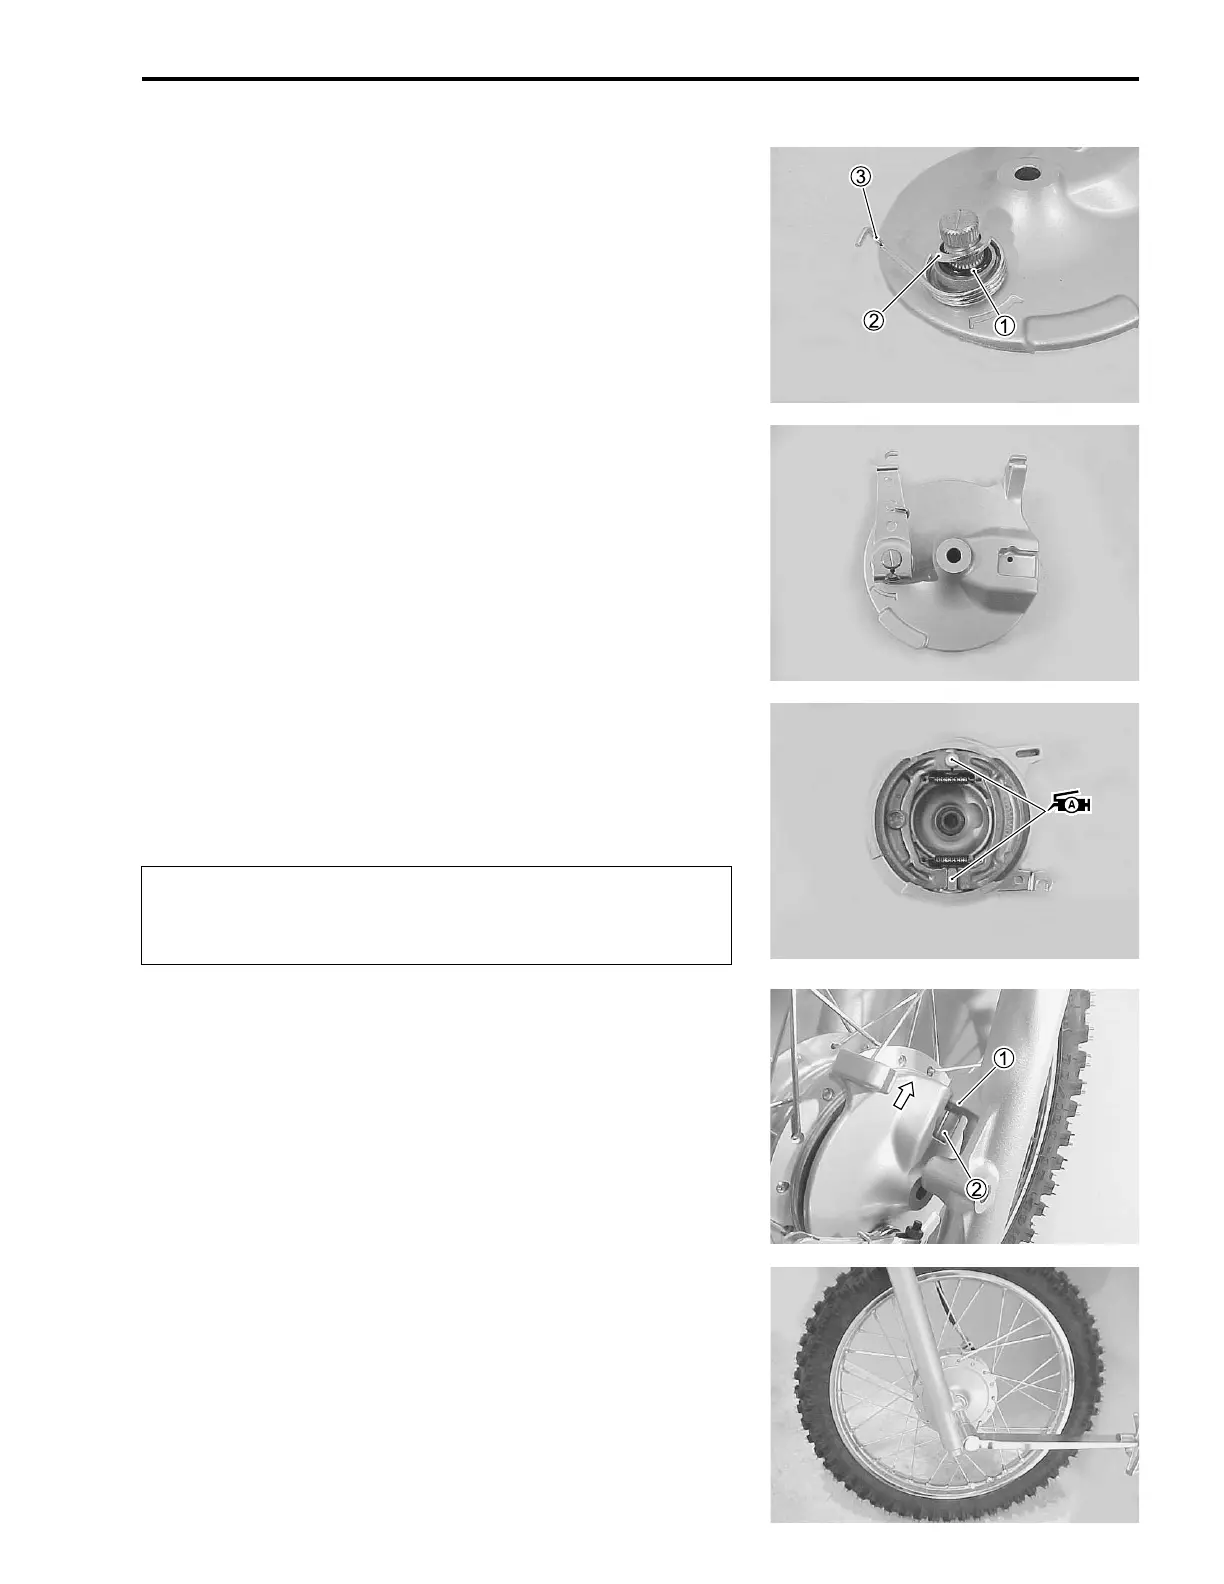
• Install the new O-ring
1, washer
2 and spring
3.
• Install the brake cam lever as shown.
• Tighten the brake cam lever nut to the specified torque.
& Brake cam lever nut: 11 N·m (1.1 kgf-m, 8.0 lb-ft)
• Apply SUZUKI SUPER GREASE “A” to the brake cam and
pin, and install the brake shoes.
% 99000-25030: SUZUKI SUPER GREASE “A” (USA)
99000-25010: SUZUKI SUPER GREASE “A” (Others)
'
REMOUNTING
Remount the front wheel in the reverse order of removal. Pay
attention to the following points:
• Align the rib
1 on the left fork leg with the slot
2 on the brake
panel.
FRONT AXLE
• Tighten the front axle nut to the specified torque.
& Front axle nut: 35 N·m (3.5 kgf-m, 25.5 lb-ft)
• Install the new cotter pin.
• Adjust the front brake lever play. (!2-14)
Be careful not to apply too much grease to the cam
and pin. If grease gets on the lining, brake slippage
will result.

 Loading...