77
ENGINE REASSEMBLY
NOTE:
All parts to be used in reassembly must be
perfectly clean.
Oil sliding and rubbing surfaces of engine
parts with engine oil just before using them
in reassembly.
Have liquid packing ready for use. Bond
No.1215 is specified for it. Use it wherever
its use is specified in order to ensure leak–
free (oil and water) workmanship of reas-
sembly.
There are many running clearances. During
the course of engine reassembly, be sure to
check these clearances, one after another,
as they form.
Gaskets, “O” rings and similar sealing com-
ponents must be in perfect condition. For
these components, use replacement parts
stock.
Tightening torque is specified for important
fasteners (mainly nuts and bolts) of the
engine and other components. Use torque
wrenches and constantly refer to the speci-
fied values given.
Do not disregard match marks provided on
parts. Some of them are those given at the
time of disassembly.
There are many sets of parts. Crankshaft
bearings, connecting rods, pistons, etc., are
in combination sets. Do not disturb such
combinations and make sure that each part
goes back to where it came from.
Engine reassembly is the reverse of engine disassembly
as far as sequence is concerned, but there are many
reassembling steps that involve measures necessary for
restoring engine as close to factory assembled condition
as possible. Only those steps will be dealt with here.
Crankshaft
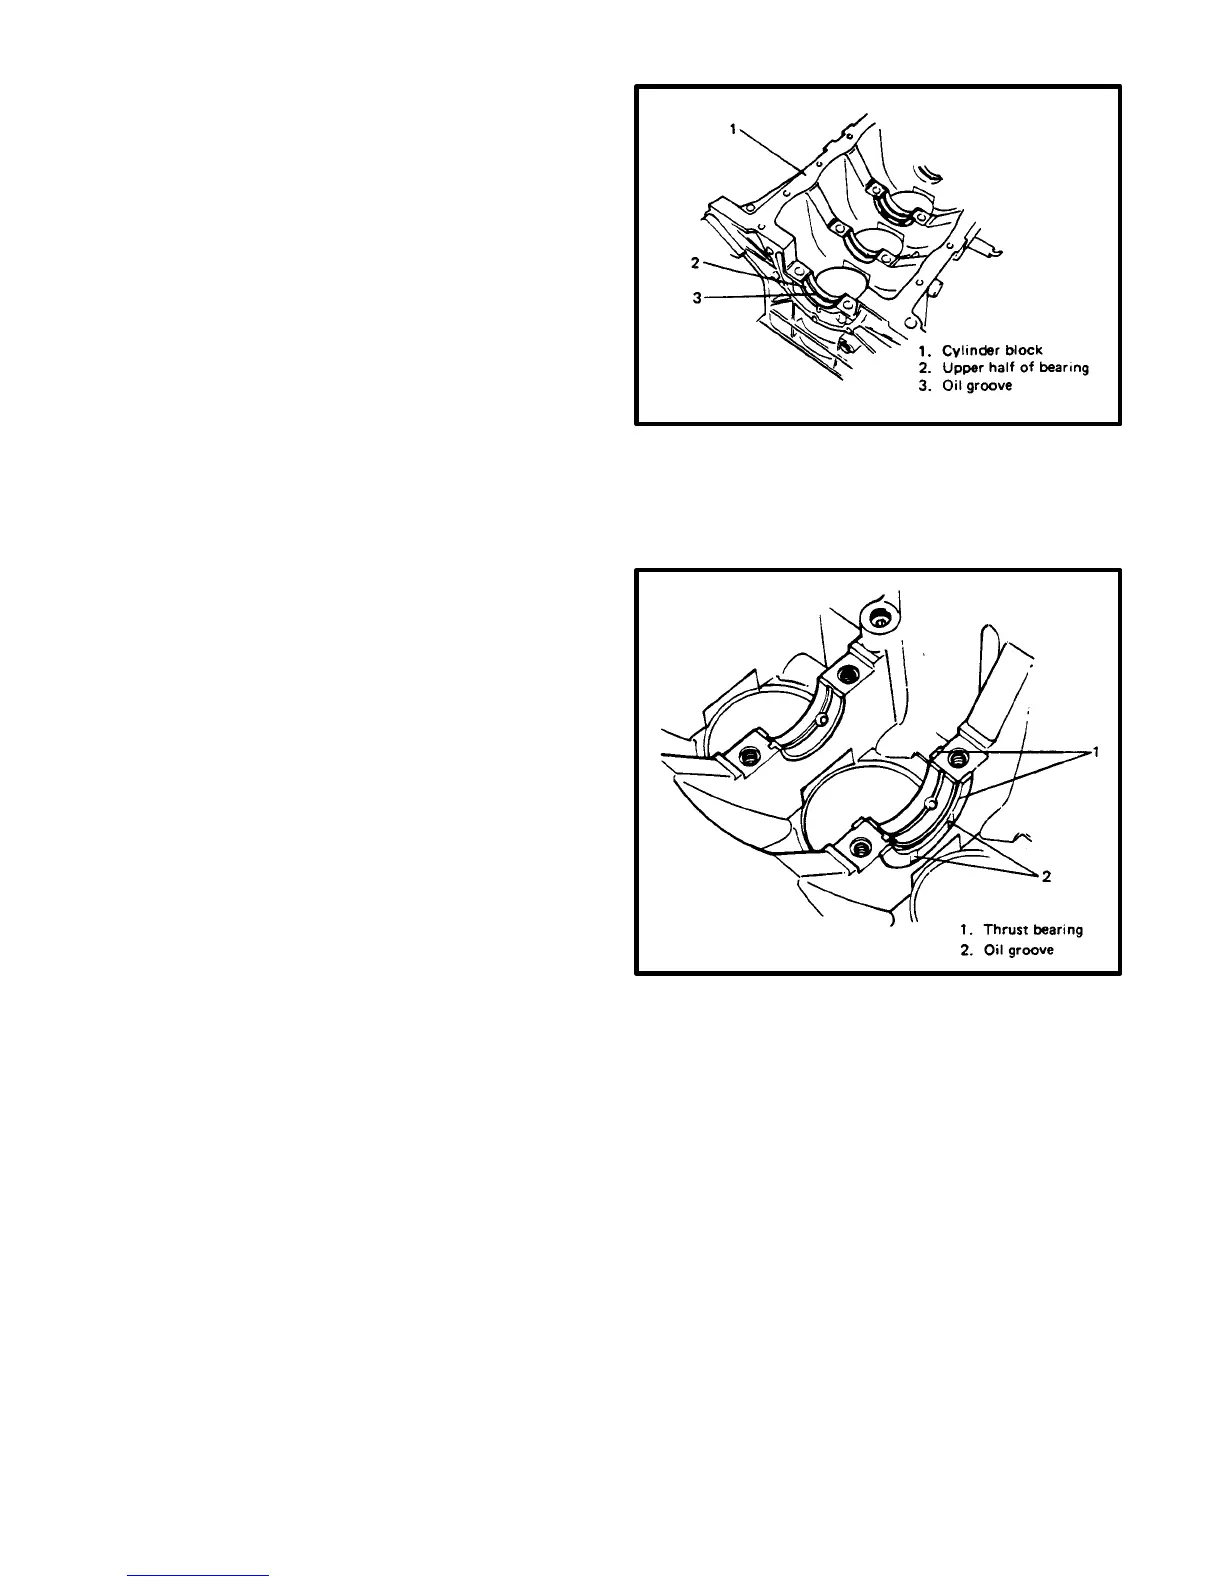
1) Install main bearings and be sure to oil them as shown.
2) Install thrust bearings to cylinder block between NO.
2 and No. 3 cylinders. Face oil grooves side to crank
webs.
3) Install crankshaft to cylinder block.
4) Oil crankshaft journals.
5) When fitting crankshaft bearing caps to journals after
setting crankshaft in place, be sure to point the arrow
mark (on each cap) to front side. Fit the sequentially in
the ascending order, 1, 2, 3 and 4, starting from front
(pulley) side.
 Loading...