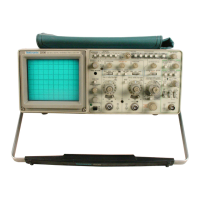
Adjustment Procedure— 2230 Service
POWER SUPPLY AND CRT DISPLAY
Equipment Required (See Table 4-1):
. —
Leveled Sine-Wave Generator (Item 2) 50 ft BNC Cable (Item 8)
Time-Mark Generator (Item 3)
50 ft BNC Termination (Item 12)
Digital Voltmeter (Item 7) Screwdriver (Item 19)
See S ADJUSTMENT LOCATIONS i at the back of this manual for location of test points and adjustments.
INITIAL CONTROL SETTINGS
PROCEDURE STEPS
Vertical
1. Check/Adjust Power Supply DC Levels (R938)
POSITION (both)
Midrange
NOTE
VERTICAL MODE
CH 1
X-Y
On (button in)
Review the information at the beginning of the
CH 1 VOLTS/DIV Variable
CAL detent
Adjustment Procedure before starting this step.
Channel 1 AC-GND-DC
GND
a. Connect the digital voltmeter low lead to chassis
Horizontal
ground and connect the volts lead to the -8 .6 V supply
(W961).
POSITION Midrange
HORIZONTAL MODE A
SEC/DIV Variable CAL detent
b. CHECK—Voltmeter reading is —8.56 to —8.64 V. If
X I0 Magnifier Off (knob in)
the reading is within these limits, skip to part d.
A TRIGGER
c. ADJUST—The -8.6 V Adj potentiometer (R938) for
VAR HOLDOFF
NORM
a voltmeter reading of -8.6 V.
Mode P-P AUTO
SLOPE
OUT
LEVEL
Midrange
d. CHECK—Voltage levels of the remaining power
HF REJECT
OFF
supplies listed in Table 5-2 are within the specified limits.
A&B INT VERT MODE
A SOURCE
INT
A EXT COUPLING AC
e. Disconnect the test equipment from the instrument.
Storage
2. Adjust CRT Grid Bias (R851)
STORE/NON STORE
NON STORE (button out) a. Connect a 50 ft termination to the EXT Z AXIS
SAVE/CONTINUE
CONTINUE (button out)
INPUT connector located on the rear panel.
PRETRIG/POST TRIG
POST TRIG (button out)
ROLL/SCAN
SCAN (button out)
1K/4K
4K (button out)
b. Adjust thei front-panel FOCUS control to produce a
POSITION CURS/
POSITION CURS
well-defined dot.
SELECT WAVEFORM
WAVEFORM
(button in)
REFERENCE/
WAVEFORM REFERENCE
c. Rotate the A INTENSITY control fully counter
MENU SELECT
(button in)
clockwise.
5-4

 Loading...