THE OVEN DOOR LATCH
ASSEMBLY
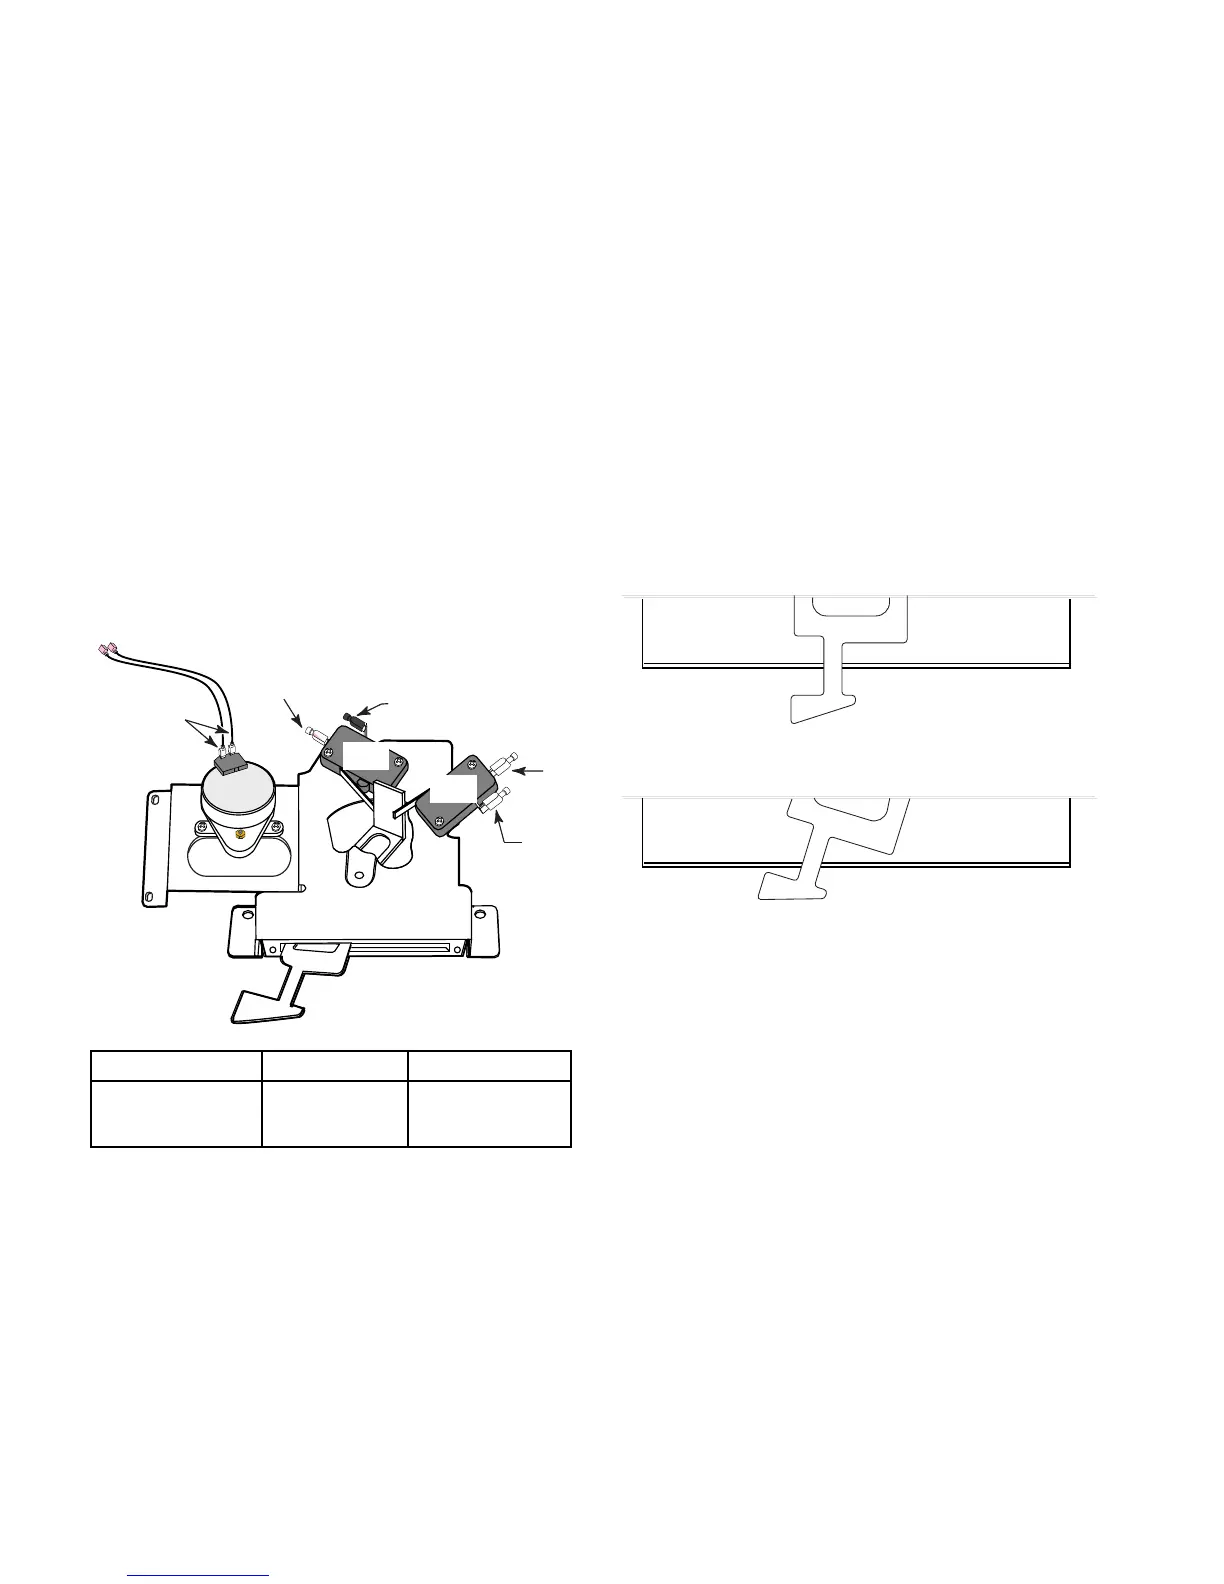
The oven door latch locks the oven door during the
CLEAN cycle (see the illustration at the bottom of the
next column for the various latch positions). Refer to
page 2-18 to access the oven door latch assembly.
To test one of the latch switches:
1. With no power applied, remove the wire con-
nectors from the switch terminals.
2. Set the ohmmeter to the R x 1 scale.
3. Connect one of the ohmmeter leads to the com-
mon (C) terminal of the switch.
4. Touch the other ohmmeter lead to the N.O.
(normally-open) switch terminal. The meter
should indicate no continuity with the switch
in its normal position, and continuity when it is
activated.
5. If the reading is not correct, remove and replace
OVEN DOOR LATCH
Motor Terminals
Com
Com
N.O.
N.O.
Lock
Switch
Unlock
Switch
Latch Position Lock Switch Unlock Switch
Unlatched Yes No
Latched No Yes
the switch.
To test the door latch motor windings:
1. With no power applied, disconnect the motor
wires from the terminal block and main harness
connector.
2. Set the ohmmeter to the R x 100 scale.
3. Touch the ohmmeter leads to the motor wire
connectors. The meter should read between
700 Ω and 750 Ω .
4. If the reading is not within this range, remove
and replace the door latch assembly.
UNLATCHED POSITION
LATCHED POSITION
Lock Switch Open UnLock Switch Closed
Lock Switch Closed
UnLock Switch Open
Door Latch Positions
Page 50
 Loading...