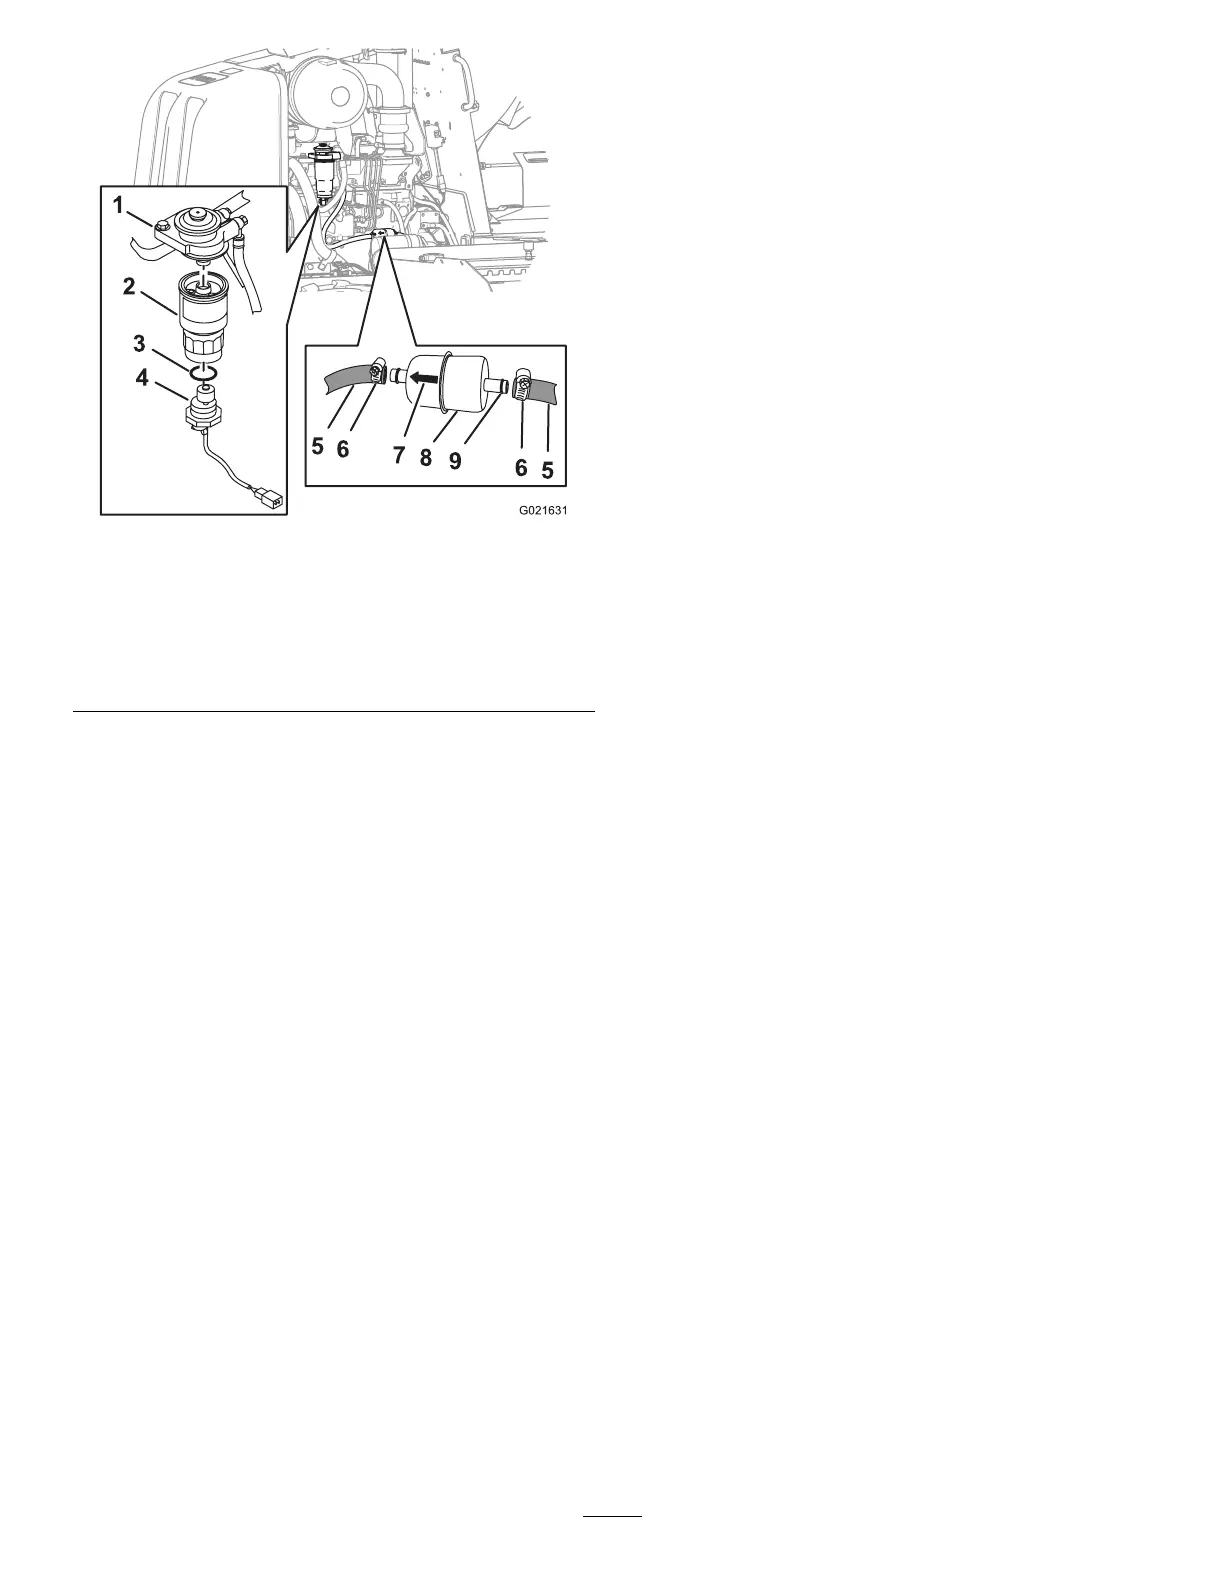
Figure92
1.Filteradapter6.Hoseclamp
2.Secondary-lterelement
7.Arrow
3.O-ring8.Primaryfuellter
4.Watersensor9.Fitting
5.Fuelsensor
D.Firmlygraspthesecondary-fuel-lterelement,
androtateitcounterclockwise,andremovethe
lterfromthelteradapter(Figure92).
Note:Discardthelterelement.
E.Cleanthelteradapterwithacleanrag.
2.Installthesecondary,fuellterasfollows:
A.Applyathinlmofcleanfueltothesealonthe
fuel-lterelement.
B.Alignthenewsecondary-lterelementtothe
lteradapter(Figure92).
C.Rotatethesecondary-lterelementuntiltheseal
contactsthelteradapter,thenrotatethelter
elementanadditional3/4turn.
Important:Donotusealterwrenchto
tightenthelter.Youcoulddamagethelter
andcausealeak.
D.AlignthenewO-ringoverthewatersensor
(Figure92).
E.Alignthewatersensortothebottomofthe
secondary,fuellter(Figure92).
F.Firmlygraspthesecondary-lterelementand
rotatethewatersensorclockwiseuntilhand-tight
(Figure92).
3.Primethefuelsystem;refertoPrimingtheFuel
System(page70).
4.Starttheengineandcheckforleaksatthefuellters.
CheckingFuelLinesand
Connections
ServiceInterval:Every500hours/Yearly(whichever
comesrst)—Inspectthefuellinesand
connections.
Inspectthefuellinesandconnectionsfordeterioration,
damage,orlooseconnections.
DrainingandCleaningtheFuel
Tank
ServiceInterval:Every1,000hours/Yearly(whichever
comesrst)—Drainandcleanthefuel
tank.
Drainandcleanthetankifthefuelsystembecomes
contaminatedorifthemachinewillbestoredforanextended
periodoftime.Usecleanfueltoushoutthetank.Referto
DrainingWaterfromtheFuelTank(page69)fordraining
instructions.
Note:Performthisprocedurewhenthefuellevelislow,to
avoidtheneedtodrainlargevolumesoffuel.
71
 Loading...