1
ank you for purchasing Toro’s new award-winning EVOLUTION
®
AG Series irrigation controller, delivering unprecedented control and
ease-of-use of your irrigation system. e EVOLUTION
®
AG is easily expandable from 4-valves to 8, 12 and 16, giving the controller the
ability to grow as your irrigation system grows. EVOLUTION
®
AG allows a rain sensor or soil sensor to be attached further automating
your irrigation needs. And lastly, the controller is housed in a rugged and durable case allowing for years of maintenance-free service and
steadfast performance. If you have any questions or problems with our controller, please call us toll-free at 1-800-367-8676 and we will be
happy to answer your questions and resolve any problem you might encounter.
Controller Introduction
Timing Mechanism
1
2
3
4
5
6
7
13
12
11
10
9
8
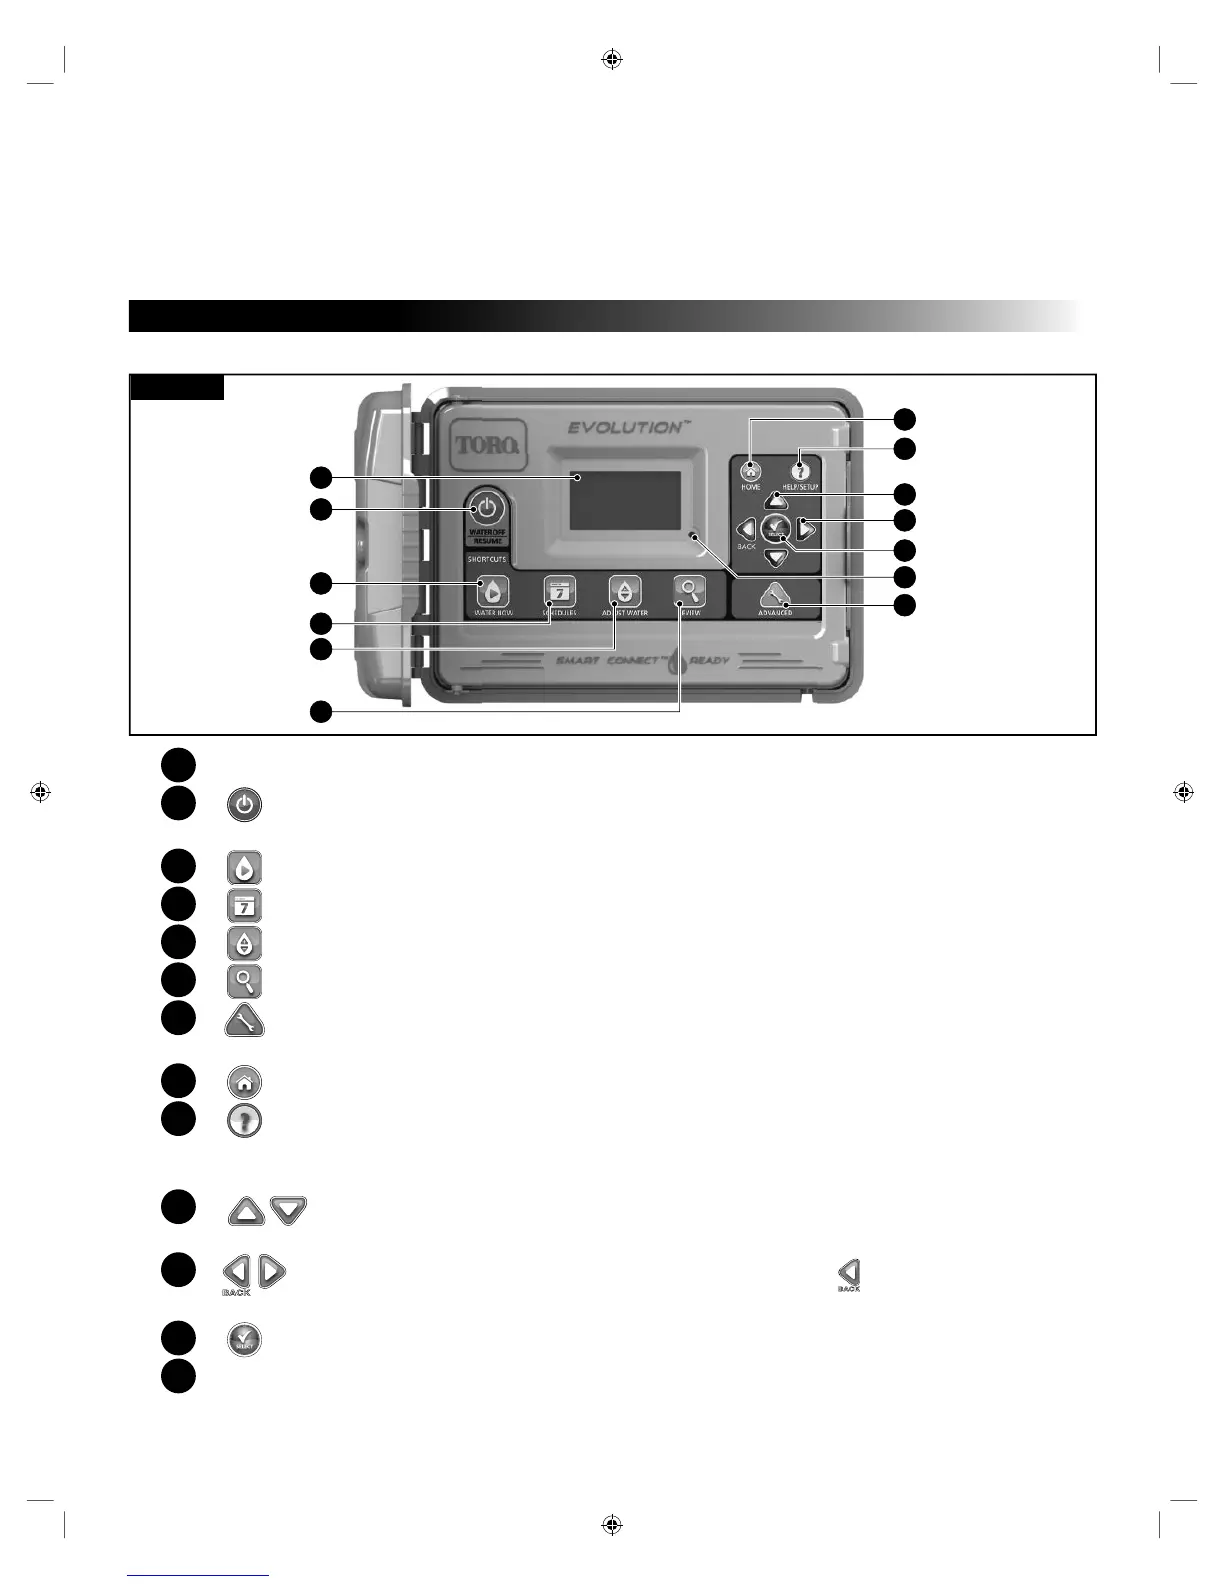
Figure 1
1
– LCD Screen
2
– Water O Button. Use to turn o scheduled and manually activated watering. For extended Water O periods, you can
select 1-14 days or Remains O.
3
– Water Now Button. Use to manually activate a schedule, specic valve(s) or All Valve Test.
4
– Schedules Button. Use to set your active watering day(s), schedule start(s) and valve runtime(s).
5
– Adjust Water Button. Adjust your watering percentage per schedule or valve runtimes.
6
– Review Button. Use to review your schedule parameters.
7
– Advanced Button. Use to access the controller’s advanced features, from valve and schedule details to sensor setup and
controller diagnostics.
8
– Home Button. Use to display the controller’s activity and alert messages.
9
– Help/Setup Button. Use to access and clear alerts, set the controller’s time and date, locate Toro contact information,
as well as modify controller preferences such as the display language and time and
date format. Use Setup also to save or load a schedule to or from your USB thumb drive.
10
–
Up and Down Arrow Buttons. Use to navigate up or down through the menu items. ey are also used to
modify parameters.
11
–
Left and Right Arrow Buttons. Use to navigate between menu parameters. e
button is also used to revert back
to previous menu selections.
12
– Select Button. Use to select a menu item or enter and save parameters.
13
– LED Indicator. Indicates that Water O is active (constantly lit) or an Alert condition is detected (ashing).

 Loading...