38
1. Remove 2 screws securing PTO belt cover to adapter
plate (Fig. 60) and 1 screw securing belt cover to tab on
spring anchor. Remove cover.
1
2
Figure 60
1. PTO belt cover 2. Adapter plate
2. Loosen 3 flange screws and flange nuts securing
adapter plate to clutch plate (Fig. 61).
3. Insert end of 1/2 in. (13 mm) drive, 20 in. (51 cm) long,
torque wrench into square hole in clutch plate (Fig. 61).
With wrench handle parallel to ground, pull wrench
upward until 180 ft.-lb. (246 N⋅m) of torque is applied
to tension belt.
4. Tighten flange screws and flange nuts locking
adjustment.
5. Reinstall PTO belt cover with screws previously
removed.
1
2
3
Figure 61
1. PTO belt
2. Adapter plate
3. Square hole
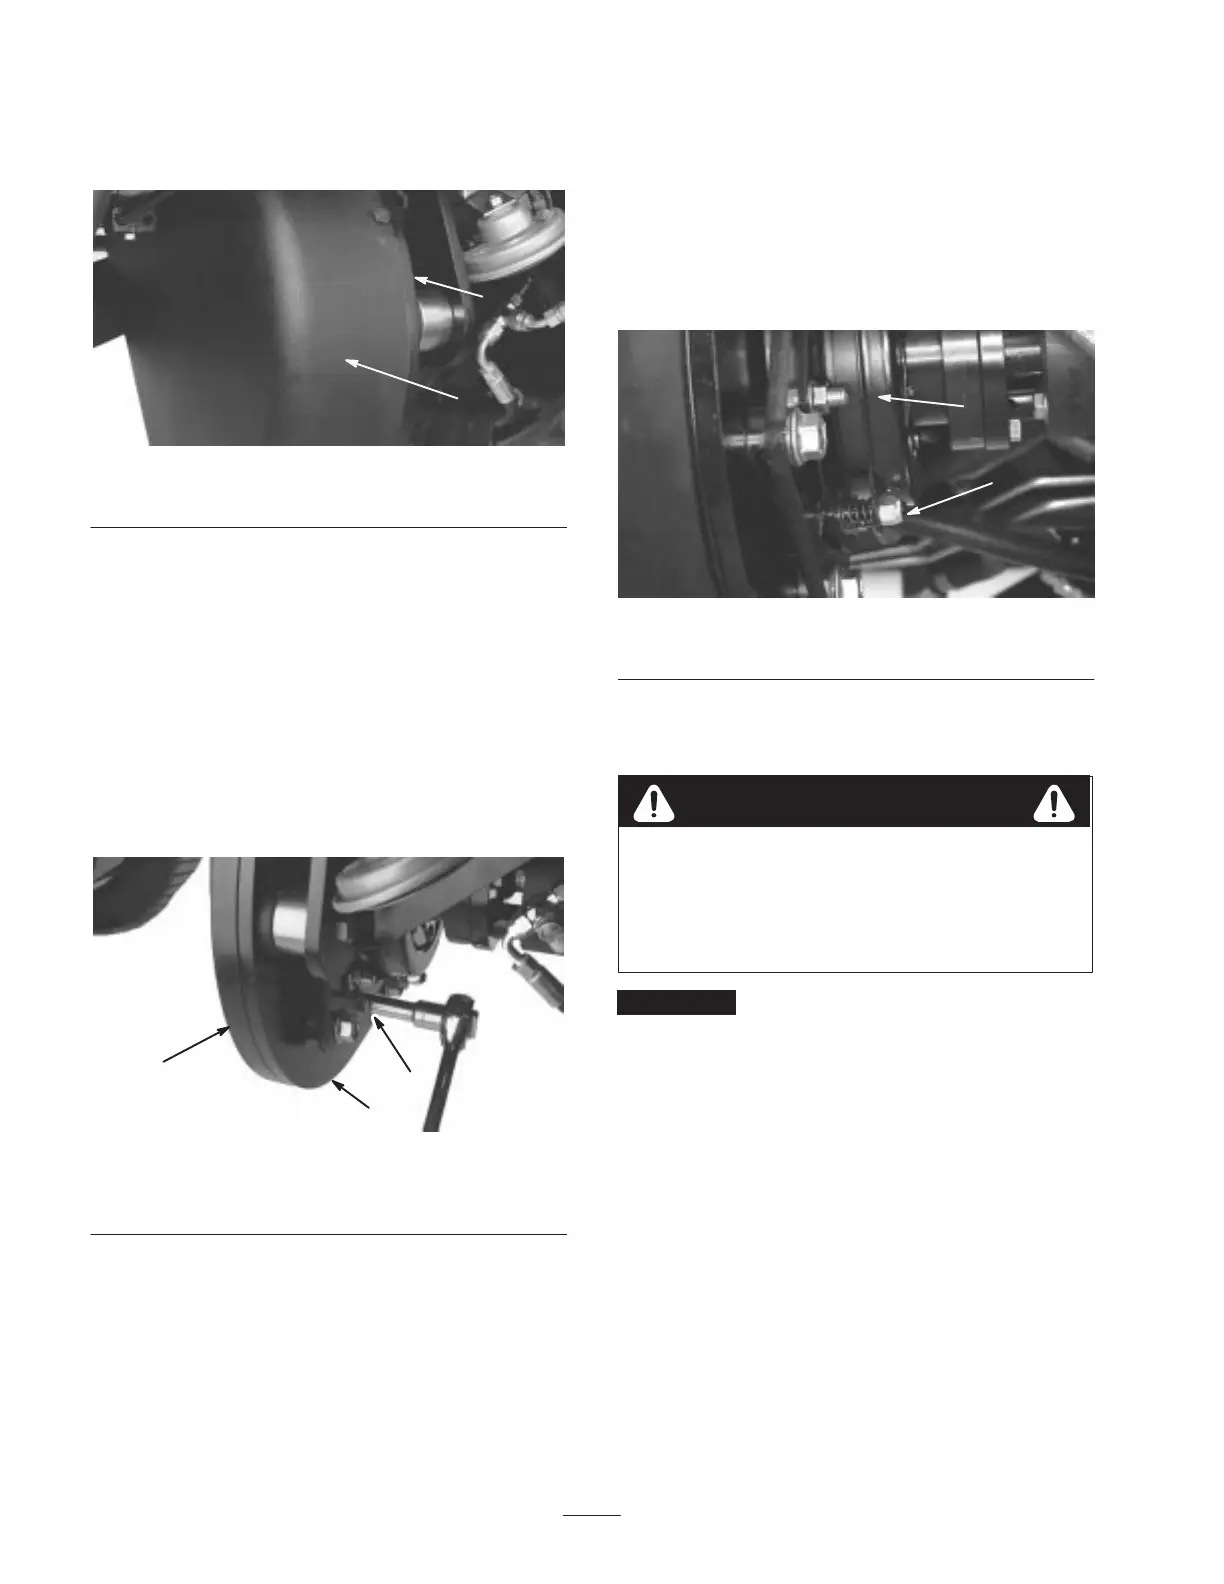
Adjusting the Clutch
The PTO clutch is adjustable to ensure proper engagement
and blade braking. Check clutch adjustment initially after
the first 10 hours of operation, thereafter, check every 200
hours.
1. To adjust clutch, tighten or loosen locknuts on flange
studs.
2. Check adjustment by inserting feeler gauge through
slots next to flange studs (Fig. 62).
3. The proper disengaged clearance between the clutch
plates is 0.011–0.021 inches (0.28–0.53 mm). It will be
necessary to check this clearance at each of the three
slots to ensure the plates are parallel to each other.
1
2
Figure 62
1. Clutch 2. Flange studs
Servicing the Battery
Battery posts, terminals, and related accessories
contain lead and lead compounds, chemicals
known to the State of California to cause cancer
and reproductive harm. Wash hands after
handling.
Warning
Important Before welding on the machine, disconnect
ground cable from the battery to prevent damage to the
electrical system.
Note: Check battery condition weekly or after every 100
hours of operation. Keep terminals and entire battery case
clean because a dirty battery will discharge slowly. To clean
the battery, wash the entire case with solution of baking
soda and water. Rinse with clear water. Coat the battery
posts and cable connectors with Grafo 112X (skin-over)
grease (Toro Part No. 505-47) or petroleum jelly to prevent
corrosion.
Servicing the Fuses
There are 4 fuses in the machines electrical system. They
are located inside control panel (Fig. 63).

 Loading...