Installing the Battery
1. Align the battery to the battery tray of the
machine ( Figure 46 ).
Note: Ensure that the positive and negative
posts of the battery are aligned as shown in
Figure 46 .
2. Secure the battery to the battery tray with the
battery clamp, carriage bolt, and locknut ( Figure
46 ).
3. Connect the battery cables; refer to Connecting
the Battery ( page 43 ) .
Connecting the Battery
1. Connect the positive battery cable to the terminal
of the battery ( Figure 46 ).
2. Connect the negative battery cable to the
terminal of the battery ( Figure 46 ).
3. Install the battery cover onto the top of the
battery ( Figure 46 ).
Charging the Battery
W ARNING
Charging the battery produces gasses that
can explode.
Never smoke near the battery and keep sparks
and ames away from battery .
Important: Always keep the battery fully charged.
This is especially important to prevent battery
damage when the temperature is below 0°C (32°F).
1. Remove the battery from the machine; refer to
Disconnecting the Battery ( page 42 ) .
2. Connect a 3 to 4 A battery charger to the battery
posts. Charge the battery at a rate of 3 to 4 A
for 4 to 8 hours (12 V).
Note: Do not overcharge the battery .
3. Install the battery; refer to Installing the Battery
( page 43 ) .
Storing the Battery
If you are storing the machine for more than 30 days,
remove the battery and charge it fully . Either store
it on the shelf or on the machine. Leave the cables
disconnected if it is stored on the machine. Store
the battery in a cool atmosphere to avoid quick
deterioration of the charge in the battery . T o prevent
the battery from freezing, make sure that it is fully
charged.
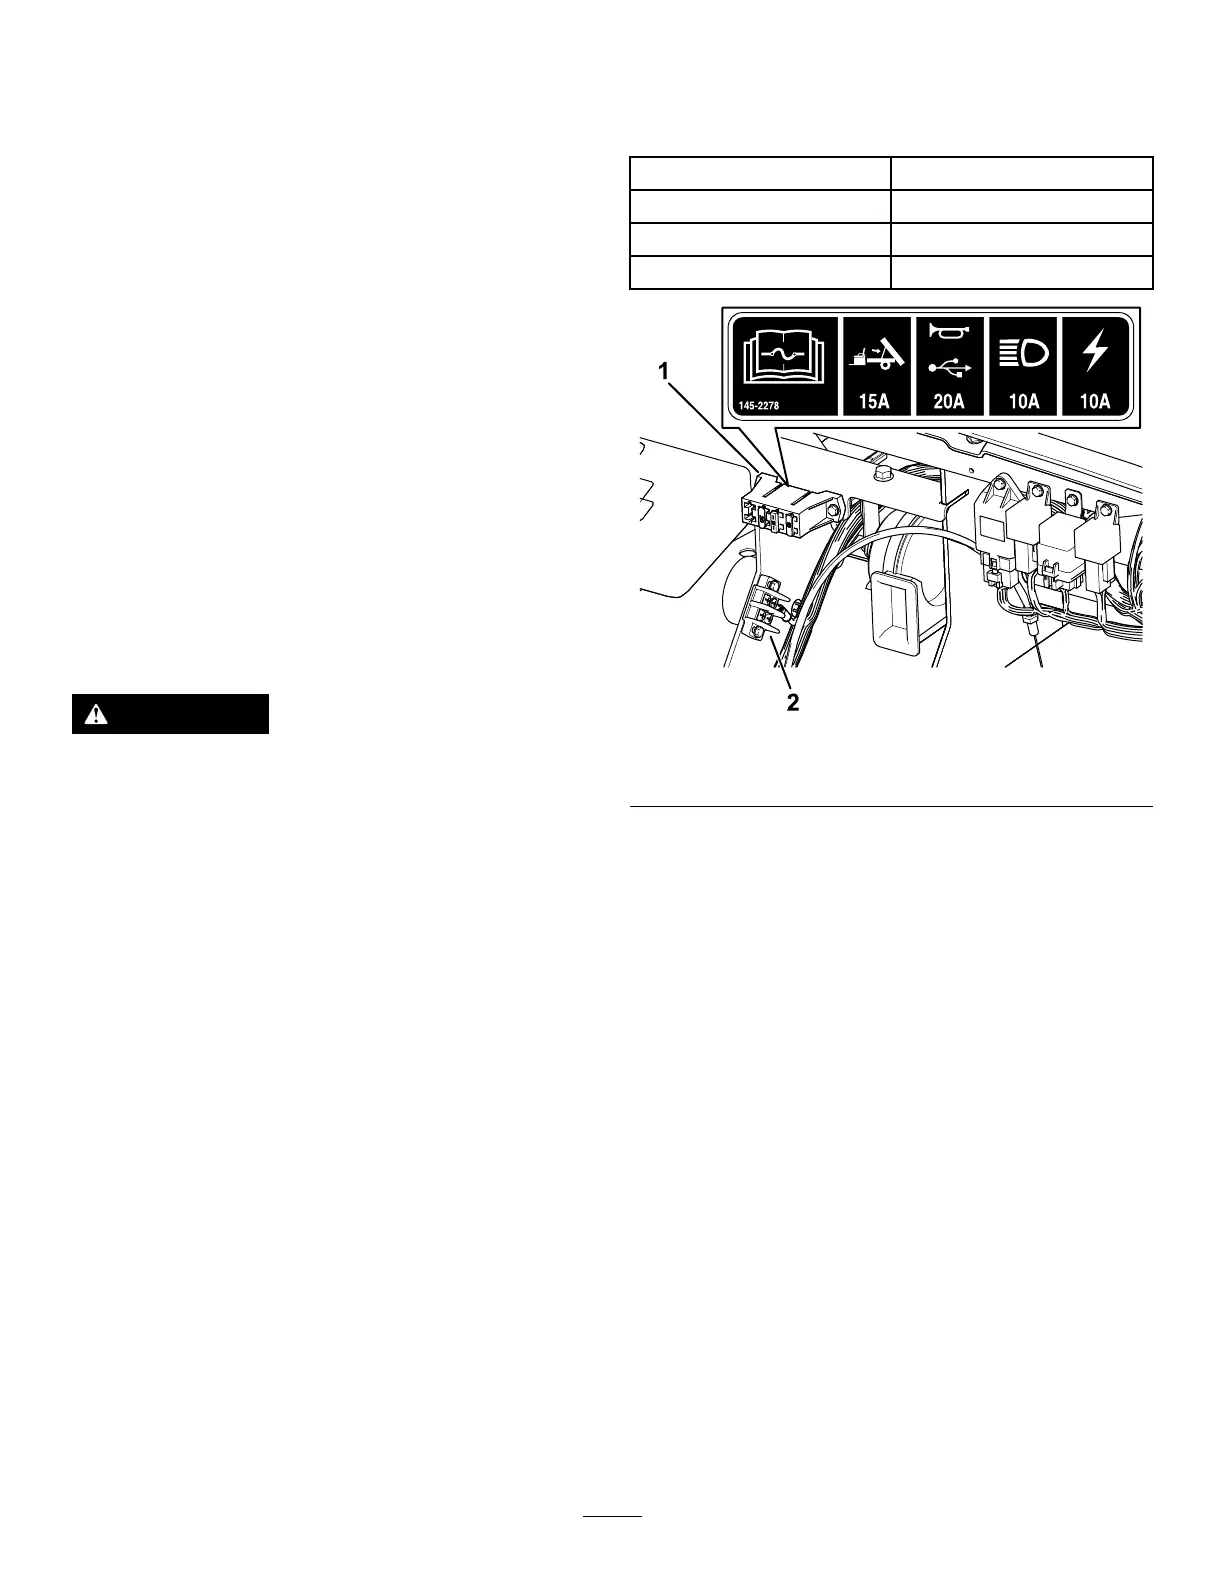
Replacing the Fuses
There are 4 fuses in the electrical system. They are
located beneath the hood ( Figure 47 ).
Bed lift (open;optional kit)
15 A
Horn/USB power point
20 A
Headlights 10 A
Machine fuse
10 A
g382796
Figure 47
1. Fuse block
2. Ground block
43

 Loading...