10. Check the uid level and add more uid if the
level is below the threads of the ll-plug hole
( Figure 56 ).
Checking and Adjusting
Neutral
Service Interval : Every 100 hours
When performing routine maintenance and/or engine
diagnostics, the transaxle must be shifted into
N EUTRAL ( Figure 58 ). The machine has a N EUTRAL
position on the shift lever , which controls the neutral in
the transaxle. Perform the following steps to ensure
that the neutral shift lever operates the transaxle
neutral correctly:
1. Shift the transmission to the N EUTRAL position
2. Ensure that the neutral bracket is in the N EUTRAL
position (level to the cable mounting bracket
located below the shift bracket) by turning the
driven clutch ( Figure 58 ).
Note: The machine should not roll back and
forth. If it does, manually move the neutral
bracket to the N EUTRAL position.
g002093
Figure 58
1. Neutral bracket 2. Locknuts
3. Rotate 1 of the locknuts ( Figure 58 ) to achieve
a 0.762 to 1.524 mm (0.030 to 0.060 inch) gap
between the bottom of the nut/washer and the
neutral bracket.
Note: Y ou must hold the threaded shaft below
the bracket when adjusting the locknut position
on top.
4. Rotate the other locknut to achieve a 0.76
to 1.52 mm (0.03 to 0.06 inch) gap between
the bottom of the nut/washer and the neutral
bracket.
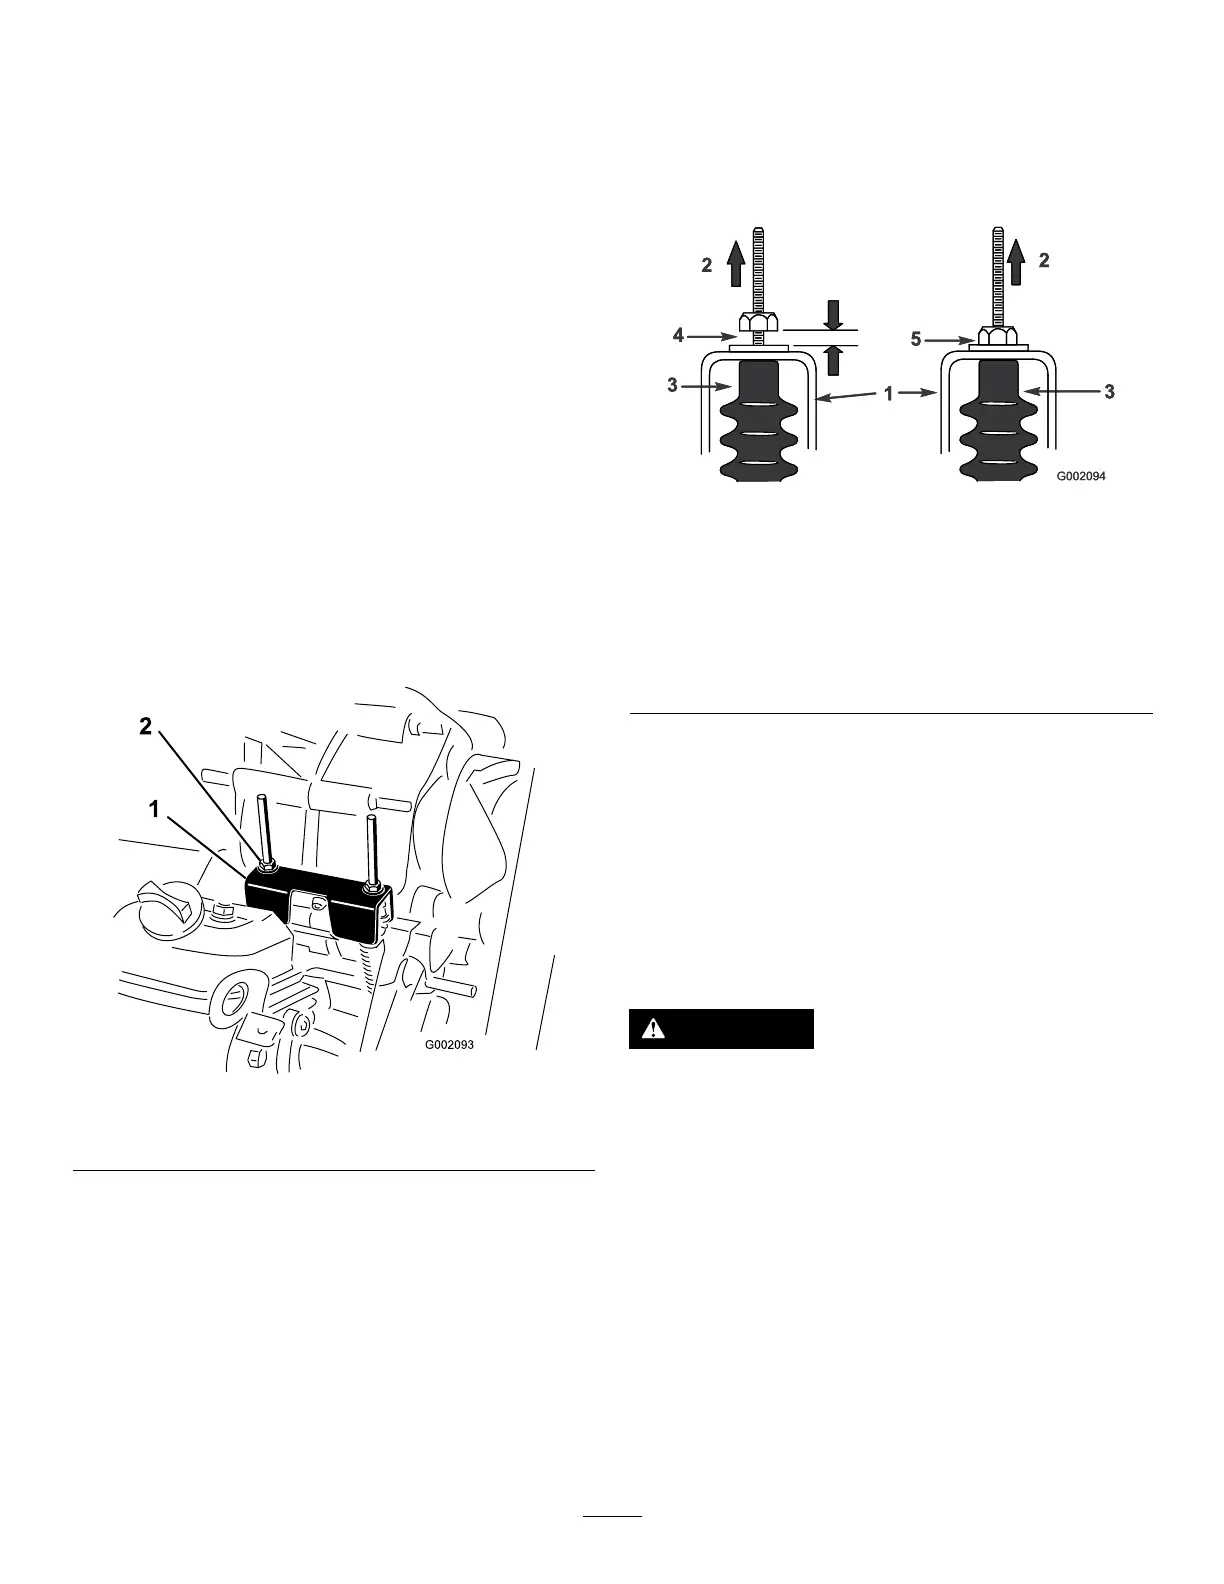
5. Pull up on each shift cable an ensure that there
is a 0.76 to 1.52 mm (0.03 to 0.06 inch) between
the nut/washer and the neutral bracket ( Figure
59 ).
Note: If there is a not a gap, adjust the nuts to
achieve the specied gap.
g002094
Figure 59
1. Neutral bracket
4. 0.76 to 1.52 mm (0.03 to
0.06 inch) gap
2. Pull up 5. W rong —adjust the to
achieve a gap of 0.76 to
1.52 mm (0.03 to 0.06
inch)
3. Cable boot
6. Start the engine and shift into F ORWARD ,
R EVERSE , and N EUTRAL several times to ensure
that the neutral bracket is operating properly .
Maintaining the Primary
Drive Clutch
Service Interval : Every 400 hours/Y early (whichever
comes rst)
CAUTION
The dust in the clutch will become airborne
and could damage your eyes or you could
inhale it, causing breathing difculties.
W ear safety goggles and a dust mask or
other eye and respiratory protection when
performing this procedure.
1. Raise and latch the cargo bed.
2. Remove the 3 bolts securing the cover to the
clutch, and remove the cover ( Figure 60 ).
Note: Retain the cover and bolts for installation.
48

 Loading...