CVHE-SVX02M-EN
53
Electrical Requirements
Installation Requirements
WWAARRNNIINNGG
PPrrooppeerr FFiieelldd WWiirriinngg aanndd GGrroouunnddiinngg
RReeqquuiirreedd!!
FFaaiilluurree ttoo ffoollllooww ccooddee ccoouulldd rreessuulltt iinn ddeeaatthh oorr
sseerriioouuss iinnjjuurryy..
AAllll ffiieelldd wwiirriinngg MMUUSSTT bbee ppeerrffoorrmmeedd bbyy qquuaalliiffiieedd
ppeerrssoonnnneell.. IImmpprrooppeerrllyy iinnssttaalllleedd aanndd ggrroouunnddeedd
ffiieelldd wwiirriinngg ppoosseess FFIIRREE aanndd EELLEECCTTRROOCCUUTTIIOONN
hhaazzaarrddss.. TToo aavvooiidd tthheessee hhaazzaarrddss,, yyoouu MMUUSSTT ffoollllooww
rreeqquuiirreemmeennttss ffoorr ffiieelldd wwiirriinngg iinnssttaallllaattiioonn aanndd
ggrroouunnddiinngg aass ddeessccrriibbeedd iinn NNEECC aanndd yyoouurr llooccaall//
ssttaattee//nnaattiioonnaall eelleeccttrriiccaall ccooddeess..
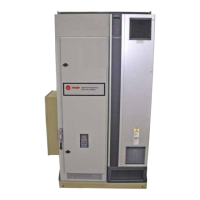
Unit-mounted starters are available as an option on
most units. While this option eliminates most field-
installed wiring requirements, the electrical contractor
must still complete the electrical connection for the
following:
• power supply wiring to the starter,
• other unit control options present, and
• any field-supplied control devices.
As you review this manual along with the wiring
instructions presented in this section, keep in mind
that:
• All field-installed wiring must conform to National
Electric Code (NEC) guidelines, and any applicable
local, state, and national codes. Be sure to satisfy
proper equipment grounding requirements per
NEC.
• Compressor motor and unit electrical data
(including motor kW, voltage utilization range,
rated load amps, and locked rotor amps) is listed on
the chiller nameplate.
• All field-installed wiring must be checked for proper
terminations, and for possible shorts or grounds.
NNoottee:: Always refer to the actual wiring diagrams
that shipped with the chiller or the unit
submittal for specific as-built electrical
schematic and connection information.
NNOOTTIICCEE
AAddaappttiivvee FFrreeqquueennccyy DDrriivvee ((AAFFDD))//
SSttaarrtteerr CCoommppoonneenntt DDaammaaggee!!
FFaaiilluurree ttoo rreemmoovvee ddeebbrriiss ffrroomm iinnssiiddee tthhee AAFFDD//
ssttaarrtteerr ppaanneell ccoouulldd rreessuulltt iinn aann eelleeccttrriiccaall sshhoorrtt aanndd
ccoouulldd ccaauussee sseerriioouuss AAFFDD//ssttaarrtteerr ccoommppoonneenntt
ddaammaaggee..
Do NOT modify or cut enclosure to provide electrical
access. Removable panels have been provided, and
any modification should be done away from the
enclosure. If the starter enclosure must be cut to
provide electrical access, exercise care to prevent
debris from falling inside the enclosure. Refer to
installation information shipped with the starter or
submittal drawings.
Electrical Requirements
Before wiring begins, observe the following electrical
requirements:
• Follow all lockout/tagout procedures prior to
performing installation and/or service on the unit.
• Always wear appropriate personal protective
equipment.
• Wait the required time to allow the capacitor(s) to
discharge; this could be up to 30 minutes.
• Verify that all capacitors are discharged prior to
service using a properly rated volt meter.
• Use appropriate capacitor discharge tool when
necessary.
• Comply with the safety practices recommended in
PROD-SVB06*-EN.
WWAARRNNIINNGG
HHaazzaarrddoouuss VVoollttaaggee ww//CCaappaacciittoorrss!!
FFaaiilluurree ttoo ddiissccoonnnneecctt ppoowweerr aanndd ddiisscchhaarrggee
ccaappaacciittoorrss bbeeffoorree sseerrvviicciinngg ccoouulldd rreessuulltt iinn ddeeaatthh oorr
sseerriioouuss iinnjjuurryy..
DDiissccoonnnneecctt aallll eelleeccttrriicc ppoowweerr,, iinncclluuddiinngg rreemmoottee
ddiissccoonnnneeccttss aanndd ddiisscchhaarrggee aallll mmoottoorr ssttaarrtt//rruunn
ccaappaacciittoorrss bbeeffoorree sseerrvviicciinngg.. FFoollllooww pprrooppeerr
lloocckkoouutt//ttaaggoouutt pprroocceedduurreess ttoo eennssuurree tthhee ppoowweerr
ccaannnnoott bbee iinnaaddvveerrtteennttllyy eenneerrggiizzeedd.. FFoorr vvaarriiaabbllee
ffrreeqquueennccyy ddrriivveess oorr ootthheerr eenneerrggyy ssttoorriinngg
ccoommppoonneennttss pprroovviiddeedd bbyy TTrraannee oorr ootthheerrss,, rreeffeerr ttoo
tthhee aapppprroopprriiaattee mmaannuuffaaccttuurreerr’’ss lliitteerraattuurree ffoorr
aalllloowwaabbllee wwaaiittiinngg ppeerriiooddss ffoorr ddiisscchhaarrggee ooff
ccaappaacciittoorrss.. VVeerriiffyy wwiitthh aann aapppprroopprriiaattee vvoollttmmeetteerr
tthhaatt aallll ccaappaacciittoorrss hhaavvee ddiisscchhaarrggeedd..
FFoorr aaddddiittiioonnaall iinnffoorrmmaattiioonn rreeggaarrddiinngg tthhee ssaaffee
ddiisscchhaarrggee ooff ccaappaacciittoorrss,, sseeee PPRROODD--SSVVBB0066**--EENN..
WWAARRNNIINNGG
PPeerrssoonnaall PPrrootteeccttiivvee EEqquuiippmmeenntt ((PPPPEE))
RReeqquuiirreedd!!
FFaaiilluurree ttoo wweeaarr PPPPEE aanndd ffoollllooww pprrooppeerr hhaannddlliinngg
gguuiiddeelliinneess ccoouulldd rreessuulltt iinn ddeeaatthh oorr sseerriioouuss iinnjjuurryy..
AAllwwaayyss wweeaarr aapppprroopprriiaattee ppeerrssoonnaall pprrootteeccttiivvee
eeqquuiippmmeenntt iinn aaccccoorrddaannccee wwiitthh aapppplliiccaabbllee
rreegguullaattiioonnss aanndd//oorr ssttaannddaarrddss ttoo gguuaarrdd aaggaaiinnsstt
ppootteennttiiaall eelleeccttrriiccaall sshhoocckk aanndd ffllaasshh hhaazzaarrddss..
 Loading...