Vertiv | NetSure 7100 Series Quick Start Guide (QS582127000) | Rev. T
Make Battery Connections
Refer to Battery Connections in the MAKING ELECTRICAL CONNECTIONS section of the Installation
Instructions (IM582127000) for complete procedures.
Recommended Torques
• 72 in-lbs for 1/4-inch hardware (when using standard flat and lock washer).
• 300 in-lbs for 3/8-inch hardware (when using standard flat and lock washer).
• 180 in-lbs for 3/8-inch hardware (when using a Belleville lock washer).
Battery Connections to Optional Battery Disconnect Distribution Panels
DANGER! Adhere to the “Important Safety Instructions” presented at the front of this document.
Battery strings are connected to the various battery disconnect distribution panels (if furnished) located inside
the distribution cabinet, as detailed in the illustrations in this section.
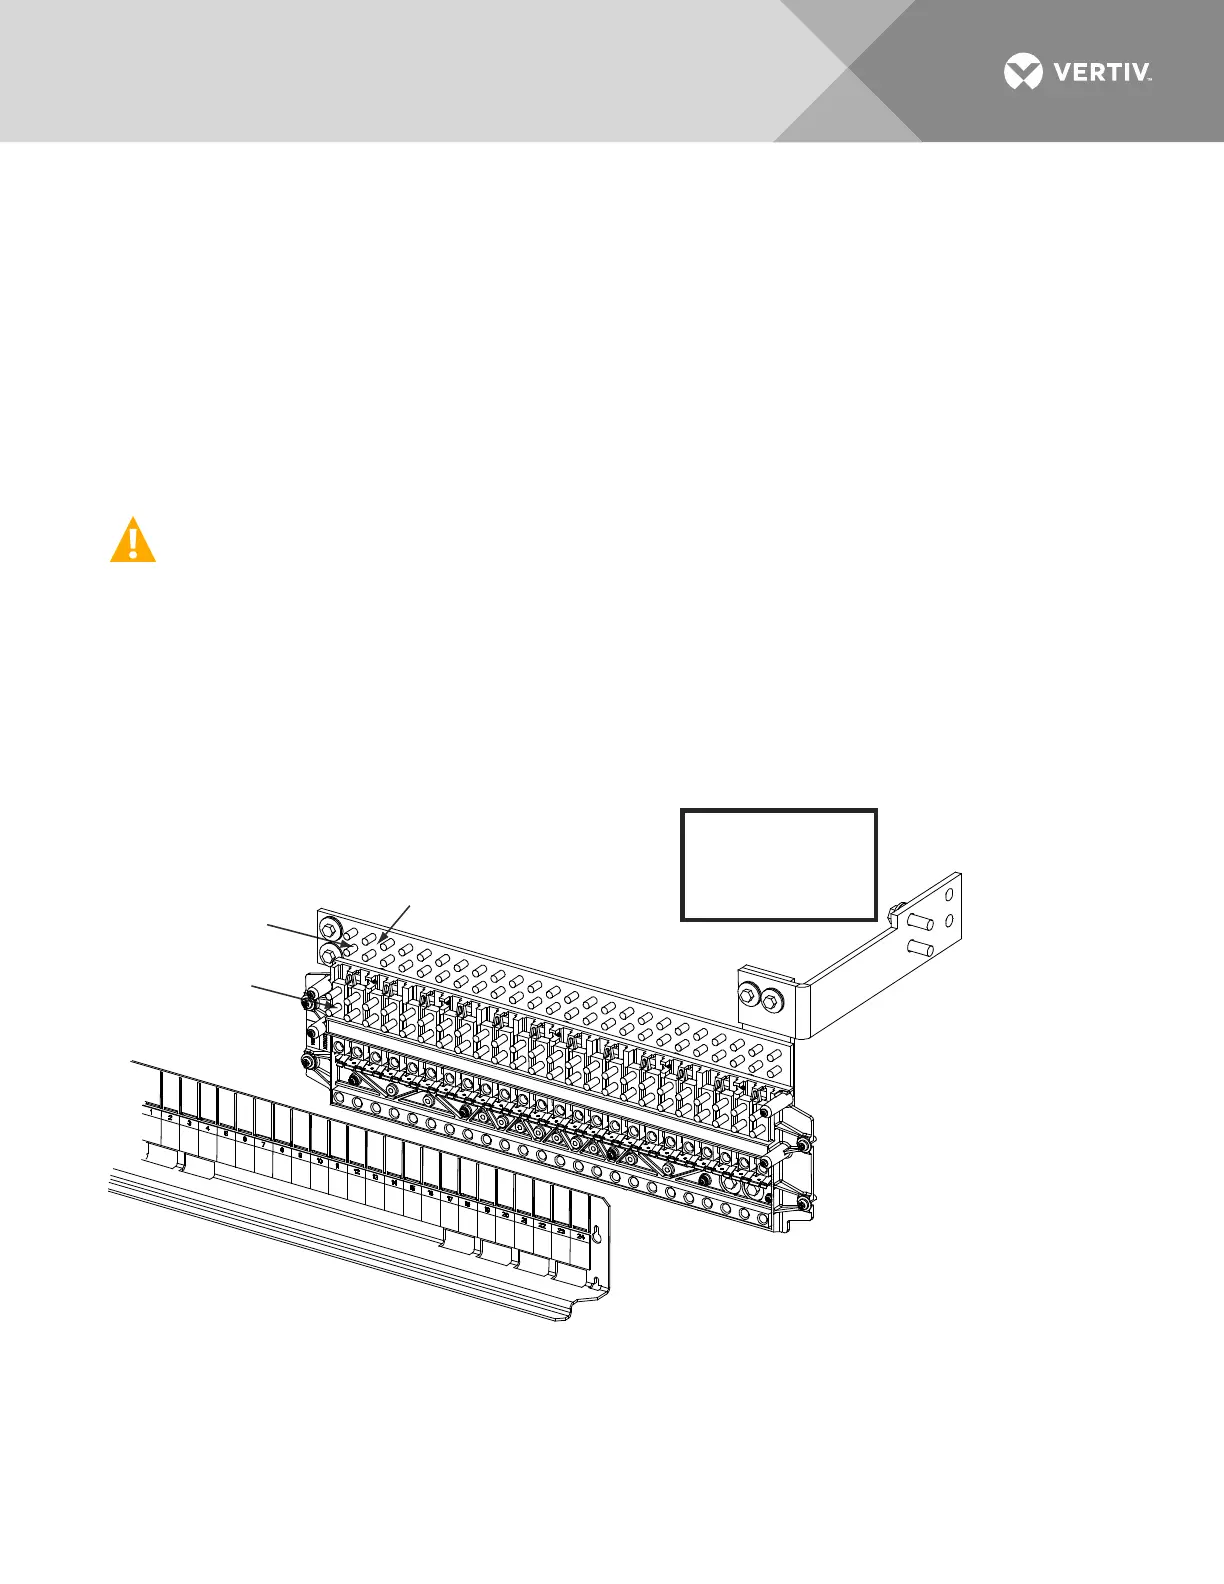
Figure 66:
List BA: Battery Disconnect Distribution Panel (with Return Busbar) and List BB: Battery
Disconnect Distribution Panel (without Return Busbar), (24) Bullet/TPS/TLS Circuit Breaker/Fuse
Battery Disconnect Positions
-48VDC Battery
Connections
Battery Return
Connections
BATTERY AND BATTERY RETURN CONNECTIONS
1/4-20 Studs on 5/8” Centers Maximum Lug Width: 0.625 inches.
(Customer must supply
or order additional
hardware)
Return Busbar
(not included with List BB)
Observe proper polarity
when making battery
connections.
WARNING!
Caution: 100 A circuit breakers and fuses can be used without a space
provided the continuous operating current in each 100 A device does
not exceed 64 A. A 175 A or greater circuit breaker shall have an
empty mounting position between it and any other overcurren
protective device.

 Loading...


