Vision Max Pro User Manual120
© 2015 Vision Engraving Systems
4.1.5 Reverse Engraving/Color Filling
In this example, a reverse engraved sign will be created from reverse engraver's plastic. The techniques
used with this application are: text layout and positioning, importing clipart, drawing simple graphics,
adding fills, mirroring the graphics for reverse engraving and color filling. The basic setup is similar to
that performed in the Rotary Engraving section in Level 1 Job Examples.
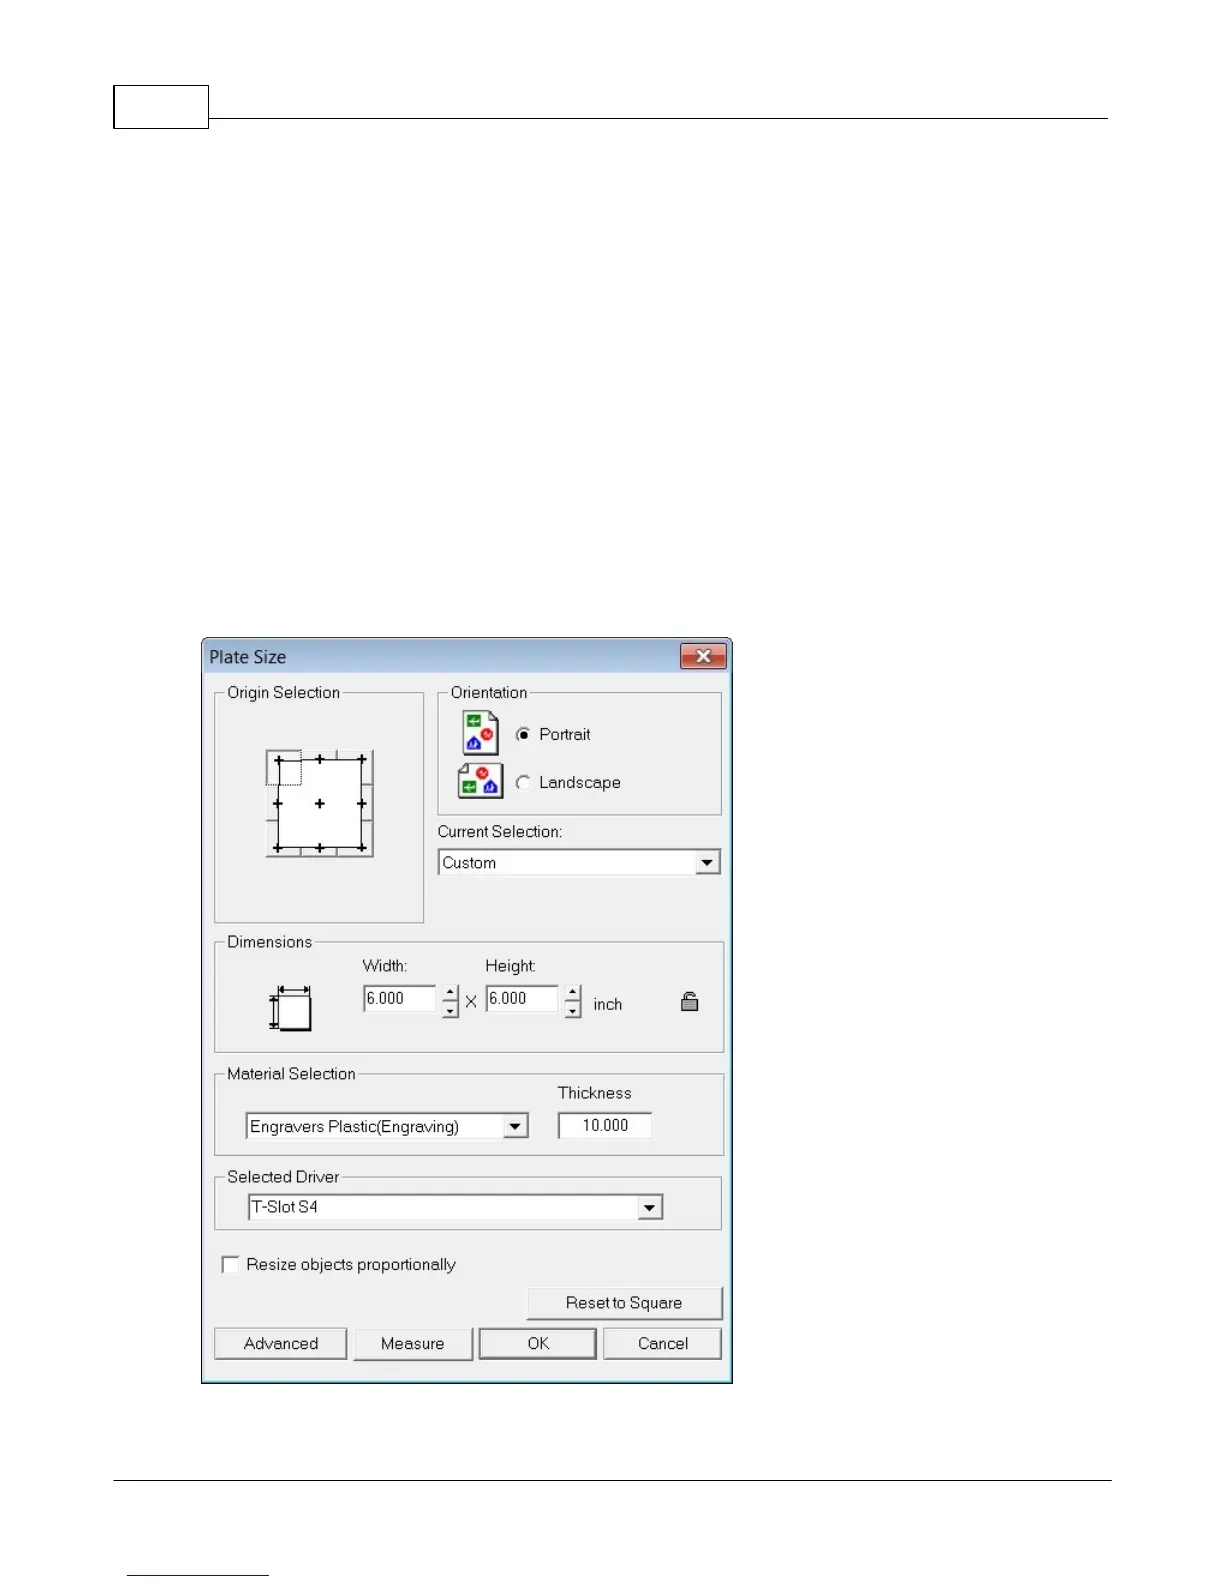
4.1.5.1 Example Job 5 - Reverse Engraving
In this example, a sign will be made using reverse engraver's plastic. The piece is pre-cut and measures
6 inches x 6 inches (150 x 150 mm).
Note - In this application, it is highly recommended to use the Vacuum Chip Removal System as
described in the Optional Accessories section. The process of engraving or cutting plastics, acrylics,
sign foam and wood, produces a significant amount of debris that can clog the nose cone and/or get
trapped between the nose cone and the material, which will cause engraving/cutting depth
inconsistencies as well as potentially scratch the surface of the material. The Vacuum Chip Removal
System significantly reduces these problems and provides for a cleaner work area.
Set the plate size to 6 x 6 inches and select the driver for your machine.
 Loading...