CAUTION When the device case is opened, regard all parts as extremely
fragile. Execute all procedure steps with care and precision.
CAUTION Observe screw torque specifications, especially with screws
that secure directly into plastic standoffs.
CAUTION To avoid mismatching screws and holes, keep the screws for
each piece with that piece as you remove modules and circuit assemblies.
It is possible to mistakenly install machine screws in locations intended for
plastite screws.
Note Plastite screws in this device have a Torx-pan head.
Required tools and equipment
• #1 Phillips bit
• #2 Phillips bit
• #10 Torx bit
• 5/16-inch socket
• Torque driver calibrated for 6.0 in-lb ±1.0 inch-pound
• Torque driver calibrated for 7.5 in-lb ±0.5 inch-pound
• Torque driver calibrated for 12.0 inch-pound ±1.0 inch-pound
• Slotted screwdriver
• Tweezers
• Needle-nose pliers
• Spudger
• Tie-wrap tool calibrated for torque specification 5 INT
• Tie-wrap cutter
• Soft lens wipes
• Scissors or other cutting device
• Canned air
• A coin to open the battery door. Select a size that comfortably fits the slot.
Power down the monitor
1. Touch the Settings tab.
2. Touch the Device tab.
3. Touch Power down.
This power-down method ensures that patient measurements are retained in the
monitor memory for a maximum of 24 hours. (These saved measurements are
available for recall, printing, or to send electronically to the network.) This method
also ensures that any configuration settings you have changed and saved will be
maintained at the next startup.
56
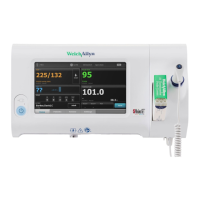
Disassembly and repair Welch Allyn Connex
®
Vital Signs Monitor 6000 Series™
 Loading...