4
Turning the Power ON
Install the charged battery pack and then
press and hold the
switch.
Inputting the Call sign
When turning the power ON for the first
time after purchasing, input the call sign of
your own station.
Input call sign may be changed from Set
Mode [CALLSIGN] (page 87).
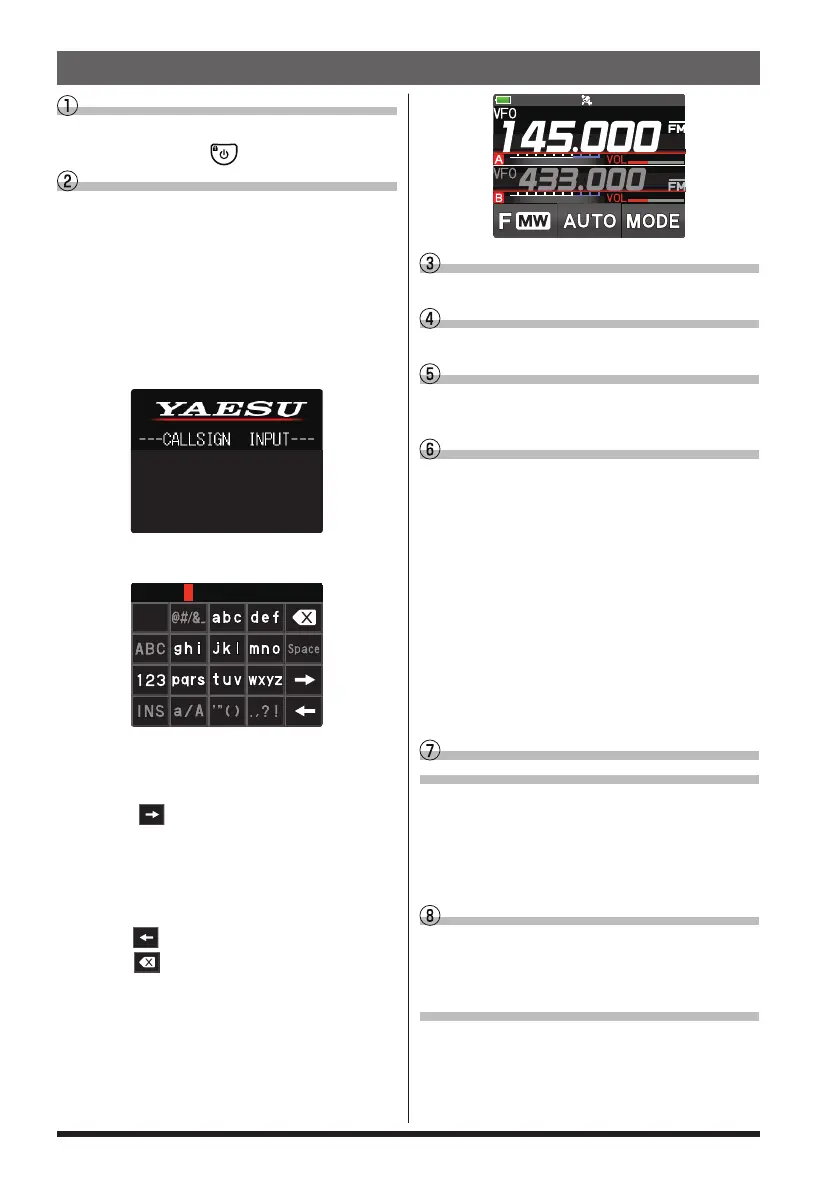
1. When turning the power ON for the first
time after purchasing, the call sign input
screen will be displayed.
Please enter your
Callsign.
(Max 10 letters)
2. Press the [DISP] key.
3. Input the call sign.
Rotate the DIAL knob to select each
character.
Touch
to move the cursor to the
right.
See “Text input screen” on page 89
to input a call sign.
4. Repeat step 3 to input the remaining
call sign characters.
Touch
to move the cursor to the left.
Touch
to erase the character at the
cursor position.
5. Press the PTT switch to conclude input-
ting.
Normal operation (VFO Mode) screen
will be displayed.
Selecting the Operating Band
Press the [BAND] key.
Tuning the frequency
Rotate the DIAL knob.
Adjusting the volume
Rotate the VOL knob to adjust the volume
to a comfortable level.
Adjusting the squelch setting
The squelch level may be adjusted to
mute the background noise when no sig-
nal is received.
1. Press the SQL switch.
2. Rotate the VOL knob to adjust the
squelch to a level at which the back-
ground noise is muted.
* When the squelch level is increased,
the noise is more likely to be si-
lenced, but it may become more diffi-
cult to receive weak signals.
3. Press the SQL switch to save the set-
ting.
Selecting the
Communication Mode
The communication mode is automatically
selected to correspond to the signal being
received.
Touch [MODE] to manually select the com-
munication mode.
Transmitting/Receiving Signals
Talk into the microphone while holding the
PTT switch on the side. Release the PTT
switch to return to receive.
Set the Bluetooth
®
function
The FT3DR/DE equipped with the Blue-
tooth function. To use a Bluetooth headset,
refer to “Bluetooth® Operation” on page
44 for setting.
Quick Guide
 Loading...