128 PSR-A3000 Owner’s Manual
Recording to the Bass, Chord 1–2, Pad and Phrase 1–2 Channels
The procedure below applies to step 4 in the Basic Procedure on page 125.
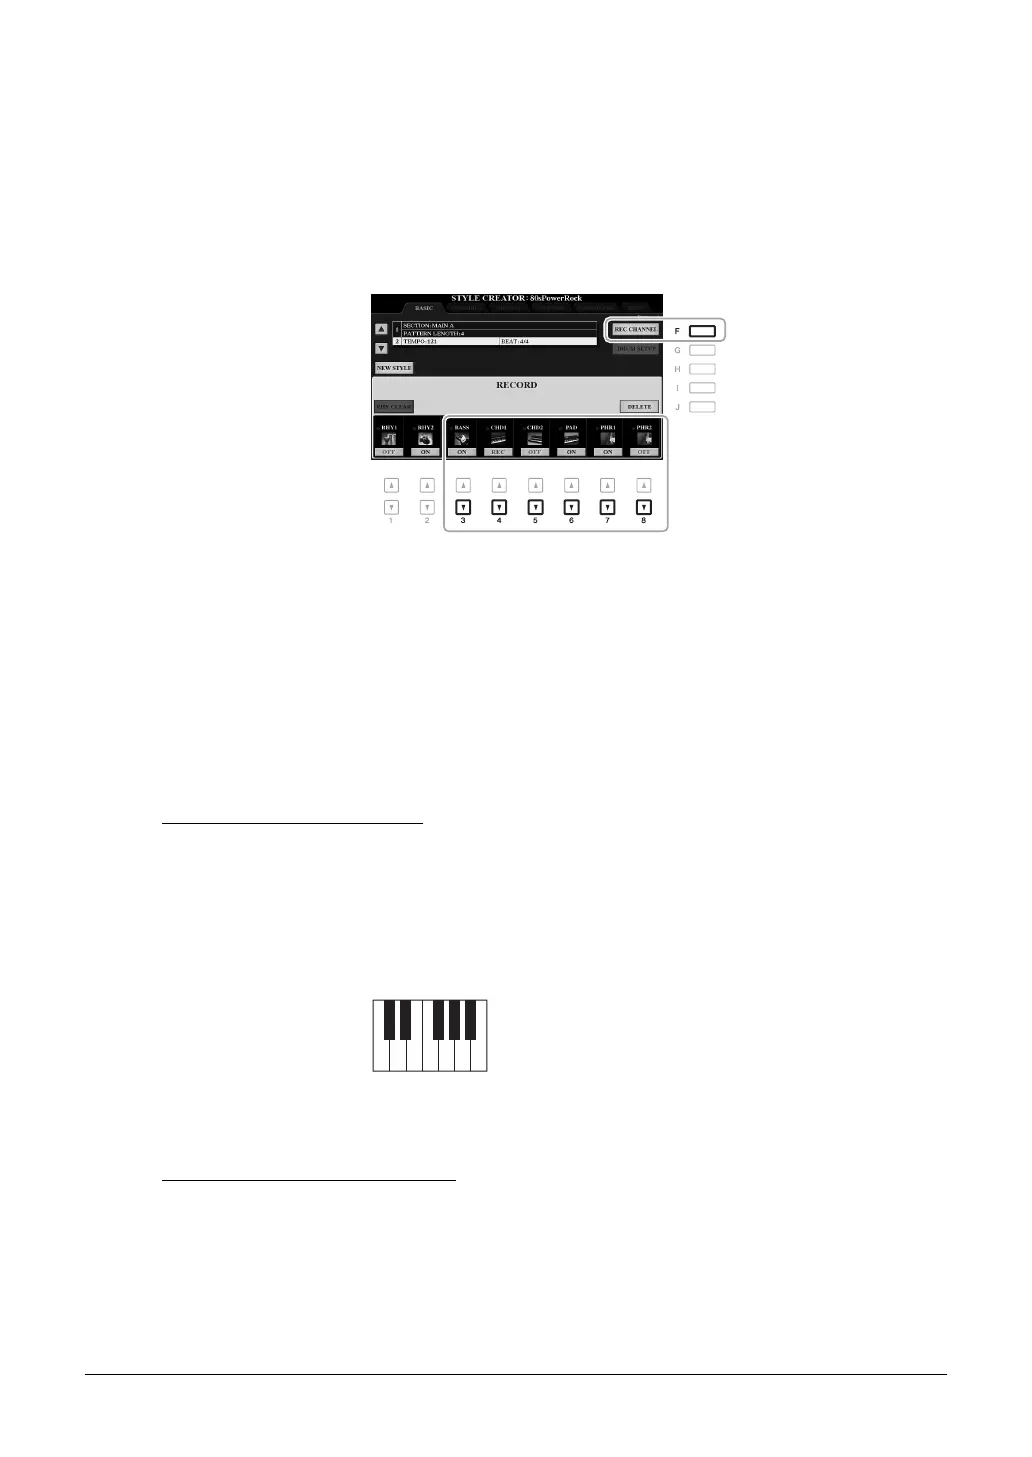
1 From the BASIC page, while holding down the [F] (REC CHANNEL) button, press one of
the [3 ]–[8 ] buttons to select the desired channel as the recording target.
If a preset Style is selected, a confirmation message appears, prompting you whether or not to delete the
already recorded data of the selected channel. Press the [G] (YES) button to delete data and the selected
channel is specified as the recording target. Note that channel data other than the Rhythm channels of the
preset Style cannot be overdubbed.
2 If necessary, select a Voice then practice the bass line, chord backing, or phrase to be
recorded.
Press one of the [3 ]–[8 ] buttons (selected channel) to call up the Voice Selection display then select the
desired Voice. After selecting, press the [EXIT] button to return to the original display. With the selected Voice,
practice the phrase or chord backing to be recorded.
• Available Voices for recording
Any except for the Organ Flutes Voice/Drum Kit/SFX kit Voices can be used for recording.
• Record a phrase in CM7 (for playing appropriate notes while chords change during performance)
Rules when recording a Main or Fill
With the default initial settings, the Source Root/Chord (page 136) is set to CM7. This means that you should
record a Source Pattern using a CM7 scale, which will change according to the chords you specify during
normal performance. Record a bass line, phrase or chord backing which you want to hear when CM7 is
specified. See below for details.
• Use only the CM7 scale tones when recording the BASS and PHRASE channels (i.e., C, D, E, G, A, and
B).
• Use only the chord tones when recording the CHORD and PAD channels (i.e., C, E, G, and B).
If you observe this rule, Style playback notes are appropriately converted depending on the chord changes
you make during your performance.
Rules when recording an Intro or Ending
These Sections are designed assuming that the chord is not changed during playback. This is why you need
not observe the rule for Main and Fill-in Sections described above, and you can create special chord
progressions when recording. However, follow the rules below since the Source Root/Chord is set to CM7.
• When recording the Intro, make sure that the recorded phrase leads properly into a C scale.
• When recording the Ending, make sure that the recorded phrase begins with or properly follows a C scale.
C = Chord note
C, R = Recommended note

 Loading...