78 PSR-A3000 Owner’s Manual
You can create a new Multi Pad by making links with audio files (WAV format: 44.1
kHz sample rate, 16 bit resolution, stereo) in the USB flash drive to each of the Multi
Pad. The audio files (WAV) can be data you’ve recorded on this instrument (page 74)
as well as commercially available ones. Multi Pads to which audio files have been
linked are called Audio Link Multi Pads. The new Audio Link Multi Pads can be
saved to the USER drive or USB flash drive.
1 Connect the USB flash drive containing the audio files (WAV) to
the [USB TO DEVICE] terminal.
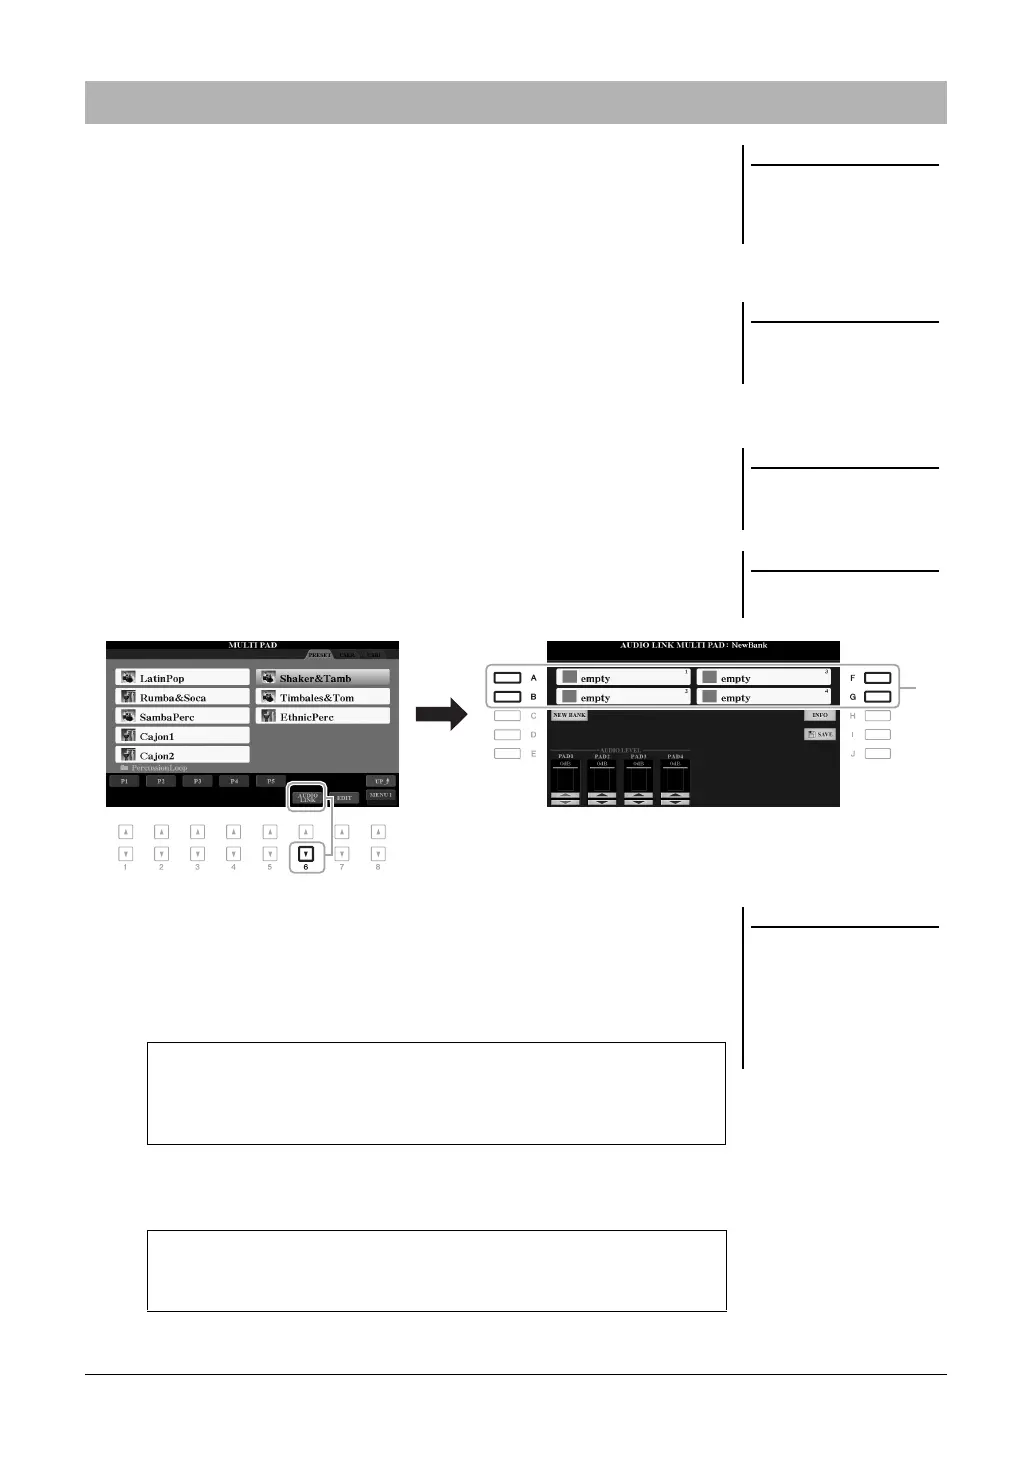
2 Press the MULTI PAD CONTROL [SELECT] button to call up the
Multi Pad Bank Selection display.
3 Press the [6 ] (AUDIO LINK) button to call up the AUDIO LINK
MULTI PAD display.
A confirmation message may appear here. If so, follow the on-display
instructions.
4 Select the desired Pad by pressing any of the [A], [B], [F] and
[G] buttons.
The WAVE File Selection display appears.
5 Select the desired audio file by using the [A] – [J] buttons.
6 Press the [EXIT] button to return to the AUDIO LINK MULTI PAD
display.
Creating a Multi Pad with Audio files (Audio Link Multi Pad)
Audio Link Multi Pads can neither be
created nor played back during play-
back, recording standby or recording
of audio files.
Before using a USB flash drive, be sure
to read “Connecting USB Devices” on
page 95.
Make sure that MENU 1 is shown at
the bottom right corner of the display
(page 26).
An audio file cannot be linked to a
MIDI Multi Pad.
If an Audio Link Multi Pad has been
selected when you press the [6 ]
(AUDIO LINK) button in step 3, the
links made for the selected Pad appear.
In order to create a new Pad, make
sure to press the [C] (NEW BANK) but-
ton. Otherwise, you are simply re-
selecting the link in the selected Pad.
To confirm the information of the selected audio file
By pressing the [6 ] (INFO) button in the WAVE File Selection display, you
can confirm the information (title name, bit rate and sample rate, etc.). Press the
[F] (OK) button to close it.
To confirm the path of the selected audio file
By pressing the [H] (INFO) button in the AUDIO LINK MULTI PAD display,
you can confirm the path. Press the [F] (OK) button to close it.

 Loading...