188 PSR-A3000 Owner’s Manual
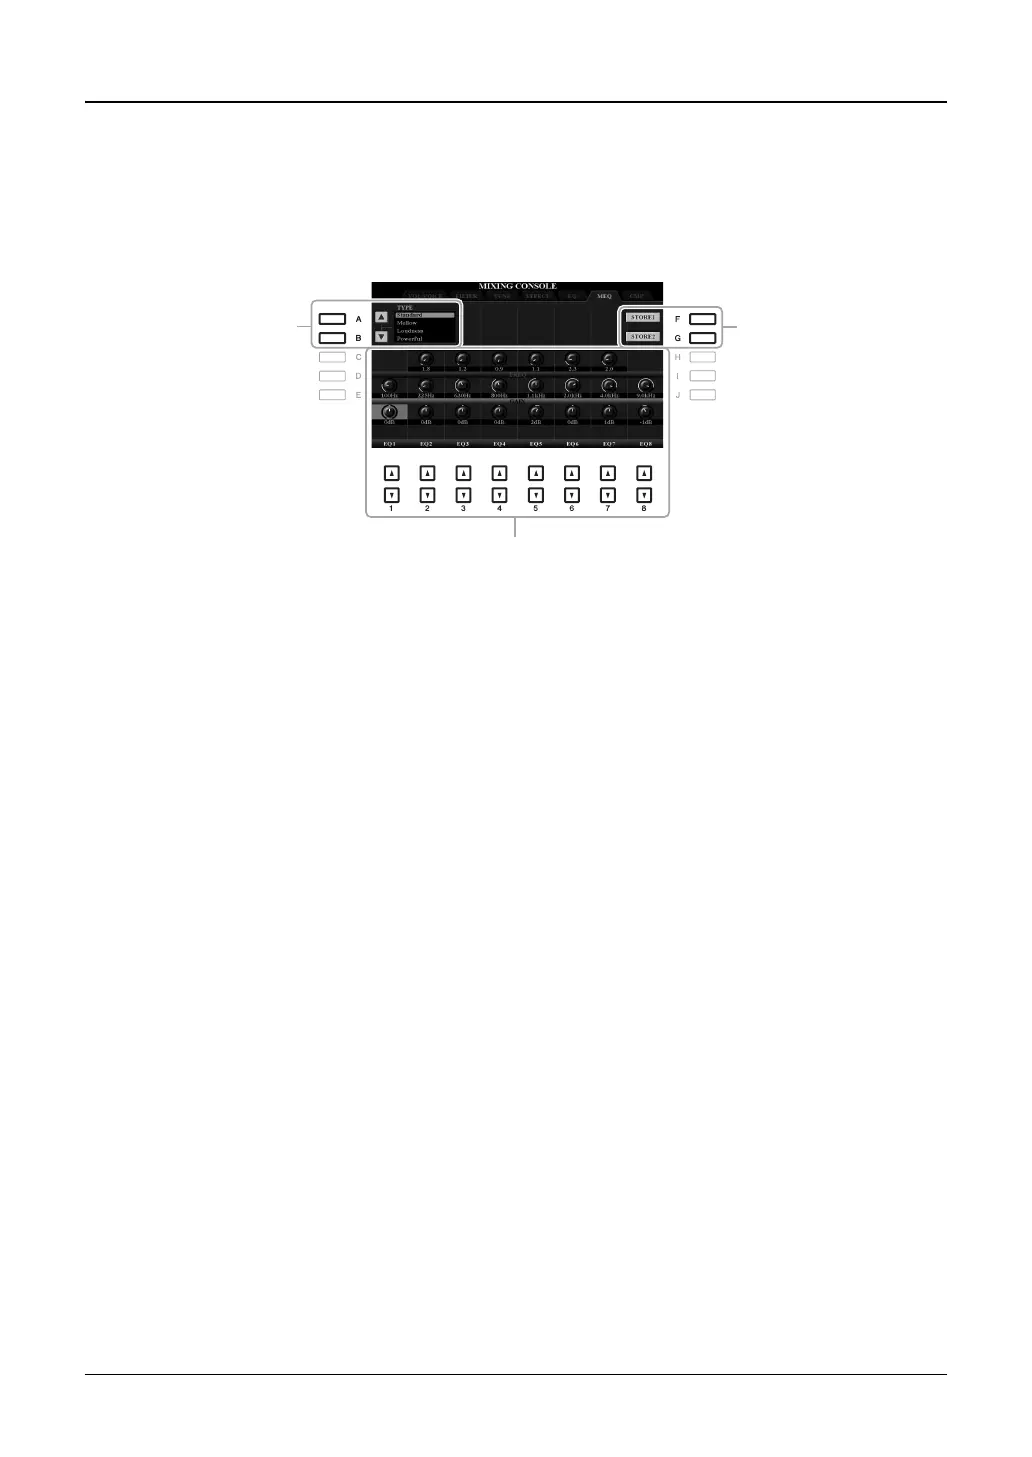
Editing and Saving Your Original Master EQ (MEQ) Type
This instrument is equipped with a high-grade eight-band digital EQ. You can select one of the five preset EQ types,
or can even create your own custom EQ settings by adjusting the frequency bands, and save the settings to one of
two User Master EQ types.
NOTE This display can also be called up by pressing the [MASTER EQ] button.
NOTE Master EQ cannot be applied to audio playback or the metronome sound.
1 Use the [A]/[B] buttons to select the desired EQ type.
Standard: Standard EQ settings in which the instrument's characteristics are optimally brought out.
Mellow: Soft and mellow EQ settings in which high-frequency bands are reduced slightly.
Loudness: Clear EQ settings in which both the low- and high-frequency sounds are emphasized. This is a good
match with up-tempo music.
Powerful: Powerful EQ settings in which all frequency sounds are emphasized. This can be used to boost the
music for parties, etc.
Flat: Flat EQ settings. The gain of each frequency is set to 0dB.
User1/2: Your own custom EQ settings stored in step 4.
2 Use the [E]/[J] buttons to move the cursor to the GAIN row, then adjust the GAIN level to
boost or cut each of the eight bands.
Use the [1 ]–[8 ] buttons to adjust the level. Changing the value while the [E] or [J] button is held lets
you boost or cut all the eight bands at the same time.
3 If desired, adjust the Q (bandwidth) and the FREQ (center frequency) of each band.
To adjust the bandwidth (also called “Shape” or “Q”), use the [C]/[H] buttons to move the cursor to the Q row,
then use the [2 ]–[7 ] buttons. The higher the value of Q, the narrower the band width.
To adjust the FREQ (center frequency), use the [D]/[I] buttons to move the cursor to the FREQ row, then use
the [1 ]–[8 ] buttons. The available FREQ range is different for each band.
4 Press the [F] or [G] (STORE 1 or 2) button to carry out the Store operation.
In the Character Entry window called up via this operation, enter the name, and then press the [8 ] (OK)
button to actually store your settings as a User Master EQ Type, which can be called up via the [A]/[B] buttons.
2,
3
4
1

 Loading...