Page – 18/139 AFFZP0BB – ACE3 – User Manual
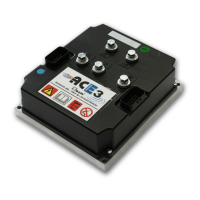
4 DESCRIPTION OF THE CONNECTORS
4.1 Power connectors
Power connections are on vertical posts where to bolt power-cables lugs. On the
cover of the converter they are labeled as:
-B * Battery negative terminal.
+B * Battery positive terminal.
U, V, W Motor phases. Match the sequence with that at the motor
terminals.
* Throughout this manual, battery terminals are also addressed as -Batt and +Batt.
4.2 Ampseal connectors
ACE3 Standard is equipped with one 23-poles Ampseal connector like that of the
following figure. Each of the 23 pins is referred to as “A#”, where “A” denotes the
connector name and “#” the pin number, from 1 to 23.
ACE3 Standard 23-poles Ampseal connector.
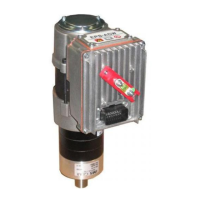
ACE3 Premium is equipped with two equal 23-poles Ampseal connectors. Each of
the 23+23 pins is referred to as “A#” or “B#”, where “A” and “B” denote the
connector name and “#” the pin number, from 1 to 23.
ACE3 Premium twin 23-poles Ampseal connectors.
The following paragraphs list the functional associations for the pins of Ampseal
connectors, for Standard and Premium versions of ACE3 and for Traction and Pump
configurations.
4 For each I/O pin, the default Zapi function is indicated. The function of each pin can
be changed in the customized software. Also, some I/O pins can have special
functionality depending on the HW configuration of the controller.
 Loading...