Setup and Configuration
45
Tango Series Audio Controllers
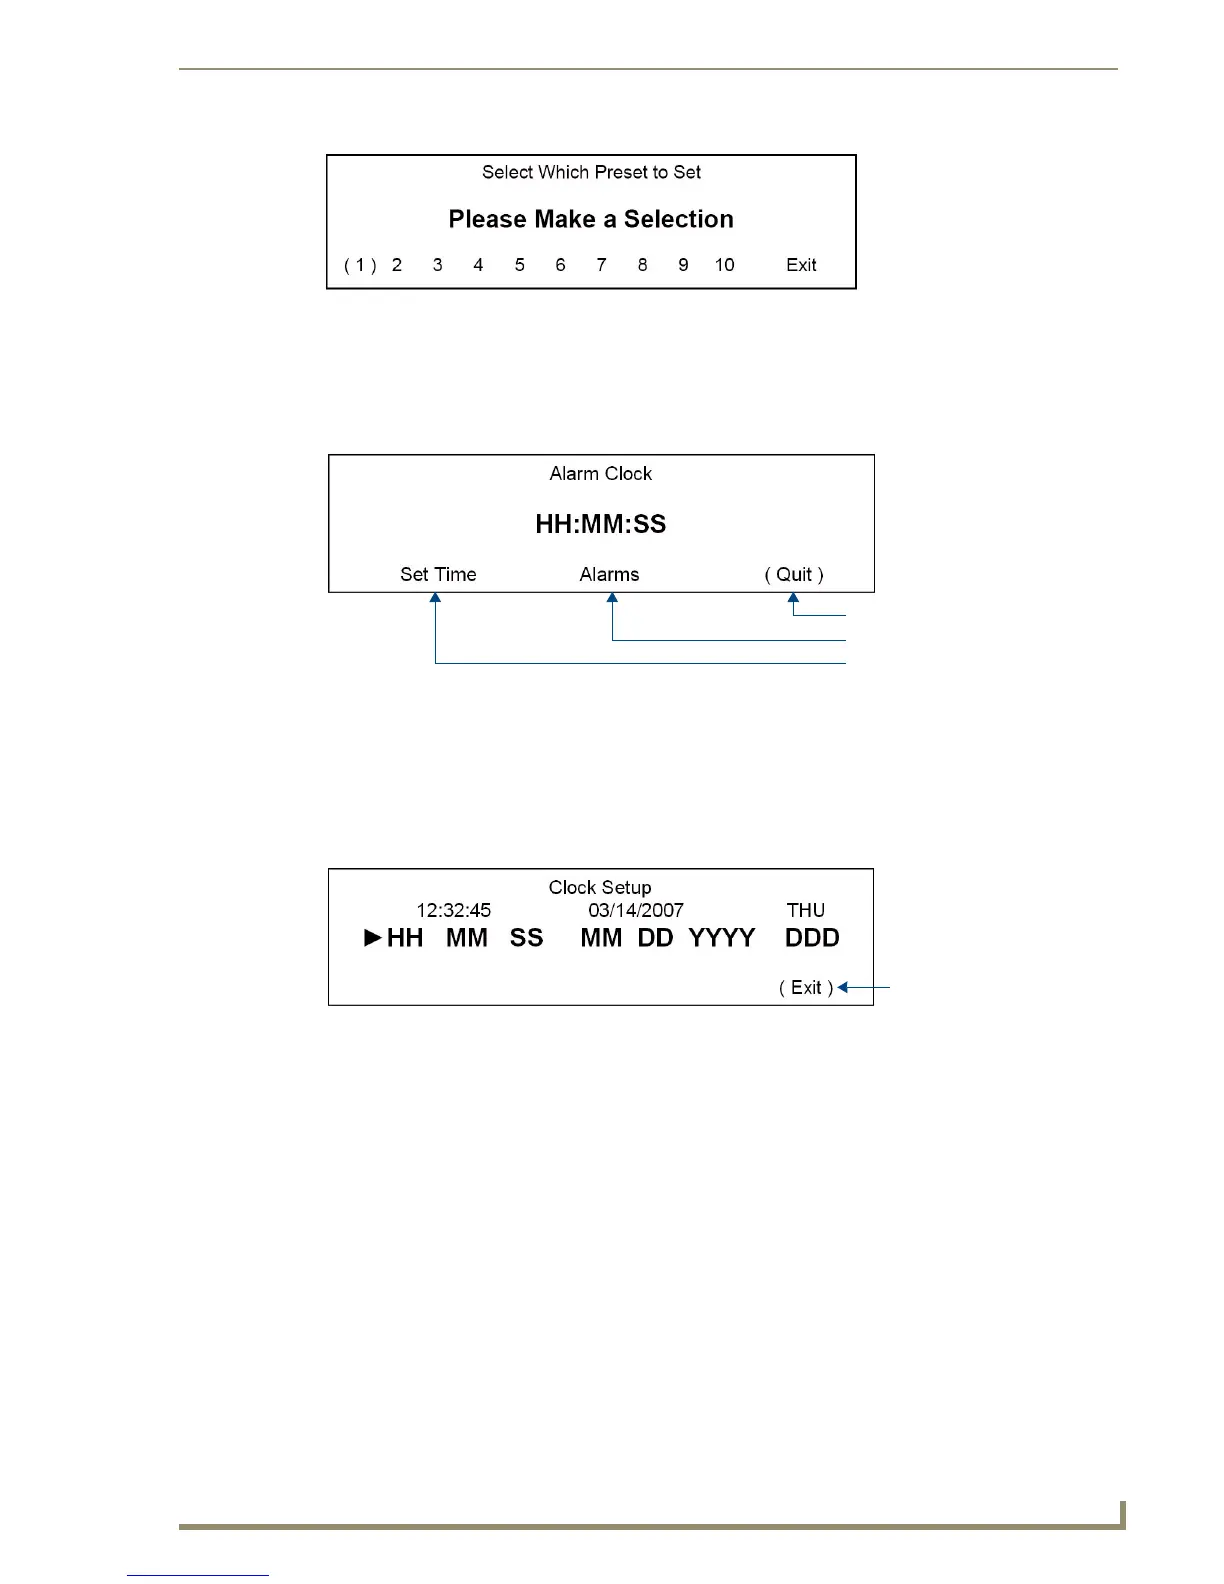
System Setup - Clock Setup Mode screen
Select Clock from the System Setup Mode screen (FIG. 25) to access the Clock Setup Mode screen
(FIG. 44):
Setting System Time
In order for Alarms to work, a System Time must be set at the Controller.
1. Select Set Time in the Clock Setup Mode screen (FIG. 44) to access the Clock Setup screen that
displays the current Time, Date, and Day (FIG. 45):
2. Select HH (hour) by using the Navigation buttons (<< / >>) on the front of the Controller. An arrow
is displayed in front of HH, as shown in FIG. 45.
3. Use the UP/DOWN Navigation buttons to increase/ decrease the hours (1 - 24).
4. Proceed to MM (minute) & SS (second) in the same manner (01 - 60).
Setting System Date
1.
In the Clock Setup screen (FIG. 45), select MM (month) by using the Navigation buttons (<< / >>)
on the front of the Controller. An arrow is displayed in front of MM.
2. Using the UP/DOWN Navigation buttons, increase/ decrease the month.
3. Proceed to DD (date) & YYYY (year) in the same manner.
Setting the Day of the week
1.
In the Clock Setup screen (FIG. 45), select DDD (day) by using the Navigation buttons (<< / >>) on
the front of the Controller. An arrow is displayed in front of DDD.
FIG. 43 Select Which Preset To Set screen
FIG. 44 Clock Setup Mode screen
FIG. 45 Clock Setup screen
Exits this screen
To the Alarms screens
To the Clock Setup screen
Saves Time / Date settings
and exits this screen

 Loading...


