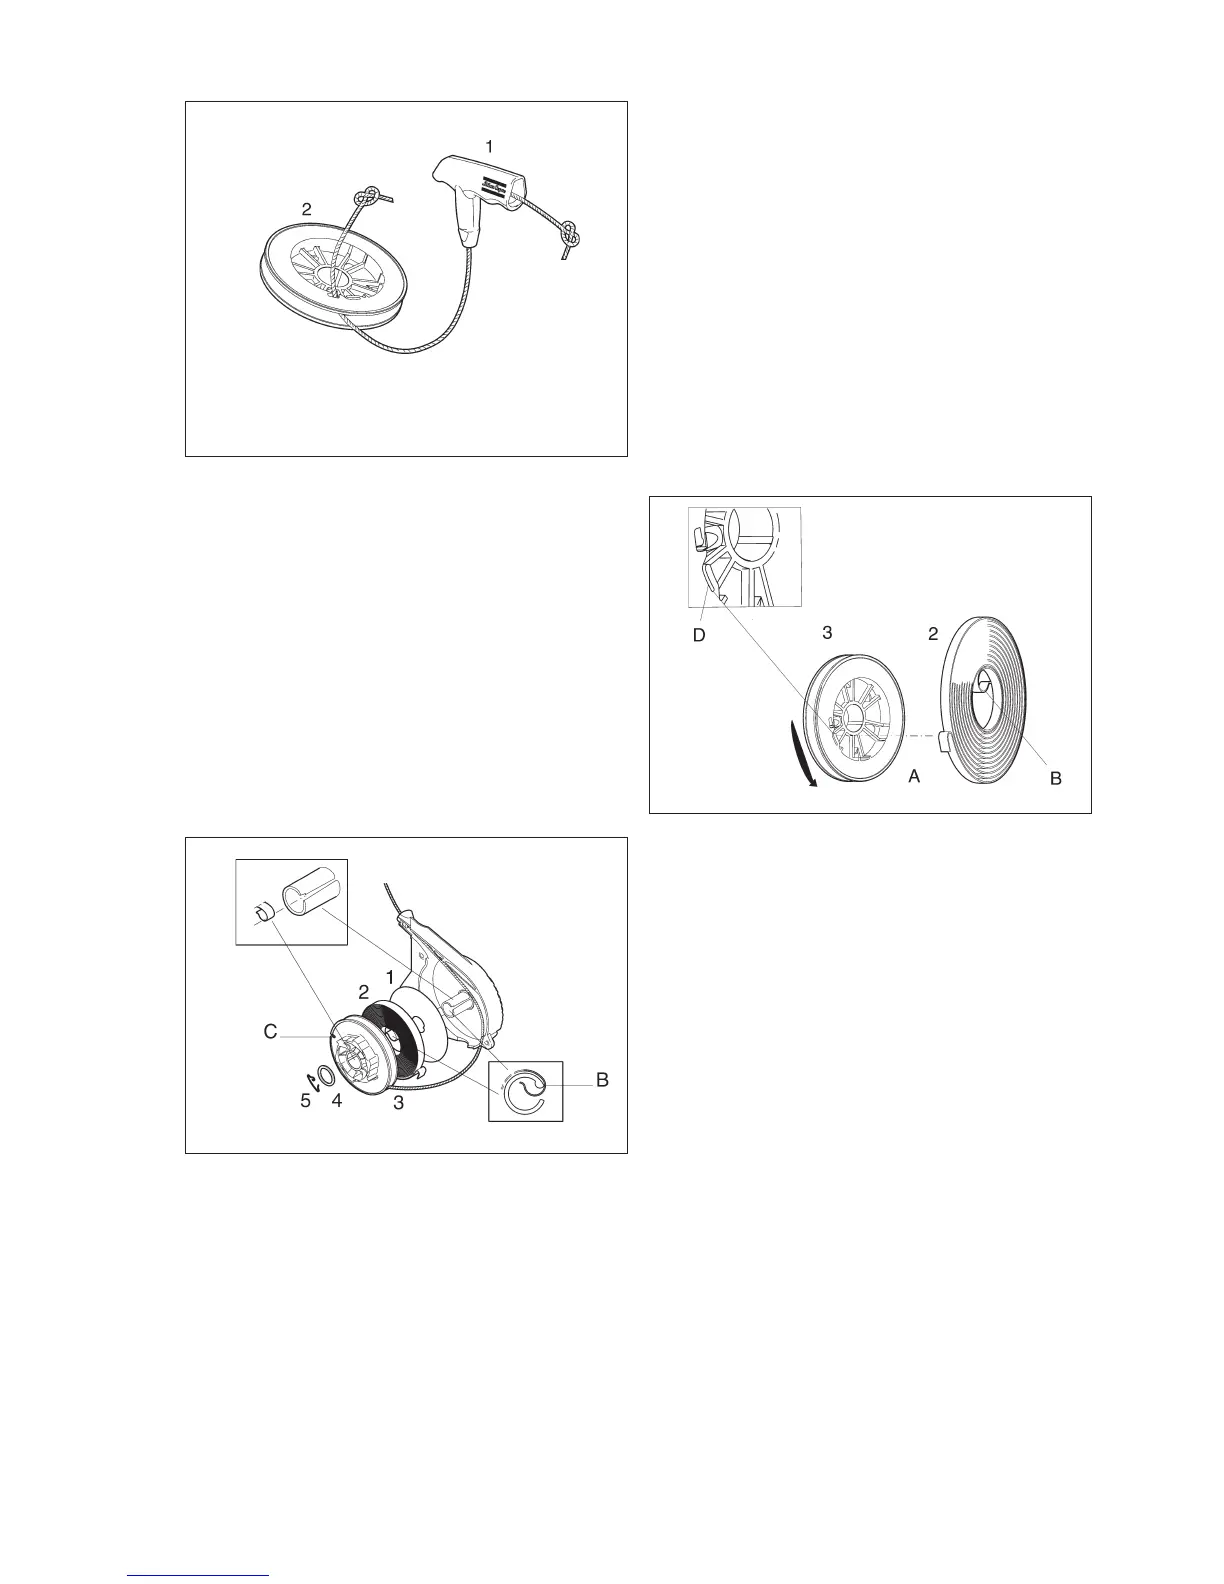
Using a pair of pliers, pull out the knot from the
starter handle (1). Cut off the knot and pull the rope
out from the handle.
Examine the handle, which must be replaced if it is
worn or has cracks. Using a pair of pliers, pull out the
rope knot from the pulley wheel (2) and remove the
rope completely.
Examine the rope and replace it if worn.
Note: Always wear protective gloves and protective
glasses when reassembling or dismantling the
starter spring.
Reassembly of starter mechanism
Locate the washer (1) on the starter cover.
Fit the starter spring (2) in the starter pulley (3). En-
gage the spring hook (A) in the groove (D) in the
starter pulley and wind up the spring anticlockwise,
at the same time guiding it into place in the starter
pulley; see Fig. 9.
Note: Always wear protective gloves and protective
glasses when reassembling or removing the starter
spring.
Wind the rope anticlockwise onto the starter pulley.
Leave about 5 cm of rope outside the cover. Engage
the spring hook (B) in the notch on the starter cover
and press the starter pulley into place.
Fit the washer (4). Refit the locking ring (5) and
check that it is correctly engaged in the groove.
Pull out the rope for approximately 40 cm. Place the
rope in the notch (C) and rotate the starter pulley (3)
one turn anticlockwise. Let the cord wind slowly onto
the starter pulley.
IMPORTANT! Check the spring tension by pulling
the starter rope out to its full extent. It must then be
possible to rotate the starter pulley for a further half
turn anticlockwise. If this is not possible, the spring is
over-tensioned and the spring tension must be re-
leased by one turn.
15
Fig. 8
Fig. 9
Fig. 7
 Loading...