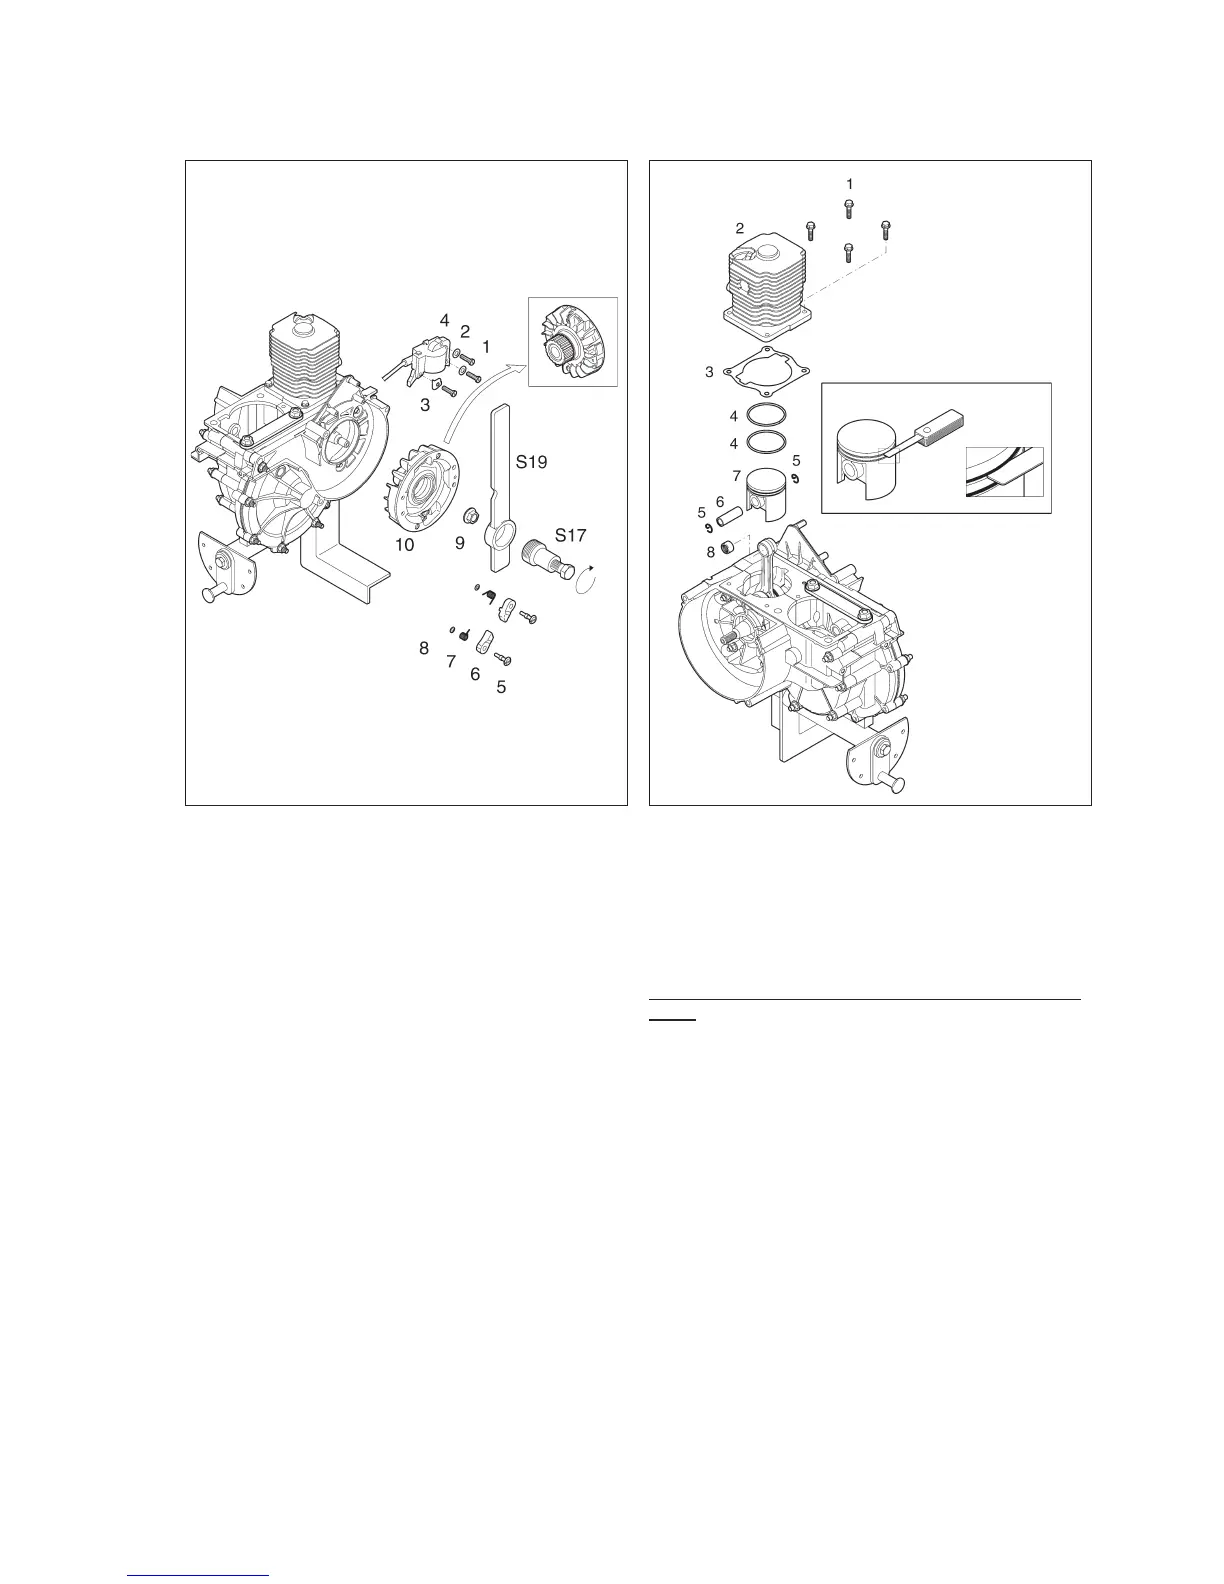
Dismantling of the electronic unit,
carriers and flywheel
Remove the three screws (1) and the washers (2)
and (3) and remove the electronics unit (4).
Note: The washer (3) protects the plastic casing of
the electronics unit from damage by the screw head.
Examine the three poles of the electronics unit for
damage, and replace if necessary. Examine the igni-
tion cable for damage, and replace if necessary.
Remove the screw (5) and lift off the carrier (6), car-
rier spring (7) and washer (8). Examine the carriers
for wear, and replace if necessary.
Lock the flywheel using service tool S19 and remove
the nut (9).
Insert the flywheel puller, service tool S17, and lock
the flywheel with service tool S19. Tighten the screw
of the puller.
If the flywheel is solid, strike a blow on the screw
head of service tool S17 to release the flywheel from
the crankshaft taper.
The gear wheel and the flywheel are a single compo-
nent.
Examine the flywheel gear wheel for wear or dam
-
age, and replace if necessary.
Note: If the flywheel gear wheel must be replaced,
the corresponding gear wheel for the drive piston
must also be replaced.
Dismantling of the engine cylinder
and piston
Remove the four screws (1) and lift off the cylinder
(2). Examine the coating of the cylinder bore for
wear. If the coating has flaked or if scratches are
present, the cylinder must be replaced.
Note: The engine cylinder and piston are a matched
pair and are marked with a grading letter on the
crown of the piston and at the top of the cylinder.
The piston and cylinder must always have the same
letter.
Carefully clean any deposits from the cylinder ex-
haust port and the decompression channel without
damaging the cylinder bore.
Remove and discard the gasket (3). Carefully clean
the sealing surfaces using a wooden or plastic
scraper without scratching the surfaces. Dismantle
and discard the locking rings (5).
Use a suitable drift to press out the gudgeon pin (6),
supporting the piston and the connecting rod at all
times. Lift out the piston and dismantle and discard
the needle bearing (8).
Dismantle the piston rings (4). Clean any deposits
from the piston ring grooves using a wooden or plas-
tic scraper. Examine the grooves for wear.
The free play of the piston rings in the piston ring
groove must not exceed 0.15 mm. Fit the piston rings
in the cylinder, and check the piston ring gap with a
feeler gauge. The gap must not exceed 0.45 mm.
23
Fig. 28
Fig. 29
 Loading...