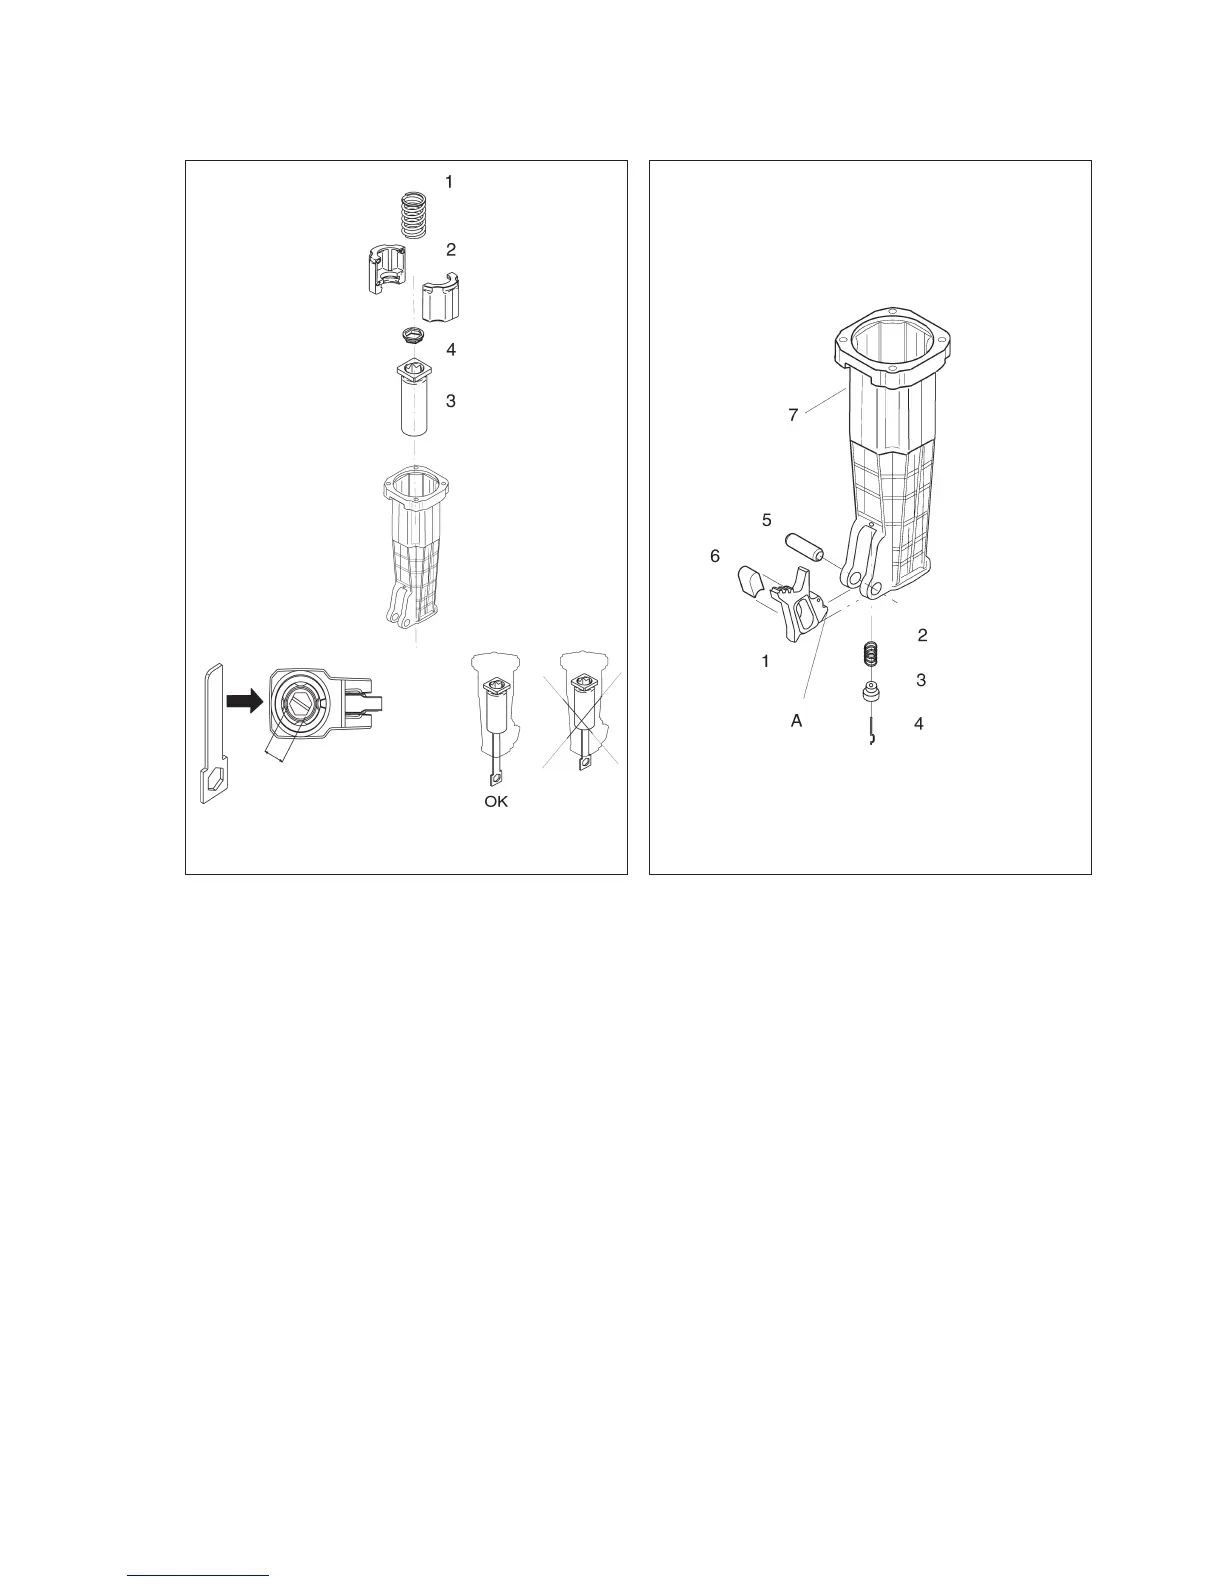
Dismantling of the tool shank
Lift out the return spring (1). Examine the spring; the
spring must be replaced if the contact surfaces are
worn or damaged.
Remove the feed stop (2). Examine the feed stop,
and replace it if worn or damaged.
Remove the tool shank (3). Use the gauge supplied
with the machine to measure the wear in the internal
hexagon.
If the gauge can be introduced to its full extent into
the tool shank, the shank is excessively worn and
must be replaced.
Remove and discard the seal (4).
Dismantling and reassembly of the
tool latch
Dismantling
Use a suitable drift to press out the locking pin (5).
Lift out the tool latch complete with its locking system
from the tool holder.
Examine the component parts; they must be re-
placed if they are worn.
Examine the locking heel (A) of the tool latch; the
tool latch must be replaced if it is worn.
Reassembly
Locate the insert (6) in the tool latch.
Hook the guide pin (4) in the hole in the tool latch.
Fit the guide (3) and the spring (2) on the guide pin.
Introduce the tool latch with its locking system until it
engages in the tool holder.
Press in the locking pin (5).
Note: The locking pin (5) must be fitted with the lon
-
gitudinal opening facing downwards.
19
Fig. 18 Fig. 19
 Loading...