Reassembly
Fit the throttle cable(9) and the electrical wires (5)
and (6) in the protective sheath (11).
Push the wires down through the hole for the bush
(10) and then up through the hole for the stop button.
Connect the wires to the stop button and then fit the
stop button in the handle.
Note: Check that the stop button is installed in the
right direction.
Push the cable down through the hole for the bush
(10) and then up through the hole for the throttle lever.
Hook the cable onto the throttle lever.
Fit the throttle lever in the handle and tap in the pin
(7). Stretch the cable and the electrical wires and
check that the electrical wires do not interfere with
the throttle lever and cable.
Fit the nipple (10).
Pass the cable down into the nipple and check that it
bottoms.
Pass the protective sheath over the nipple (10).
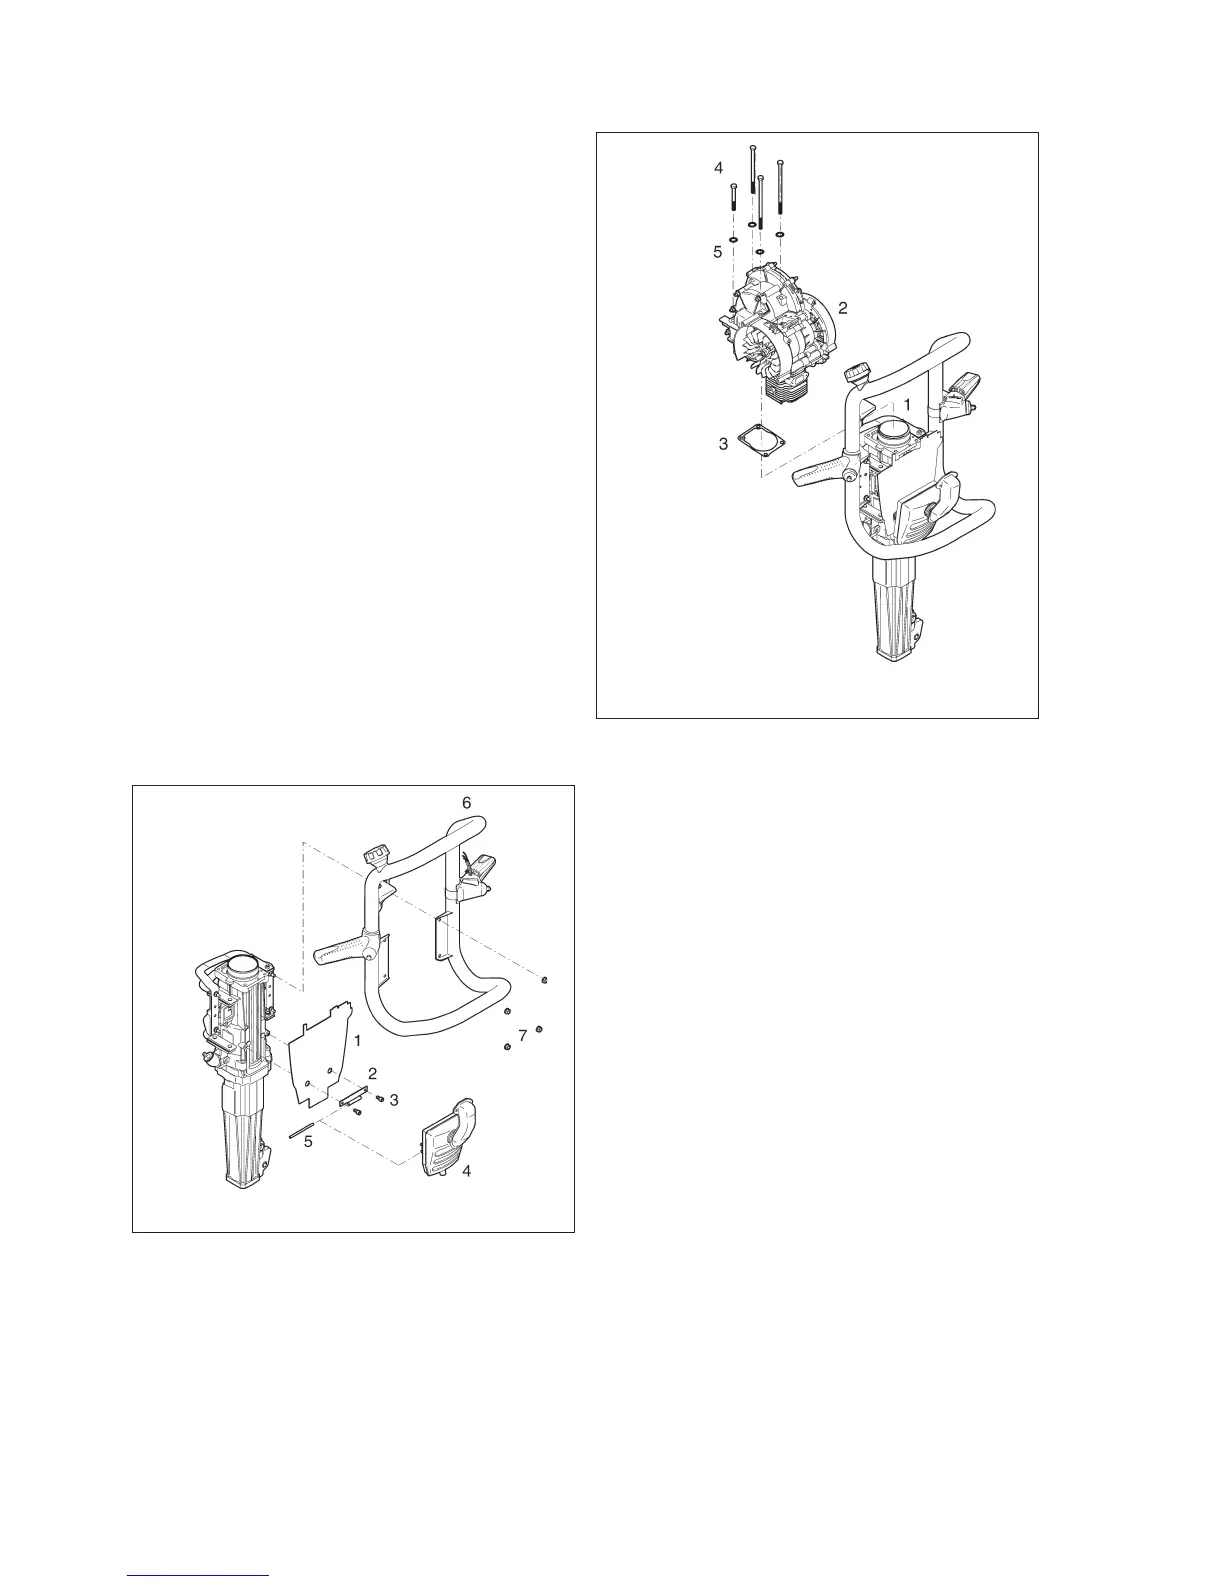
Fit the handle (2), washer (12) and locking nut (1) to
the handle strap. Fix the handle in the correct posi-
tion on the fuel tank and tighten the handle locking
nut (1).
Reassembly of fuel tank and
muffler
Locate the heat shield (1) on the hammer cylinder.
Note: Check that the heat shield is facing in the cor-
rect direction.
Fit the bracket (2) with the screws (3). Fit the muffler
(4) to the bracket (2) and tap in the spring pin (5).
Fit the fuel tank (6) to the end stop and tighten the
nuts (7).
Reassembly of engine
Lubricate the hammer cylinder bore (1) and the drive
piston.
Place a new gasket (3) on the hammer cylinder.
Position the drive piston in the hammer cylinder bore
and lower the engine (2) carefully onto the hammer
cylinder.
Tighten the engine mounting screws (4) together
with the washers (5). The screws must be tightened
to the stipulated torque load.
Note: The mounting screws (4) must be provided
with washers (5) to enable the correct tightening
torque load to be contained.
36
Fig. 69
Fig. 70
 Loading...