52
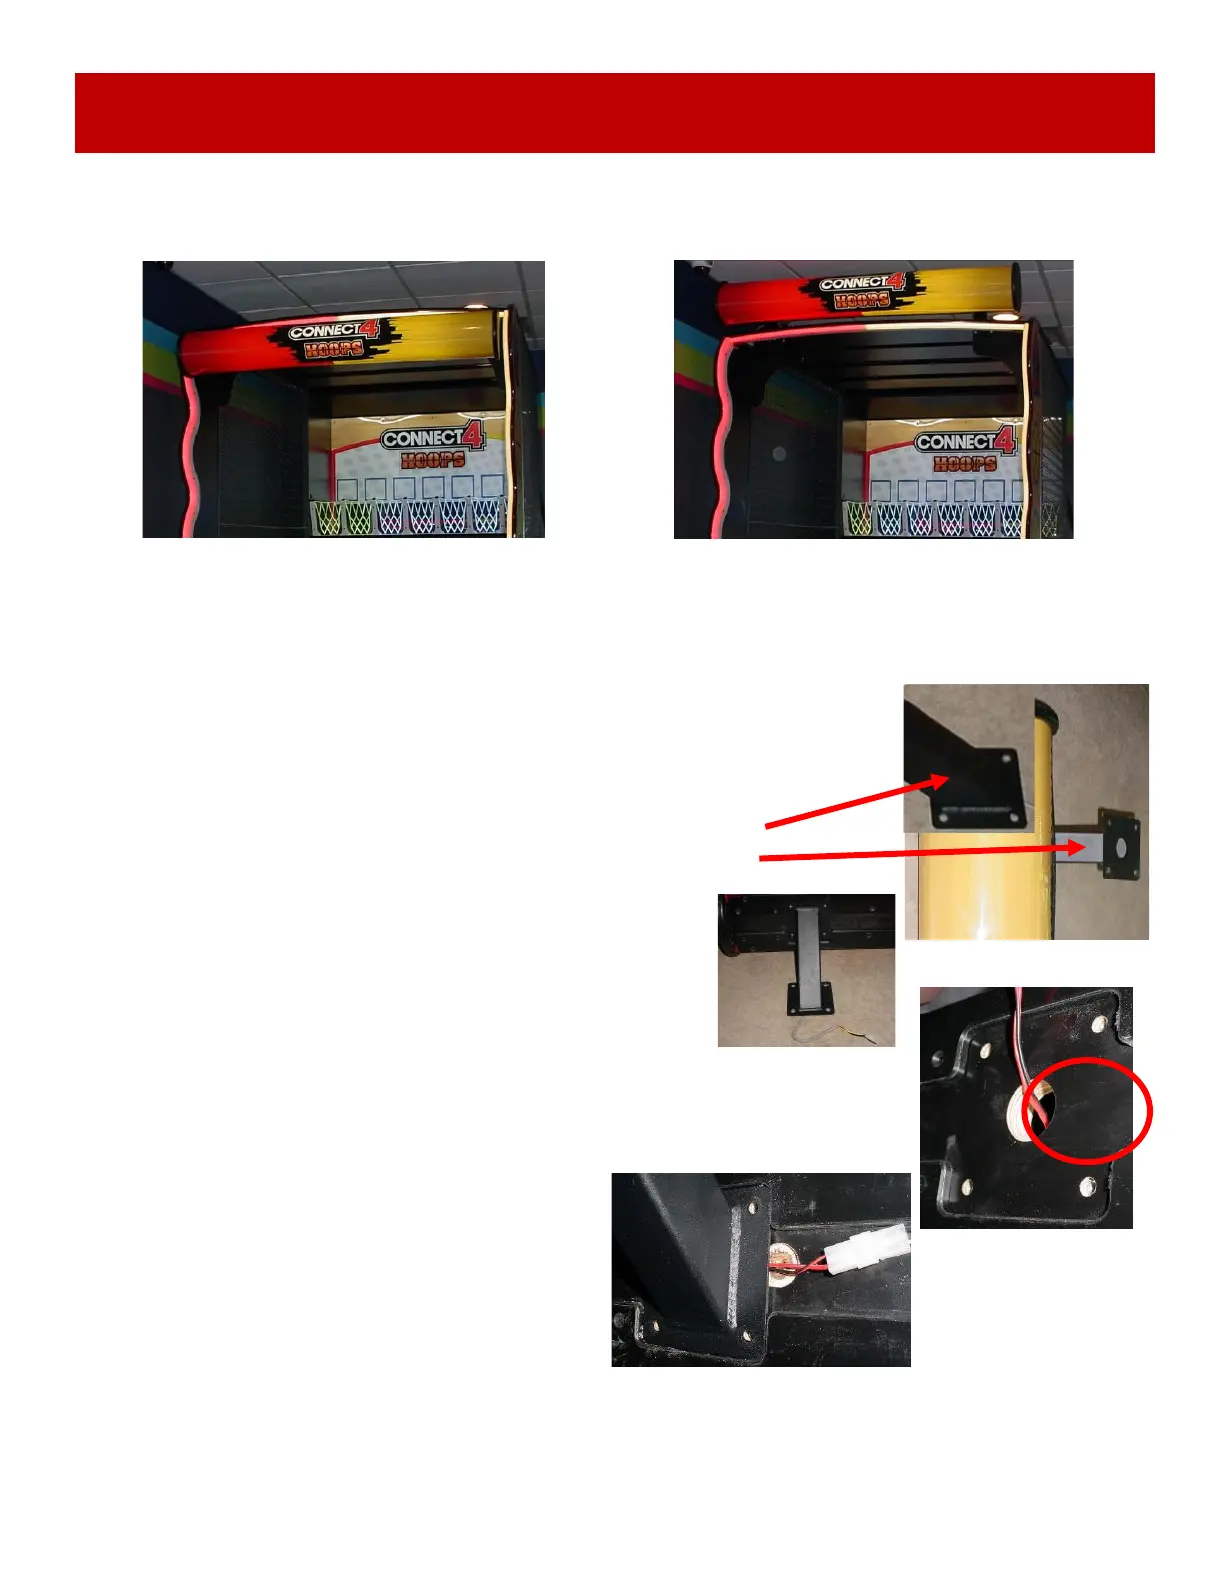
If you have at least 9 inches of clearance above your game, the round marquee may be installed on
top of the game. This is a matter of personal preference:
Standard mounting under the roof Optional mounting on top
HOW TO MOVE MARQUEE TO TOP OF GAME
Tools needed:
7/16” Wrench Phillips Screwdriver 2 people
Using 2 people, carefully bring the marquee back up onto the top of the game and re-install the
bolts, washers, and nuts. Make sure these are all tightened completely. Plug in the power connector.
Installation is complete.
Instructions:
Using 2 people, carefully climb up into the cabinet and remove the 8
nut and bolts attaching the marquee to the game using a Phillips
screwdriver and 7/16” wrench.
Unplug the 2 pin connector, and set on the floor.
On yellow side - Remove the 4 bolts using a Phillips screwdriver.
Rotate the bracket 180 degrees and re-install, from this
to this.
On red side - Remove the 4 bolts using a Phillips
screwdriver.
Pull the cable from the center of the support, it will be
moved to under the bracket, against the marquee.
Remove the support bracket.
If there is no channel to route wire, uses a spade drill bit to create a channel
so the wires do not get pinched.
Route wires as shown.
Rotate the bracket 180 degrees and re-install.

 Loading...