Manual
Adjustment of the
Audio
Recording
Level
-
»
Q.
<
l»
::::J
(')
CD
Q.
"T1
£:
::::J
(')
e
o
::::J
CJ)
Displaying
the
Audio
Level
Indicator
Usually, the audio level indicator will be
displayed only after the manual
adjustment
of
the audio recording level.
With the procedure below, you can
display the
audio
level
indicator
also
when the audio level is adjusted
automatically
or
during playback.
3
Adjust
(
....
~
)
the
audio
level
as
necessary.
•
• Push the joystick
(~
) toward + to
raise the audio recording level
or
push
it (
....
) toward - to lower
it.
•
As
a guideline, adjust the audio
recording level so that the audio level
meter
will go to the right
of
the -12 dB
mark
only occasionally.
• When the
0 dB mark turns red, the
sound may be distorted.
4
Press
(8
)
to
save
the
setting
and
hide
the
joystick
guide.
To
USE
THE
MICROPHONE
ATTENUATOR
If
the audio level is too high and the
sound gets distorted, activate the
microphone attenuator by setting [MIC
ATT.] to
[om
ON]
(CD
39).
CD~~~t~~,~~=~~_,:~,=~",:~~,~~~_~~,~=·,~~~~,=_:~::==~~=,.1
• The audio recording level can be adjusted
only while the green adjustment bar appears
under the audio level indicator.
To
avoid
changing the level by mistake, after you
manually adjust the audio recording level be
sure to press
(8)
to hide the joystick guide.
• When the mode switch
is
set to
tmID,
the
camcorder will adjust the audio level
automatically.
• We recommend using headphones
(CD
30)
to check the sound level while adjusting the
audio recording level or when the microphone
attenuator is activated.
(CD
10)
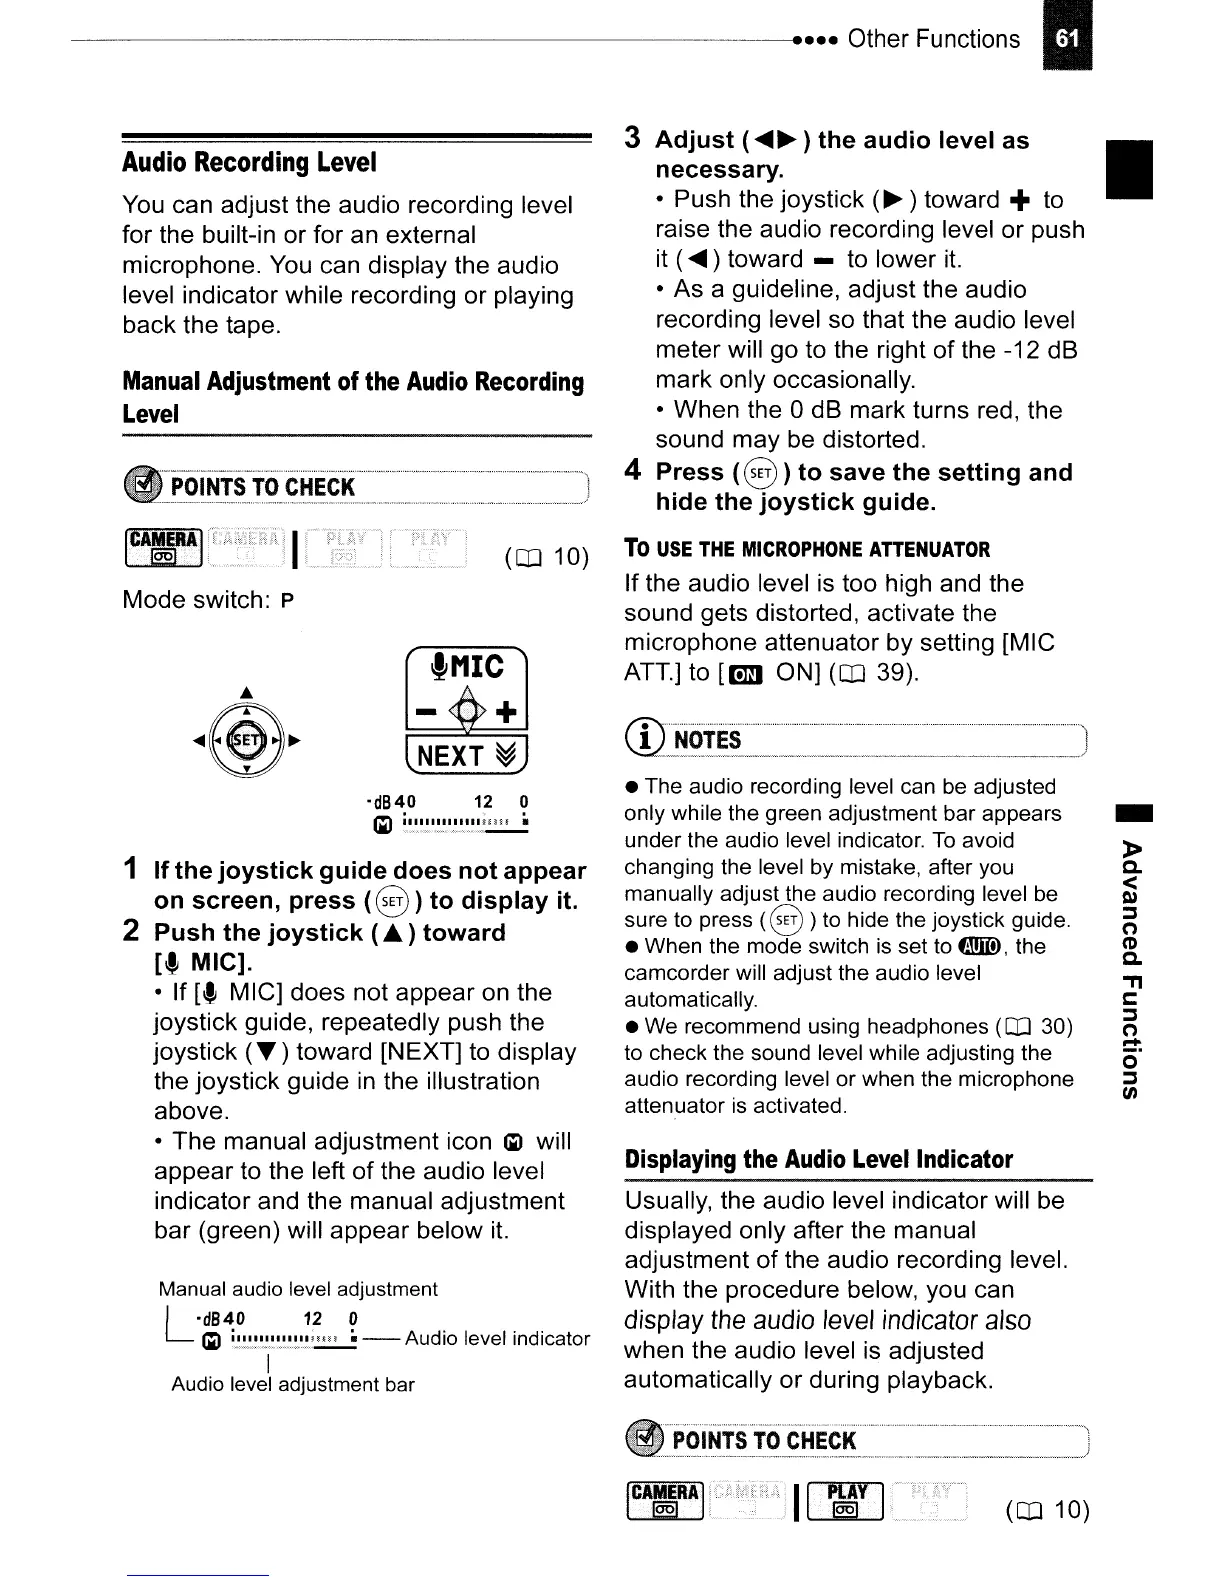
tMIC
- +
NEXT
~
-dB40
12
0
Ii)
i,~"I.~",I_,I.,~,~};"I
..
"~,~,~,,~~
OINTS
TO
CHECK
Manual audio level adjustment
L
·dB40
12
0
lil
i.~~,~~~~.'.'.~.'.~.',I:~
- Audio level indicator
I
Audio level adjustment bar
ICI'1841
Mode switch: P
Audio
Recording
Level
You can adjust the audio recording level
for the built-in
or
for an external
microphone. You can display the audio
level indicator while recording
or
playing
back the tape.
1
If
the
joystick
guide
does
not
appear
on
screen,
press
(8
)
to
display
it.
2
Push
the
joystick
(
..
)
toward
[t
Mle].
•
If
[t
MIC] does not
appear
on the
joystick guide, repeatedly push the
joystick
(T)
toward [NEXT] to display
the joystick guide
in
the illustration
above.
• The manual adjustment icon
lil
will
appear
to the lett
of
the audio level
indicator and the manual adjustment
bar (green) will
appear
below
it.
POINTS
TO
CHECK
100
(CD
10)
 Loading...