669224-R5
34
ERVICE
S
5.5 Restrictor Cartridges
5.5-1 Restrictor Cartridge
Adjustment
The restrictor cartridges must be adjusted so that the arms
have equal travel during opening and closing.
NOTE: Current production cylinders have the restrictor
cartridge installed in the rod end port. Early production
cylinders have the restrictor cartridges installed in the base
end port.
PRESSURE MUST NOT EXCEED 2300 psi (160 bar).
Hydraulic flow should fall within the volume range shown in
Section 6.1.
1 Remove the bumper if the restrictor cartridges are
installed in the cylinder rod end ports.
2 Loosen the jam nuts on the restrictor cartridges. Screw
in the plungers with a screwdriver until they bottom,
then back out three full turns.
3 Operate the attachment to determine the arm speed.
4 Screw in plunger on faster arm until equal in closing. If
not equal on opening, screw in plunger on faster arm
until equal on opening and closing. Back out plungers
equally until arms start to lose equalization. Tighten the
jam nuts.
5 If the arm travel will not equalize and the restrictor
cartridges are installed in the cylinder base end ports,
remove the cartridges and reinstalled in the rod end
ports and readjust.
6 Install the bumper as described in Section 5.3-1, step 9.
5.5-2 Restrictor Cartridge Service
WARNING: Before removing a restrictor
cartridge, relieve pressure in the hydraulic
system. Turn the truck off, then open the
truck auxiliary control valves several time in
both directions.
1 Remove the bumper if the restrictor cartridges are
installed in the cylinder rod end ports.
2 Remove the restrictor cartridge from the cylinder port.
For reassembly, tighten to 10–15 ft.-lbs. (13–20 Nm).
3 Remove the jam nut.
4 Remove the plunger.
5 Replace the O-rings.
6 For reassembly, reverse the above procedures except
as follows:
• Lubricate the O-rings with STP.
• Reinstall the bumper as described in Section 5.3-1,
step 9.
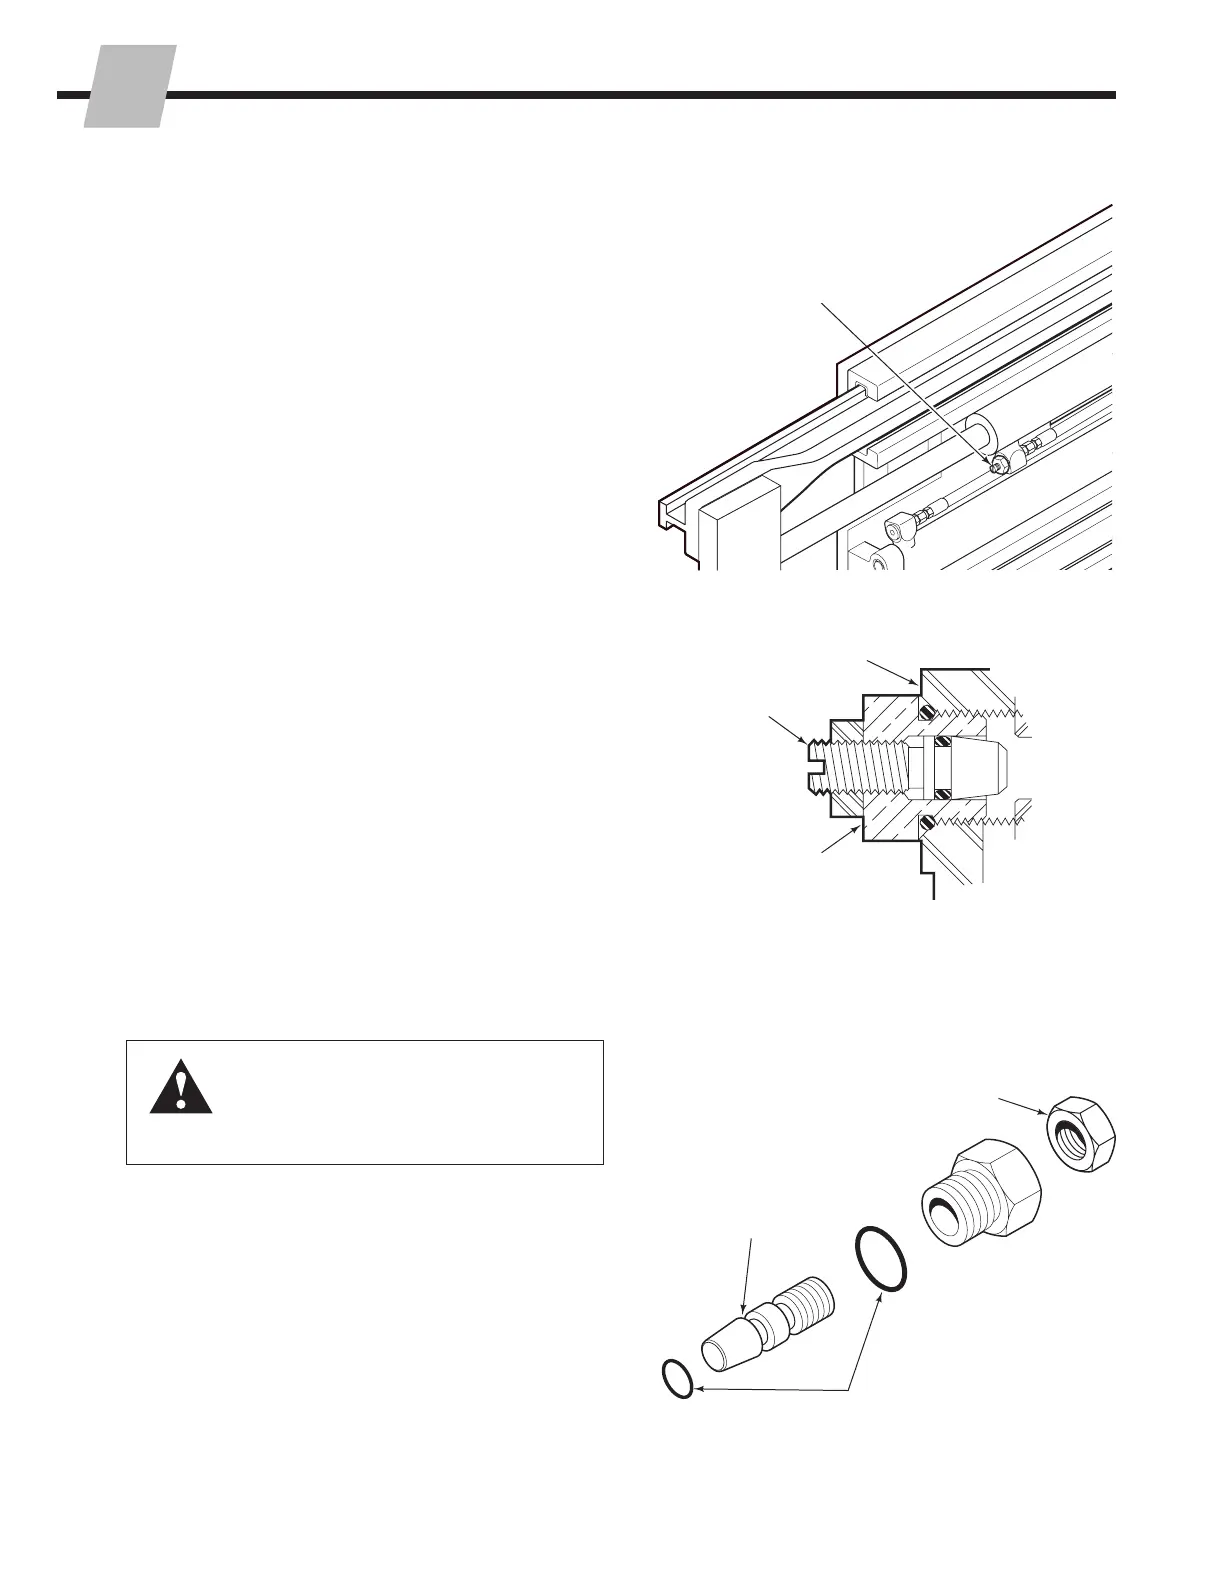
Restrictor Cartridge
(Current location in
cylinder rod end port)
CL1432.eps
CL1433.eps
Body
Plunger
Jam Nut
3
4
5
 Loading...