669224-R5
38
ERVICE
S
5.7 Base Unit
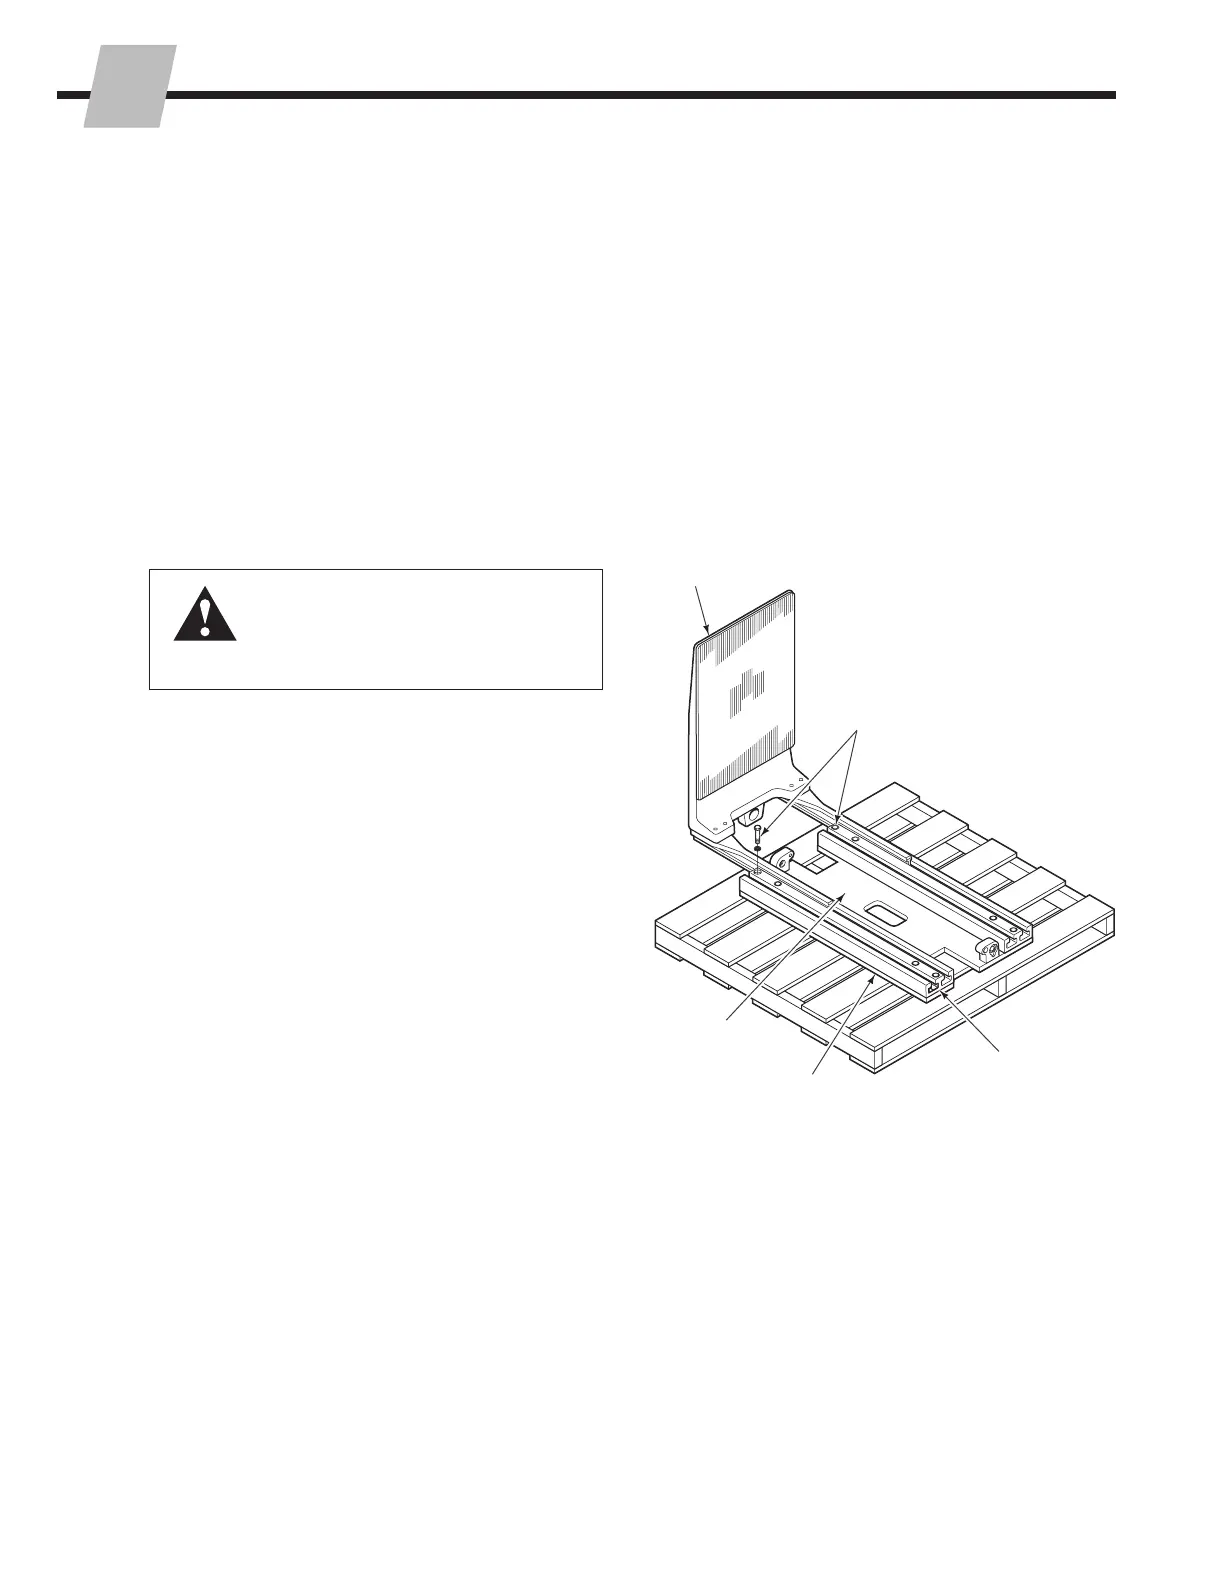
5.7-1 Frame and Mounting Plate
Disassembly and Reassembly
1 Remove the attachment from the truck as described in
Section 5.1
2 25D, 35D, 40D & 50D – Remove the check valve as
described in Section 5.6-1.
70D, 80D, 100D – Remove the check valve as
described in Section 5.6-2.
3 Remove the cylinders as described in Section 5.3-1.
4 Install two .50 in.–13 NC (M12) eyebolts in the frame.
Attach a suitable overhead chain hoist. Lay the clamp
over with the mounting brackets down.
WARNING: Check the attachment weight
(located on the nameplate) to make sure
the overhead hoist and chains or straps
are at least the rated capacity of the
attachment.
5 Pull the arm assemblies out of the frames.
6 Inspect arm bearings for wear. If the bearings are worn
in any area to a thickness less than .040 in. (1 mm), they
must be replaced. See Section 5.2-5 for removal and
installation.
7 Remove the capscrews fastening each frame to the
mounting plates. Tag the frame so they are reassembly
in their original position.
8 For reassembly, reverse the above procedures except
as follows:
• Fasten the frames to the mounting plates, leaving the
capscrews finger tight.
• Insert the arm assemblies into the frames.
• Position the frames and arms to allow unrestricted
arm assembly travel.
NOTE: Arm assemblies should be free to slide in the
frames manually. If necessary, realign and retighten
arm capscrews.
• Tighten the frame capscrew to a torque of:
25D, 35D – 55–65 ft.-lbs. (75–88 Nm)
40D, 50D – 105–115 ft.-lbs. (140–155 Nm)
70D, 80D, 100D – 180–200 ft.-lbs. (245–270 Nm)
CL4425.eps
5
8
6
Mounting
Plate
Frame
 Loading...