4 Piping installation
Installation manual
12
EGSAH/X06+10UDA9W
Daikin Altherma 3 GEO
4P598591-1A – 2019.12
4.2.5 To insulate the brine piping
The piping in the complete brine circuit MUST be insulated to
prevent reduction of the heating capacity.
Consider that the brine circuit piping inside the house can/will
condensate. Foresee adequate insulation for these pipes.
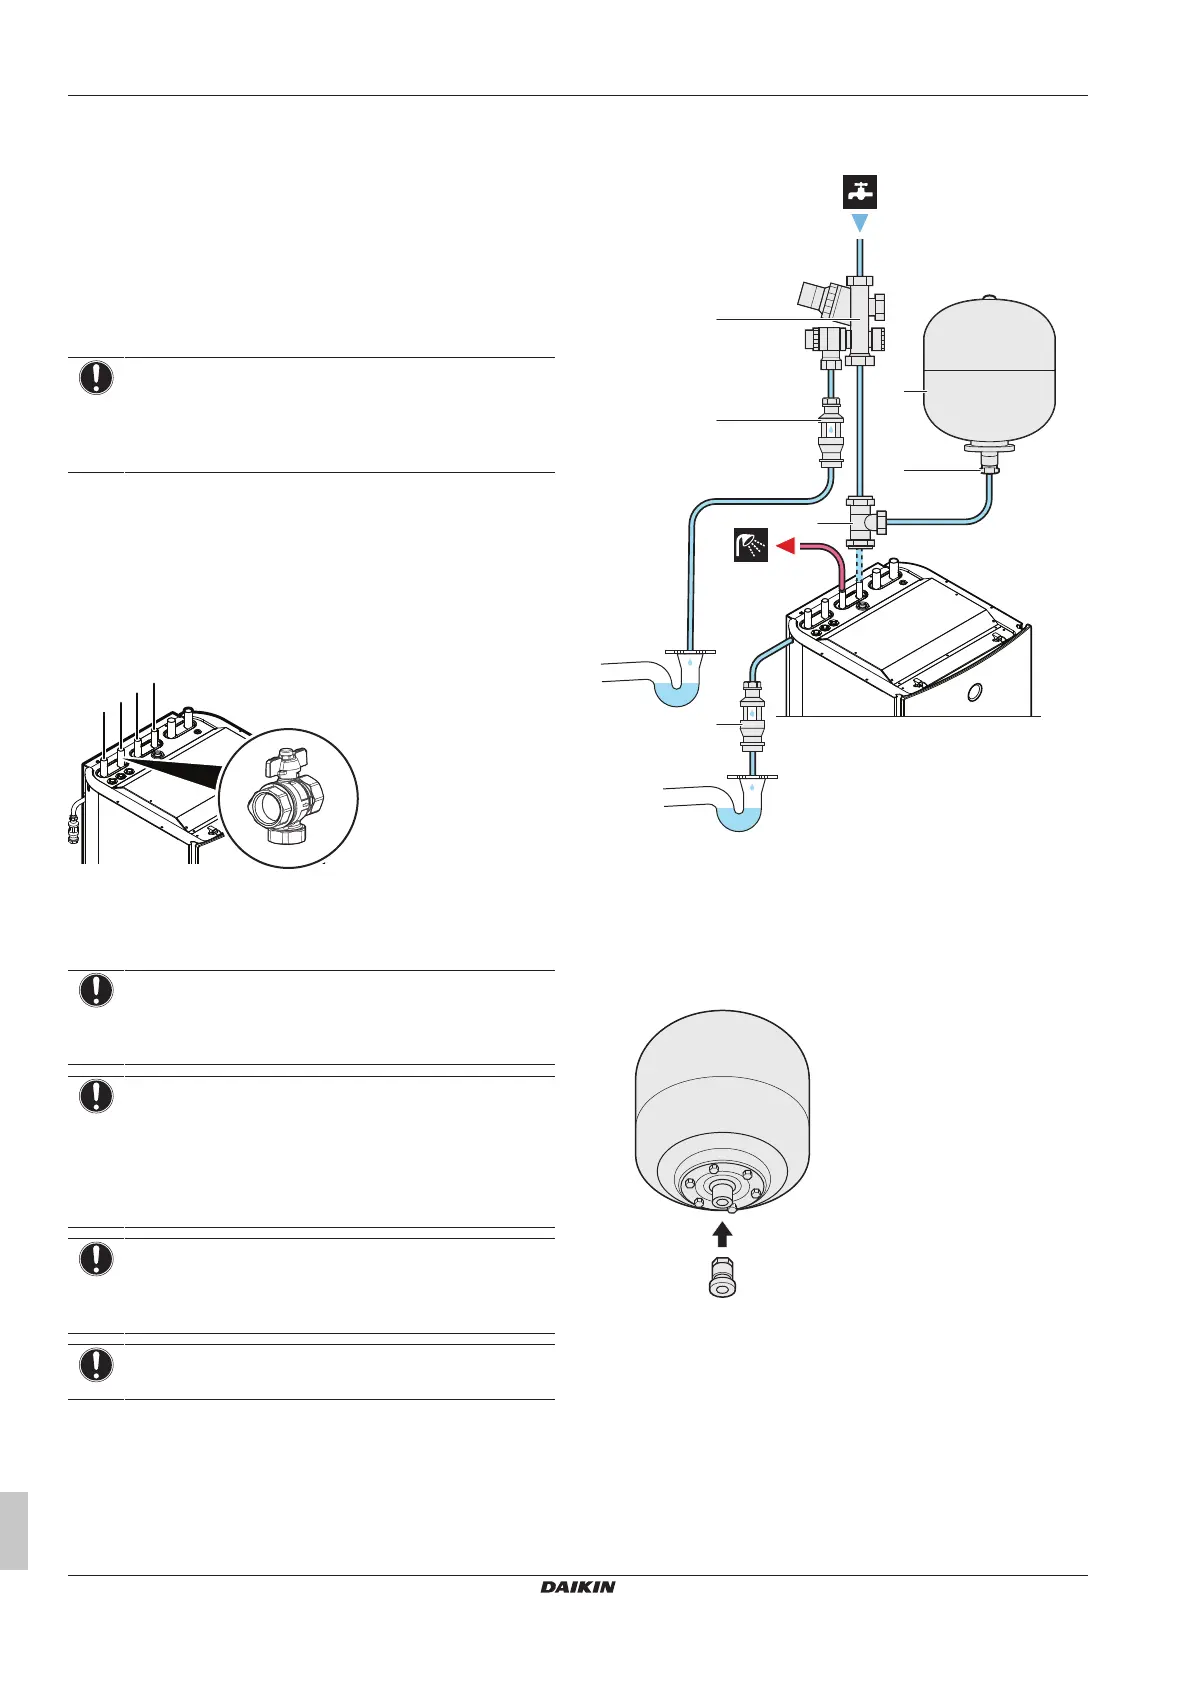
4.3 Connecting water piping
4.3.1 To connect the water piping
NOTICE
Do NOT use excessive force when connecting the field
piping and make sure the piping is aligned properly.
Deformation of the piping can cause malfunctioning of the
unit.
1 Install the shut off-valve with integrated filter (delivered as
accessory) at the space heating/cooling water inlet.
2 Connect the space heating/cooling in pipe to the shut-off valve
and the space heating/cooling out pipe to the unit.
3 Connect the domestic hot water in and out pipes to the indoor
unit. It is obligatory to use the accessory G3 kit EKUHWG3D to
comply with UK legislation. See "4.3.2 To connect the water
piping for domestic hot water"[412].
a Space heating/cooling water OUT (Ø22mm)
b Space heating/cooling water IN (Ø22mm) and shut-off
valve with integrated filter (accessory)
c Domestic hot water: hot water OUT (Ø22mm)
d Domestic hot water: cold water IN (Ø22mm)
NOTICE
It is recommended to install shut-off valves to cold water in
and hot water out connections. Shut-off valves are field
supplied.
NOTICE
About the shut-off valve with integrated filter (delivered as
accessory):
▪ The installation of the valve at the water inlet is
mandatory.
▪ Mind the flow direction of the valve.
NOTICE
Expansion vessel. An expansion vessel (field supply)
MUST be installed on the entering piping before the water
pump within 10m of the unit.
NOTICE
Install air purge valves at all local high points.
4.3.2 To connect the water piping for domestic
hot water
a Pressure reducing valve/pressure relief valve combination.
Water inlet and water outlet 22mm connection, discharge
piping connection 15mm
b Adaptor 22mm×3/4" Female BSP
c T-piece 22mm×22mm×22mm
d Expansion vessel of 18L – 3/4" Male BSP
e Tundish 15mm inlet, 22mm outlet
1 Pre-assemble the adaptor and expansion vessel so that the
expansion vessel is ready for installation.
2 Mount the expansion vessel to the wall.

 Loading...