3 Unit installation
Installation manual
8
EGSAH/X06+10UDA9W
Daikin Altherma 3 GEO
4P598591-1A – 2019.12
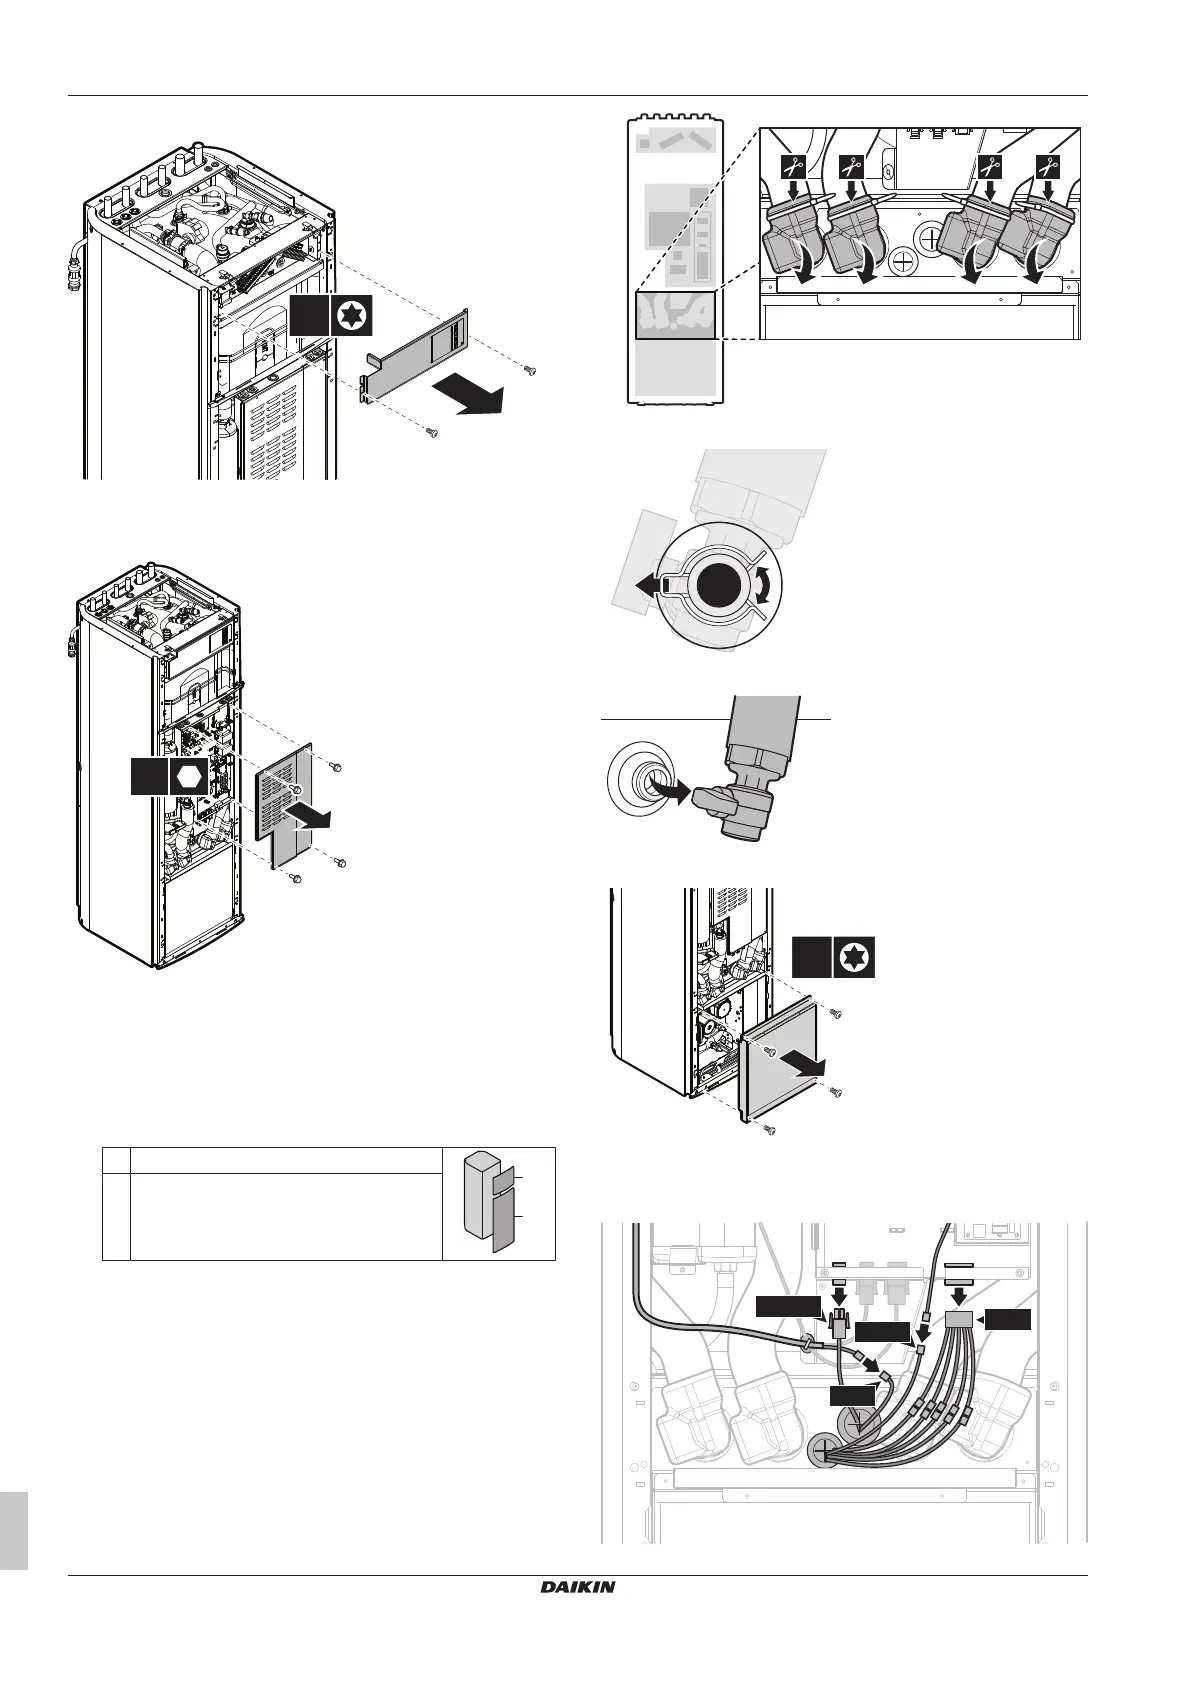
5 Open the installer switch box as follows:
6 In case you have to install additional options that require access
to the main switch box, remove the main switch box cover as
follows:
3.2.2 To remove the hydro module from the unit
Removing the hydro module is only required for easier transportation
of the unit or for servicing. The removal of the module will
significantly reduce the weight of the unit. This makes the unit easier
to handle and carry.
1 Open the following (see "3.2.1To open the indoor unit"[47]):
1 User interface panel
2 Front panel
2 Remove the insulation from the shut-off valves by cutting the
cable ties.
3 Remove the clips that lock the valves in place.
4 Uncouple the piping.
5 Remove the lower hydro module cover.
6 Unlink the connectors that run from the hydro module to the
main switch box or other locations. Route the wires through the
grommets of the upper hydro module cover.

 Loading...