5 Electrical installation
Installation manual
20
EGSAH/X06+10UDA9W
Daikin Altherma 3 GEO
4P598591-1A – 2019.12
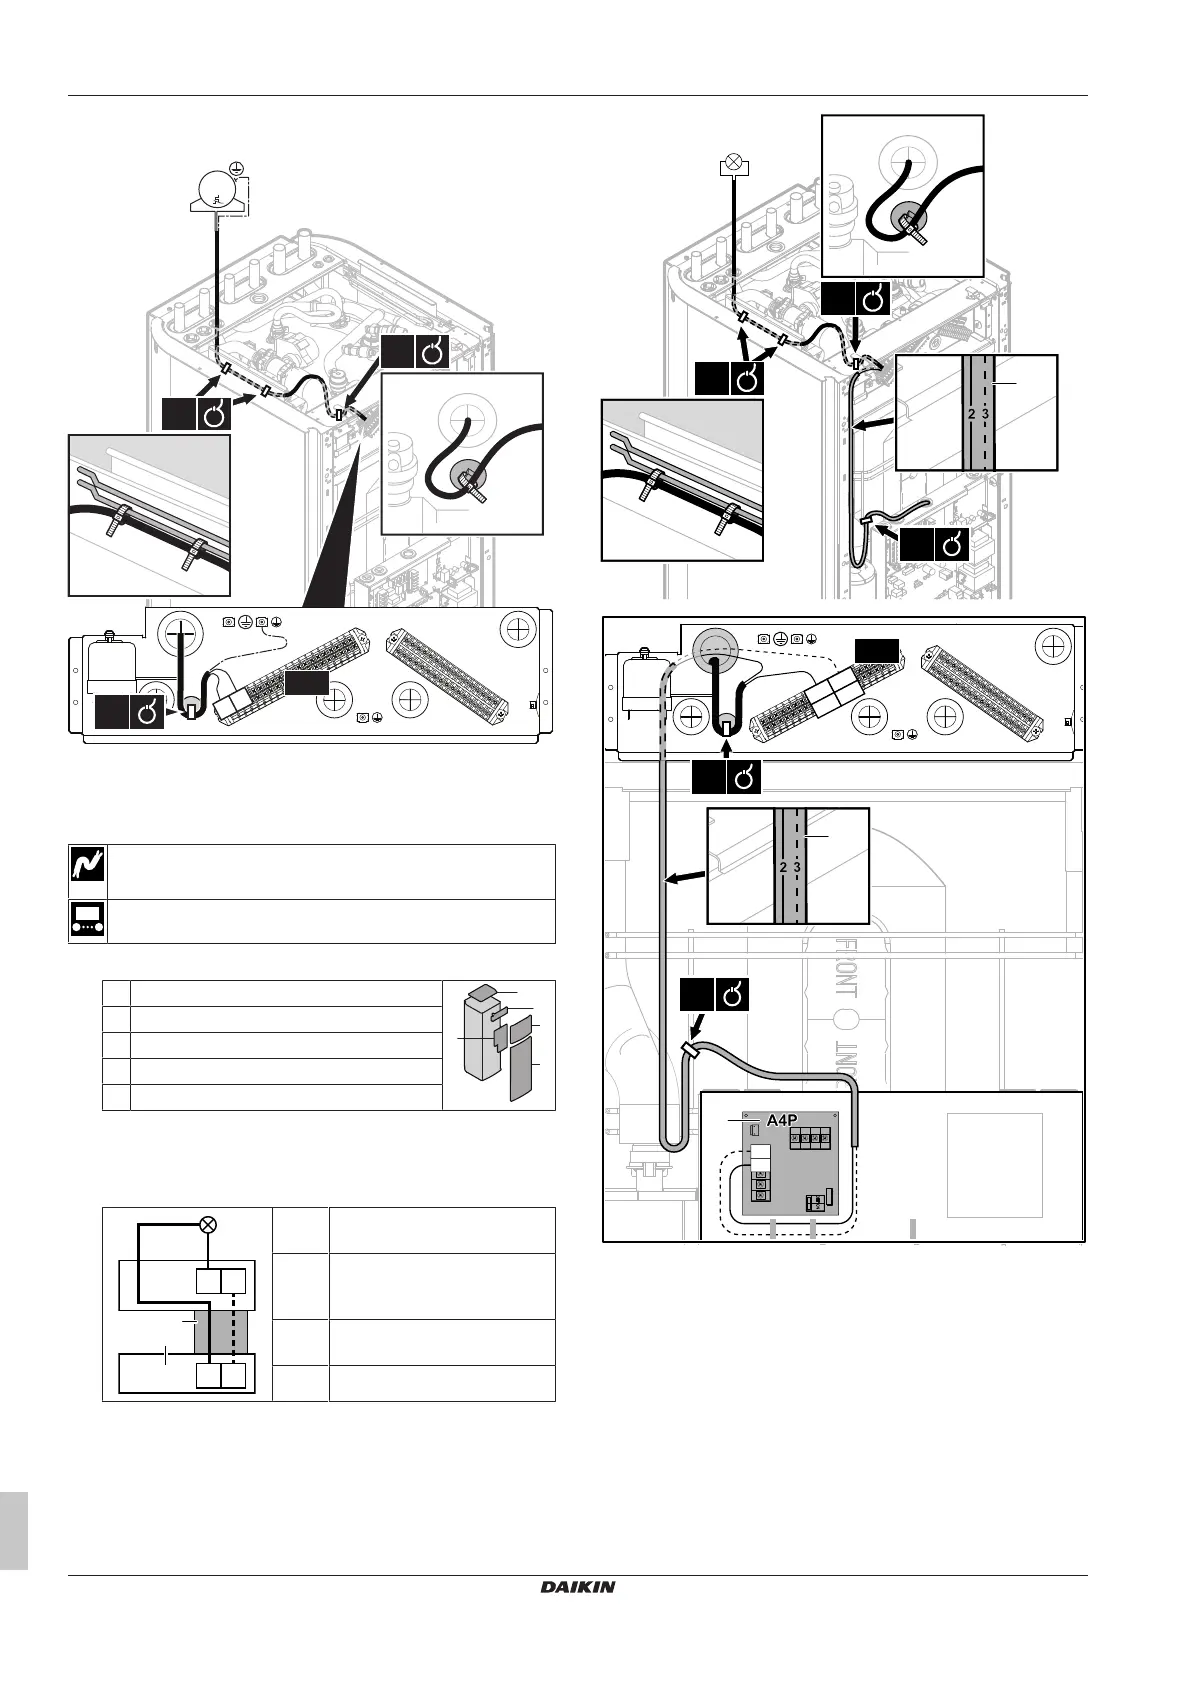
2 Connect the domestic hot water pump cable to the appropriate
terminals as shown in the illustration below.
3 Fix the cable with cable ties to the cable tie mountings.
5.8 To connect the alarm output
Wires: (2+1)×0.75mm²
Maximum load: 0.3A, 250VAC
[9.D] Alarm output
1 Open the following (see "3.2.1To open the indoor unit"[47]):
1 Top panel
2 User interface panel
3 Front panel
4 Installer switch box cover
5 Main switch box cover
2 Connect the alarm output cable to the appropriate terminals as
shown in the illustration below. Make sure to put wires 2 and 3
between the installer switch box and main switch box in a cable
sleeve (field supply) so that they are double insulated.
1+2 Wires connected to the alarm
output
3 Wire between the installer
switch box and main switch
box
a Installation of EKRP1HBAA is
required.
b Cable sleeve (field supply)
3 Fix the cable with cable ties to the cable tie mountings.

 Loading...