3 Unit installation
Installation manual
6
EGSAH/X06+10UDA9W
Daikin Altherma 3 GEO
4P598591-1A – 2019.12
▪ Remove the hydro module when you want to carry the unit up or
down staircases. See "3.2.2To remove the hydro module from the
unit"[48] for more information.
▪ It is recommended to use lifting straps to carry the unit up or down
staircases.
2.2 Domestic hot water tank kit
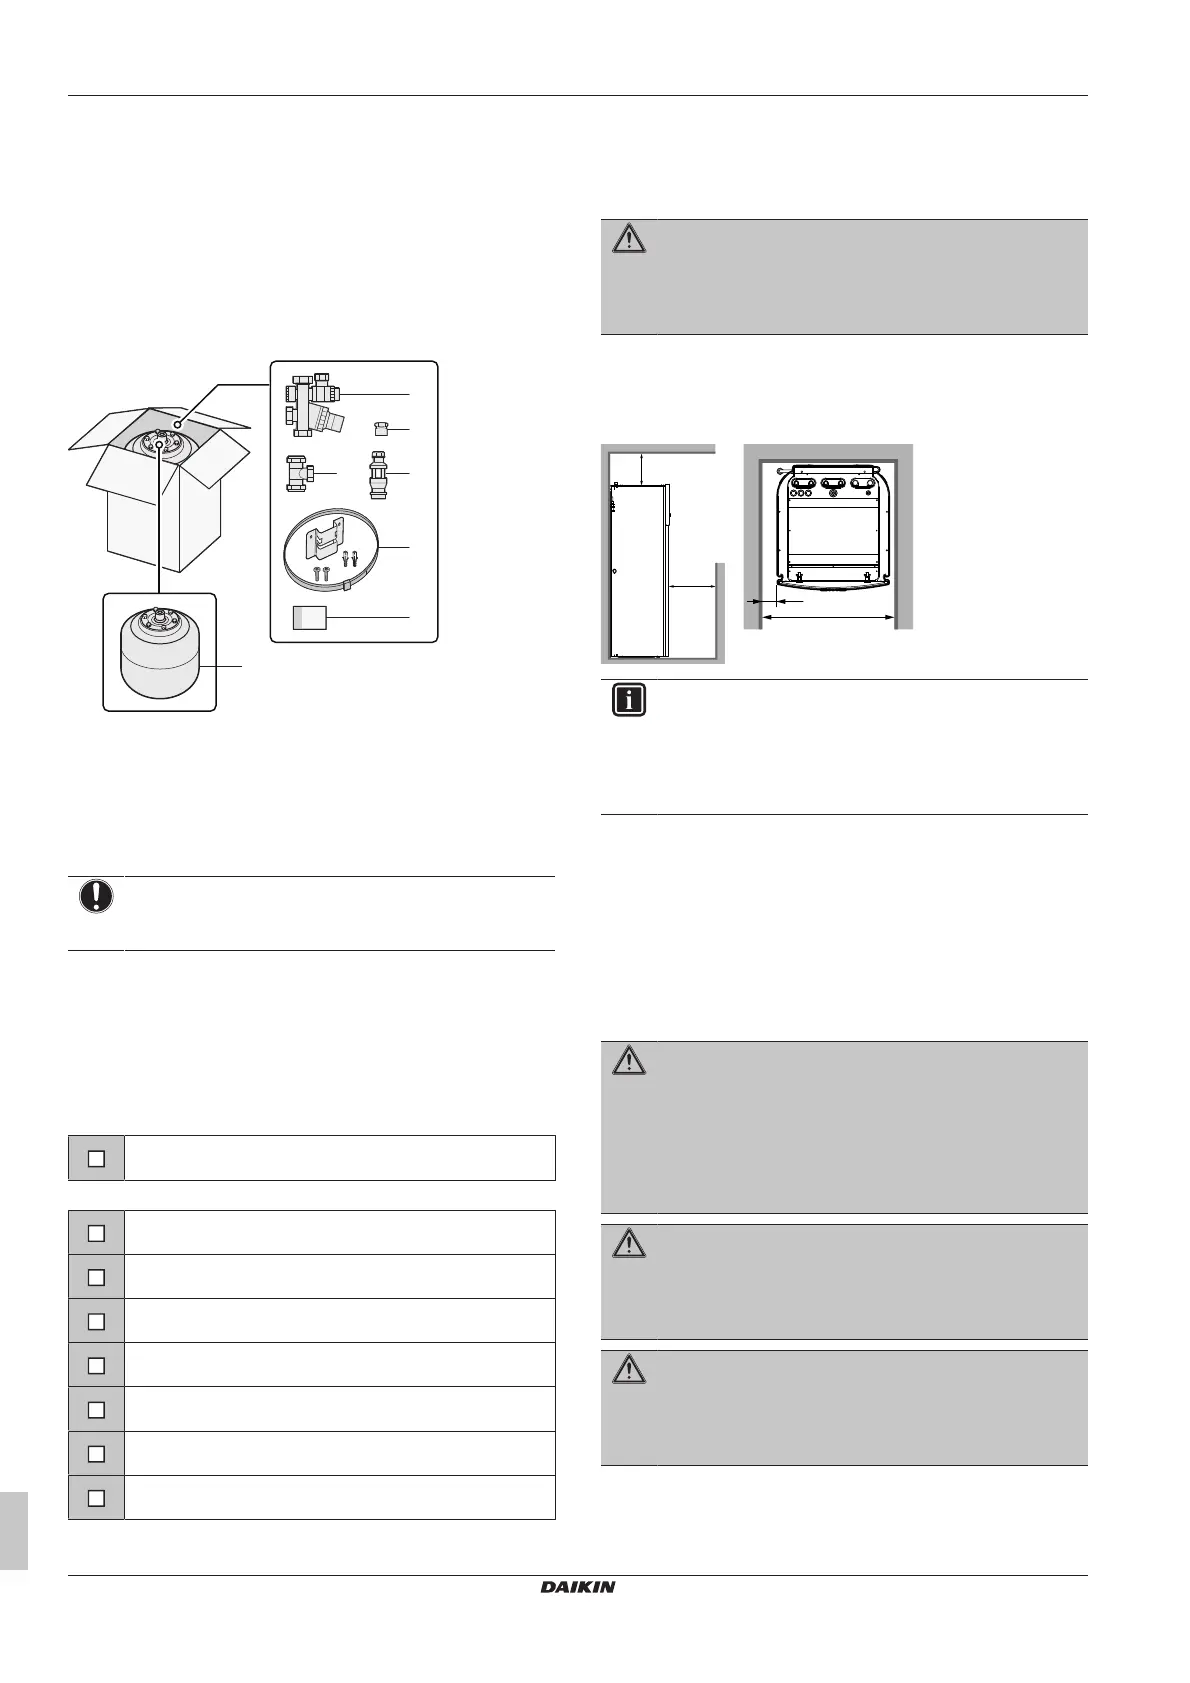
2.2.1 To remove the accessories from the
domestic hot water tank kit
a Pressure reducing valve/pressure relief valve combination.
Water inlet and water outlet 22mm connection, discharge
piping connection 15mm
b Adaptor 22mm×3/4" Female BSP
c T-piece 22mm×22mm×22mm
d Tundish 15mm inlet, 22mm outlet
e Wall mounting set for expansion vessel
f Instruction sheet
g Expansion vessel of 18L – 3/4" Male BSP
NOTICE
All piping MUST be installed according to section G3 of the
Building Regulations.
2.3 Checklist for the required DHW
accessories
For installation compliant with section G3 of the Building
Regulations, you must verify that the following accessories are
present.
Delivered with indoor unit:
Tundish 15mm inlet, 22mm outlet
Delivered with domestic hot water tank kit:
Pressure reducing valve/pressure relief valve combination
Adaptor 22mm×3/4" Female BSP
T-piece 22mm×22mm×22mm
Tundish 15mm inlet, 22mm outlet
Wall mounting set for expansion vessel
Instruction sheet
Expansion vessel of 18L – 3/4" Male BSP
3 Unit installation
3.1 Preparing the installation site
WARNING
The appliance shall be stored in a room without
continuously operating ignition sources (example: open
flames, an operating gas appliance or an operating electric
heater).
3.1.1 Installation site requirements of the
indoor unit
▪ Mind the following spacing installation guidelines:
INFORMATION
If you have limited installation space and need to install the
option kit EKGSPOWCAB (= power cable for split power
supply), remove the left side panel before installing the unit
in its final position. See "3.2.1 To open the indoor
unit"[47].
▪ The indoor unit is designed for indoor installation only and for
ambient temperatures ranging from 5~35°C.
Special requirements for R32
The indoor unit contains an internal refrigerant circuit (R32), but you
do NOT have to do any refrigerant field piping or refrigerant
charging.
The total refrigerant charge in the system is ≤1.842 kg, so the
system is NOT subjected to any requirements to the installation
room. However, mind the following requirements and precautions:
WARNING
▪ Do NOT pierce or burn.
▪ Do NOT use means to accelerate the defrosting
process or to clean the equipment, other than those
recommended by the manufacturer.
▪ Be aware that R32 refrigerant does NOT contain an
odour.
WARNING
The appliance shall be stored so as to prevent mechanical
damage and in a well-ventilated room without continuously
operating ignition sources (example: open flames, an
operating gas appliance or an operating electric heater).
WARNING
Make sure installation, servicing, maintenance and repair
comply with instructions from Daikin and with applicable
legislation (for example national gas regulation) and are
executed only by authorised persons.

 Loading...