3 Unit installation
Installation manual
7
EGSAH/X06+10UDA9W
Daikin Altherma 3 GEO
4P598591-1A – 2019.12
3.2 Opening and closing the unit
3.2.1 To open the indoor unit
NOTICE
For a standard installation, it is usually NOT required to
open the unit. Opening the unit or any of the switch boxes
is ONLY required when you want to install extra option kits.
For more information, see the installation manual of the
specific option kit, or below.
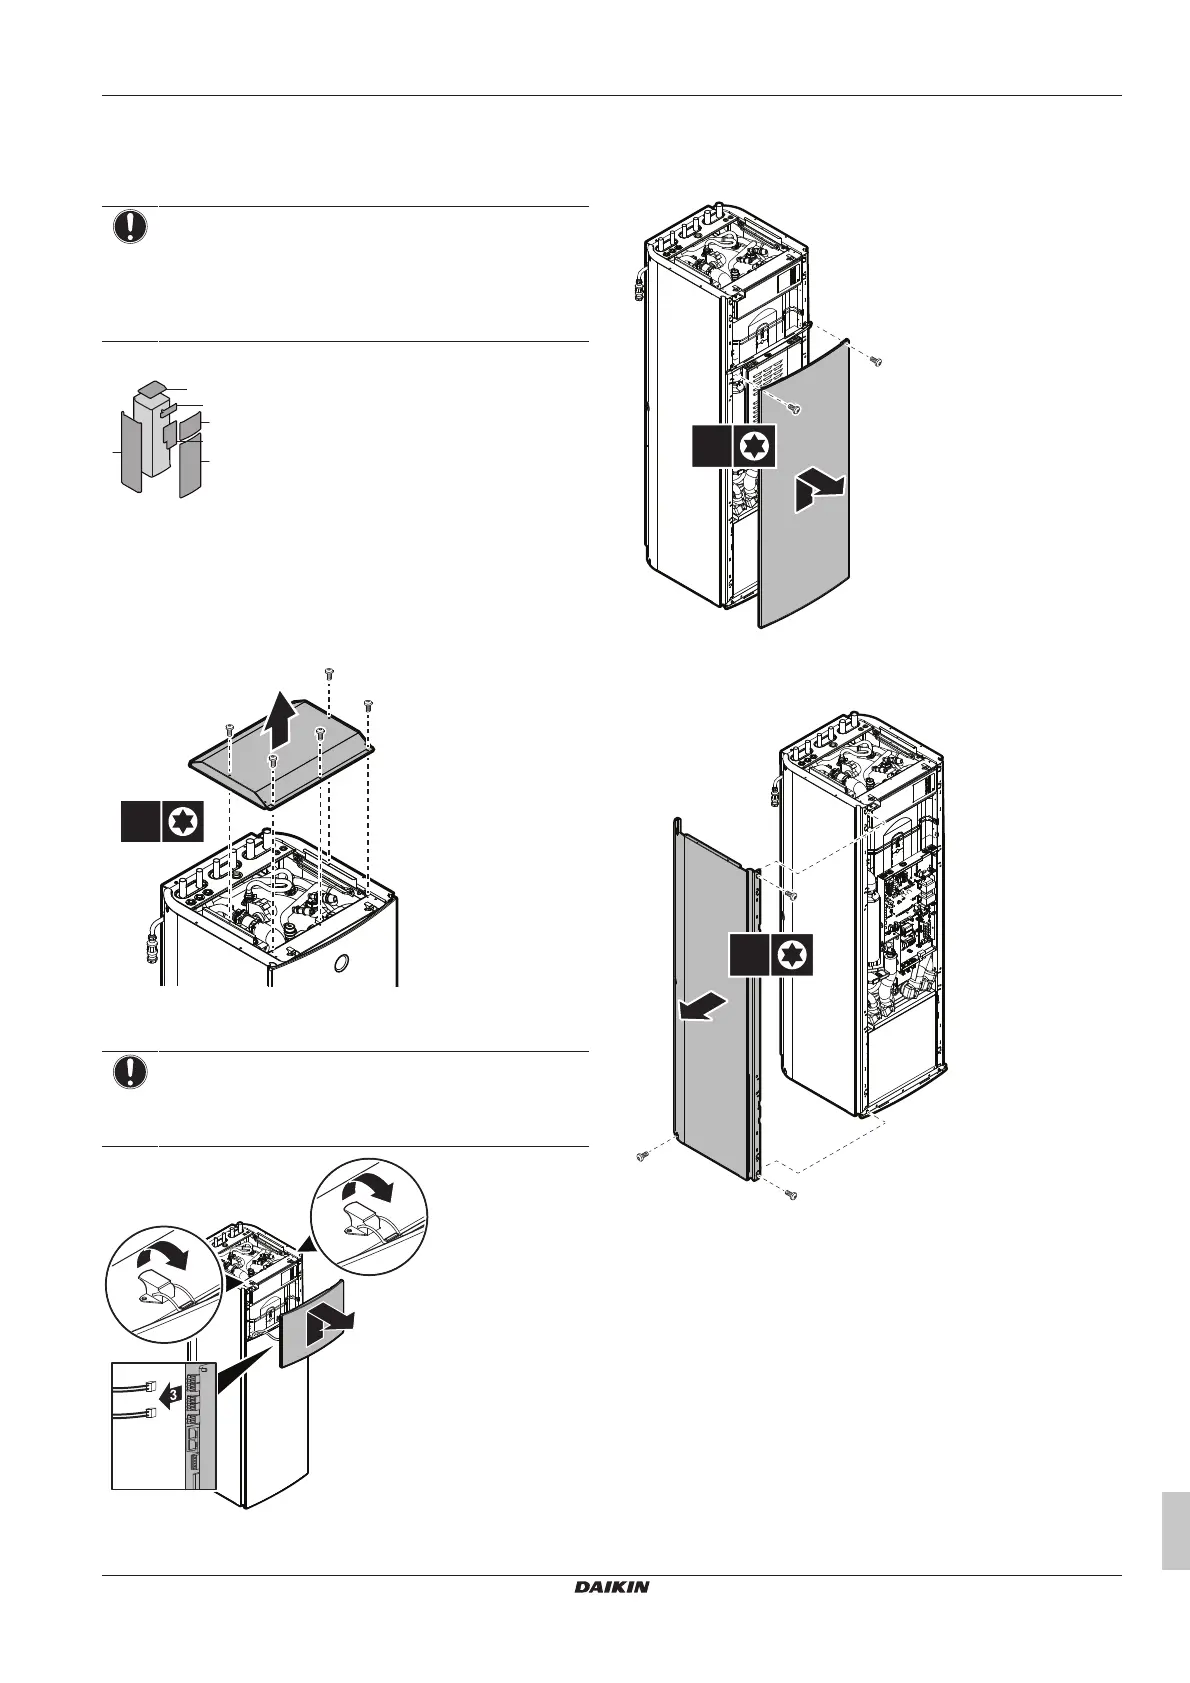
Overview
1 Top panel
2 User interface panel
3 Front panel
4 Left side panel
5 Installer switch box cover
6 Main switch box cover
Open
1 Remove the top panel.
2 Remove the user interface panel. Open the hinges at the top
and slide the user interface panel upwards.
NOTICE
If you remove the user interface panel, also disconnect the
cables from the back of the user interface panel to prevent
damage.
3 If necessary, remove the front panel. This is, for example,
necessary when you want to remove the hydro module from the
unit. See "3.2.2 To remove the hydro module from the
unit"[48] for more information.
4 In case you want to install the option kit EKGSPOWCAB
(=power cable for split power supply), also remove the left side
panel. Also see "5.3To connect the main power supply"[415].

 Loading...