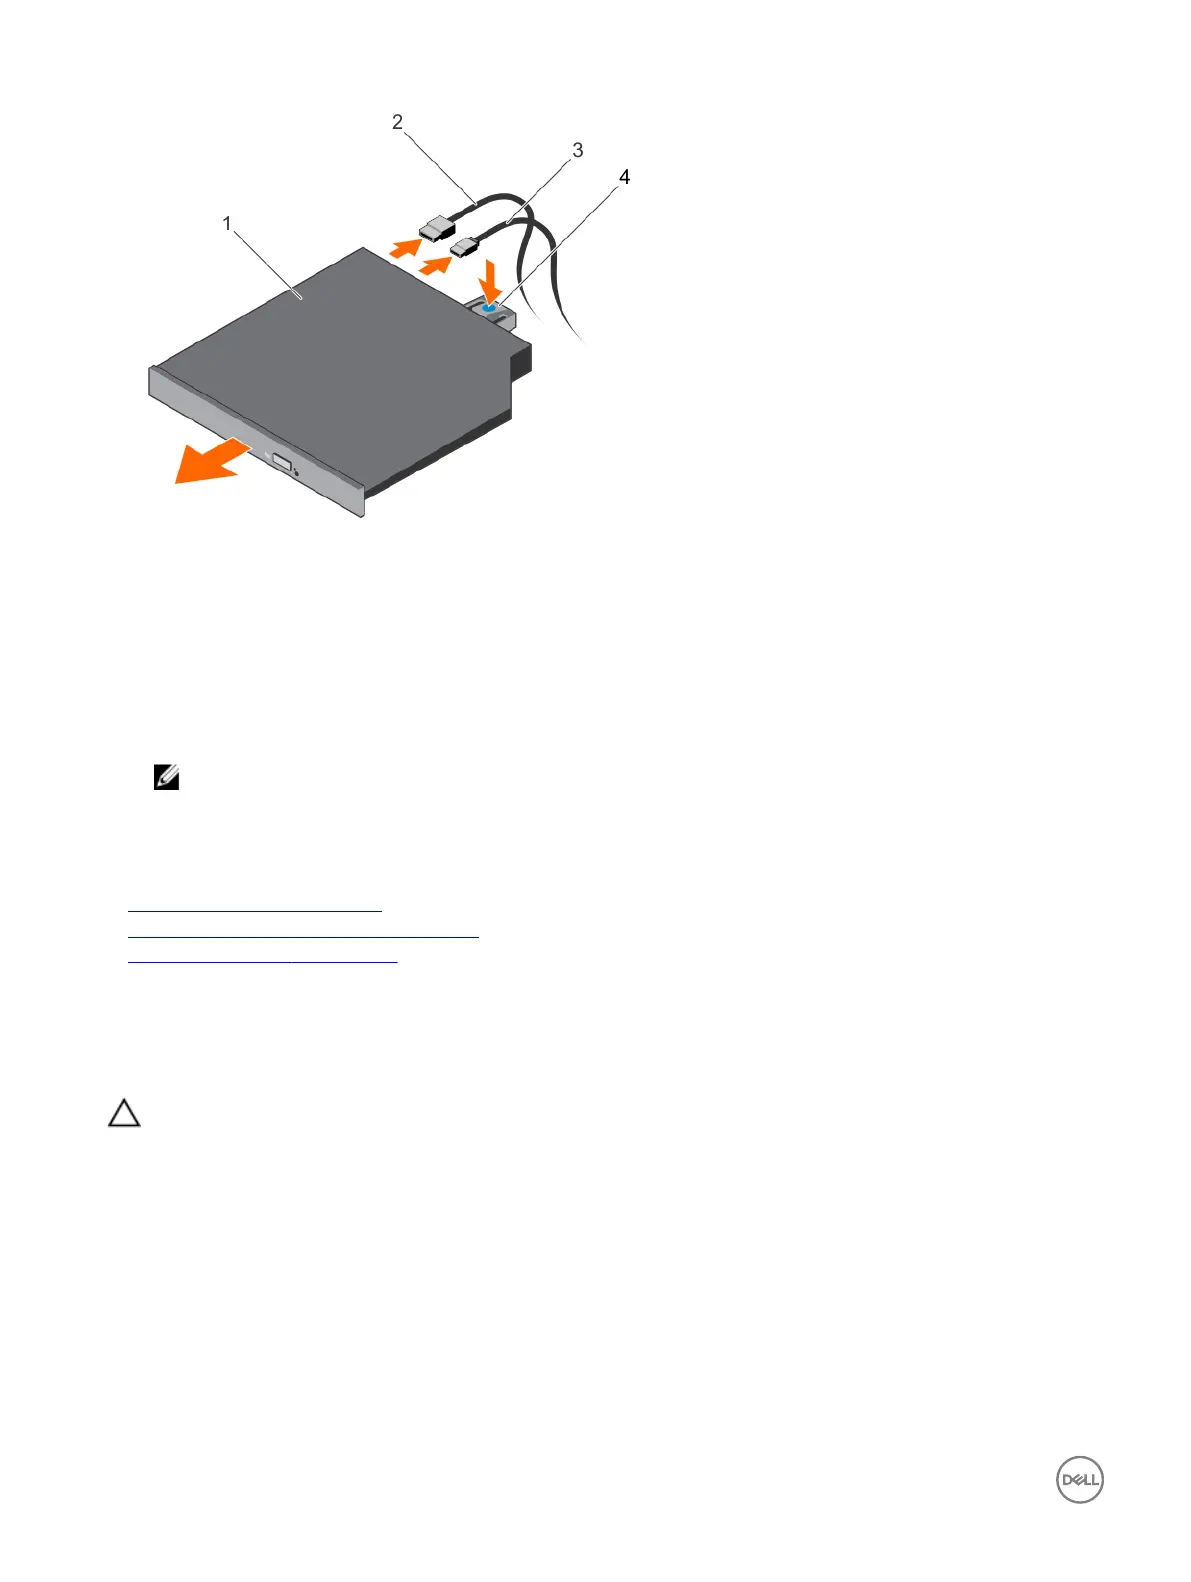
Figure 46. Removing the optical drive
1. optical drive 2. data cable
3. power cable 4. release tab
Next steps
1. Depending on your system conguration, install an optical drive or two 1.8-inch solid state drives (SSDs).
2. If you are not immediately installing an optical drive or 1.8-inch SSDs, install an optical drive blank.
NOTE: Blanks must be installed on empty optical drive or tape drive slots to maintain FCC certication of the
system. The brackets also keep dust and dirt out of the system and aid in proper cooling and airow inside the
system.
3. Follow the procedure listed in the After working inside your system section.
Related links
Installing the optional optical drive
Installing the optional 1.8-inch solid state drives
Supported hard drive congurations
Installing the optional optical drive
The procedure for installing an optical drive and optical drive blank is similar to the procedure to install an optical drive.
Prerequisites
CAUTION: Many repairs may only be done by a certied service technician. You should only perform troubleshooting and
simple repairs as authorized in your product documentation, or as directed by the online or telephone service and support
team. Damage due to servicing that is not authorized by Dell is not covered by your warranty. Read and follow the safety
instructions that are shipped with your product.
1. Follow the safety guidelines listed in the Safety instructions section.
2. Follow the procedure listed in the Before working inside your system section.
3. If installed, remove the optical drive blank by pressing the blue release tab at the back of the blank and pushing the blank out of
the system.
Steps
1. Align the optical drive with the optical drive slot on the front of the chassis.
2. Slide the optical drive into the slot until the latch snaps into place.
3. Connect the power and data cables to the back of the optical drive.
84
 Loading...