WLAN card
Removing WLAN card
Steps
1. Follow the procedure in Before working inside your computer.
2. Remove the base cover.
3. Disconnect the battery cable from the connector on the system board.
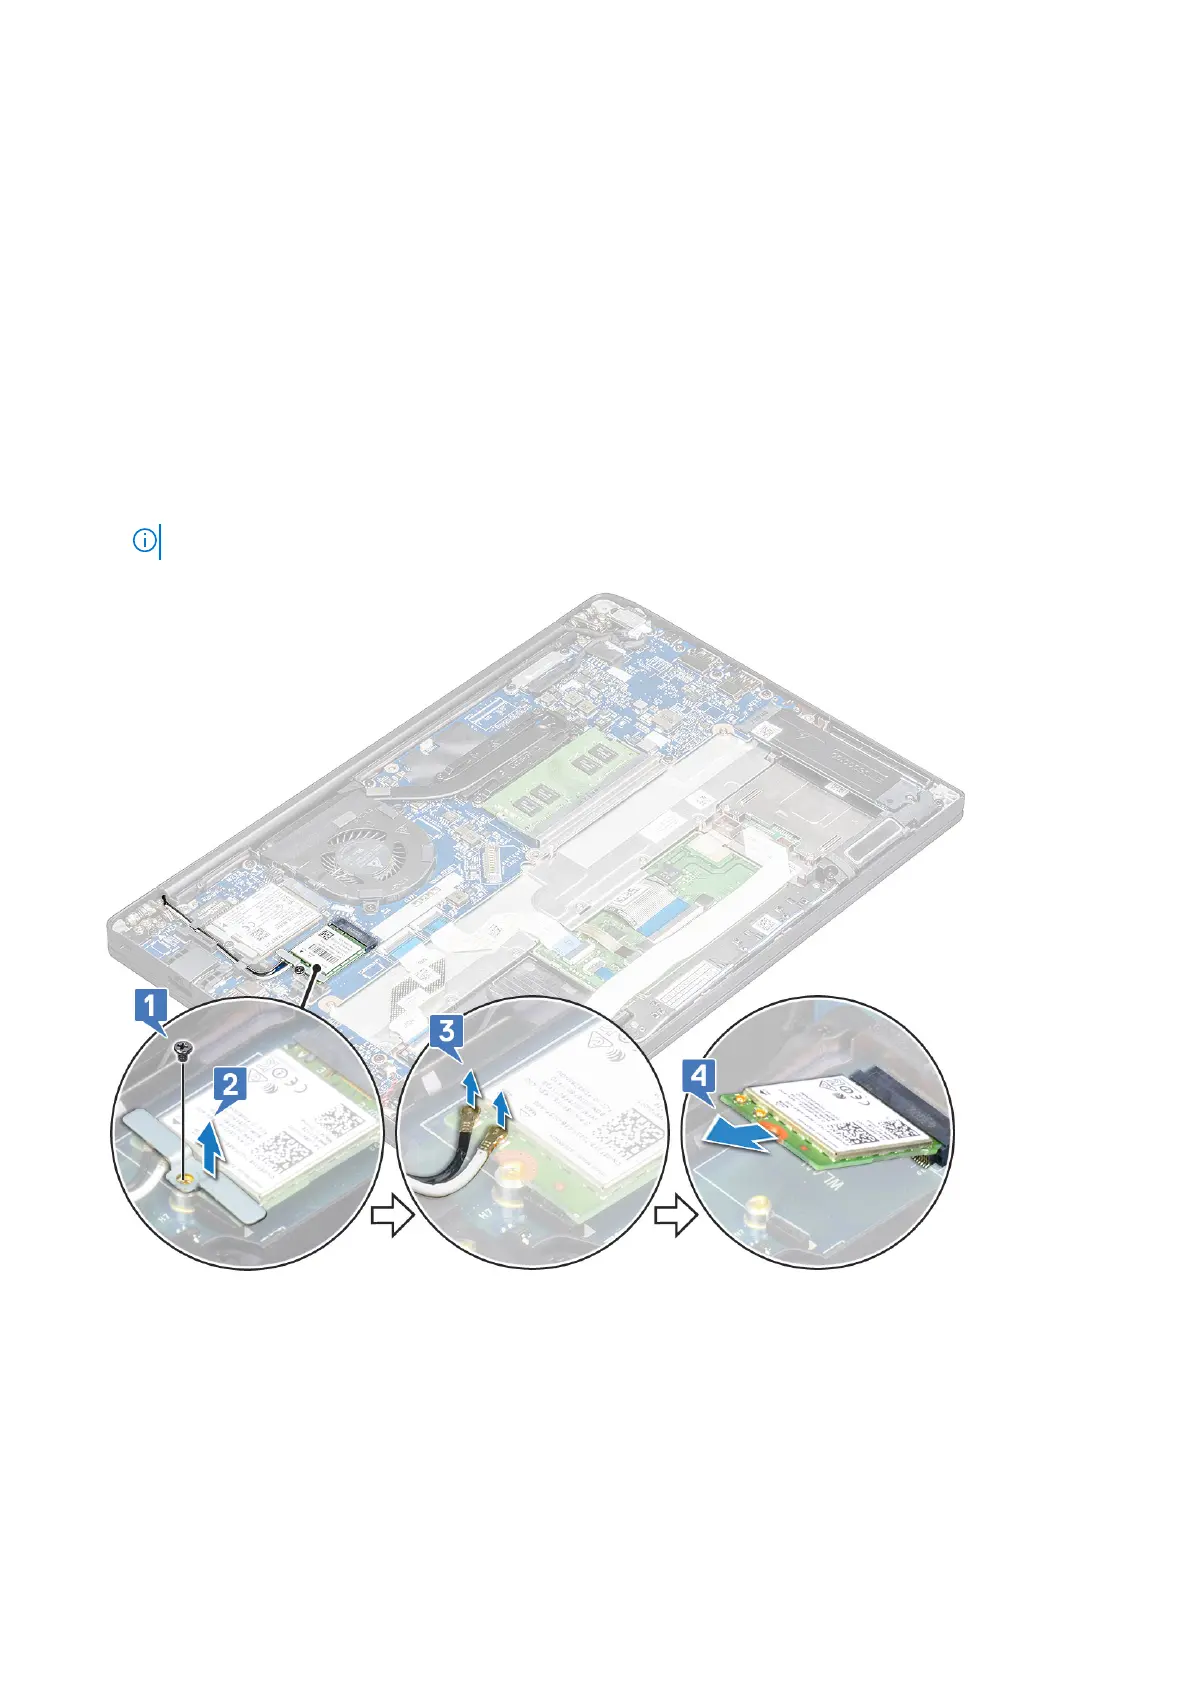
4. To remove the WLAN card:
a. Remove the M2.0 x 3.0 screw that secures the metal bracket to the WLAN card [1].
b. Lift the metal bracket [2].
c. Disconnect the WLAN cables from the connectors on the WLAN card [3].
d. Remove the WLAN card from the computer [4].
NOTE: Ensure NOT to pull the WLAN card more than 35°, to avoid damage to pin.
Installing WLAN card
Steps
1. Insert the WLAN card into the connector on the system board.
2. Connect the WLAN cables to the connectors on the WLAN card.
3. Place the metal bracket and tighten the M2.0 x 3.0 screw to secure it to the computer.
4. Connect the battery cable to the connector on the system board.
Removing and installing components
25
 Loading...