For more information visit: www.cutler-hammer.eaton.com
Page 5-1
Effective 10/02 IL17562BH04
SECTION 5—PROGRAMMING THE MP-3000
5.0 General
The Program mode is used to change MP-3000 settings.
The user should read this section and also Section 9, Application
and Settings, for a full understanding of the settings and the relay
functions they control. This Section summarizes the functions of all of
the settings. Section 9 provides more detailed engineering explanation
for selected settings that require it.
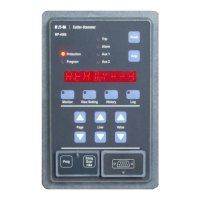
Open the security door and press the Prog button to put the relay into
Program mode (Figure 4.1). Use Table 4.3 as a guide and as a
worksheet for programming. Use the Page and Line pushbuttons to
navigate through the Program mode, and the Value pushbuttons to
change the setting values.
A relay protecting a running motor can be reprogrammed only if the
setting number 6 (RUN PGM or STOP PGM) on the SP SYSTEM Page
(Page 12 of the settings) was previously set to RUN PGM. See Section
5.12.6 below.
The relay continues to protect the motor with its prior settings as you
manipulate the values in Program mode. Changes to the settings will
not take effect until the program button is pressed a second time to
exit the Program mode.
Make sure the motor is in a stable state before programming. If the
operating state of the motor changes during a programming opera-
tion, the MP-3000 exits the program mode without actually making
any of the changes entered to that time. State changes include any
transition to start, run, stop, alarm, or trip.
In the following, the notation PnLm designates the setting on page n,
line m.
5.0.1 Conditional Setting Ranges
Program settings have individual ranges and setting increments, or
selections, listed in Table 4.3. However, note that seven of the settings
have linked ranges. Because of this, it may be possible to set
unacceptable combinations of values during the programming
operation. If this error is made, the user will not be able to exit the
programming mode by pushing Prog. Instead, the display indicates
which setting is out of range and the Help message indicates the fix.
Also, see individual descriptions for each of these linked settings:
• The ratio of Motor Full Load Amperes nameplate value (FLA; P1L1)
to Phase Ct-ratio numerator (PCT, P1L5) must be between 0.25 and
1.5. These values are both dictated by the design of the protected
equipment, and the error can be corrected only by installing an
appropriate current transformer set for this motor. See FLA CT L
and FLA CT H in Table 5-1, also see Section 5.1.5 for guidance on
Ct ratio selection.
• The instantaneous over current trip setting (IOC, P3L4) must be
below (1130 * PCT/ FLA)% or 1600%, whichever is less. See IOC
OUT in Table 5-1.
• The jam trip and alarm current levels (JMT, P3L6 and JMA, P4L3)
must be below (1130 * PCT/ FLA)% or 1200%, whichever is less.
See JAMT OUT and JAMA OUT in Table 5-1.
• The underload trip (ULT, P3L9) and alarm (ULA, P4L5) levels must
be greater than the programmed Stop Current Threshold (STOP XX,
P1L9). Remember that underload trip and alarm functions are
programmed as a percentage of the FLA while the Stop Current
Threshold is programmed as a percentage of the PCT. In order to
compare, multiply the Stop Current Threshold by PCT/FLA.
• A motor start is declared when the current is initially seen with a
magnitude that is greater than 30% of FLA (see Section 9.2.1).
Make sure that the Stop Current Threshold is less than this value.
Remember the Stop Current Threshold is programmed as a
percentage of the PCT. In order to compare, multiply the Stop
Current Threshold by PCT/FLA. This number must be less than 30%.
• The Motor Start Transition Current Level (TRNC, P5L5) must be
greater than the programmed Stop Current Threshold. Remember
that the TRNC is programmed as a percentage of FLA, while the
Stop Current Threshold is programmed as a percentage of the PCT.
In order to compare, multiply the Stop Current Threshold by PCT/FLA.
CAUTION
FLA IS A FIXED PROPERTY OF THE MOTOR. SELECT A CT
WHOSE RATIO IS SUITABLE FOR THIS MOTOR.
5.0.2 Viewing Settings
Most of the following settings can be viewed by users without access
to the Program button behind the front-panel security door. Use the
View Settings display mode button.
Note that certain settings without logical display values are not visible
in the View Setting mode. These are on setting pages 12, 13, and 14,
and are indicated by dashes in the Factory Default column of Table
4.3. They include testing settings and time values. Check the setting
of the calendar/clock using the Monitor Time page of the Monitor
Mode.
5.1 Page 1, SP MOTOR, Settings P1L1 to P1L8
Settings for motor constants. These settings are usually obtained from
the motor nameplate or manufacturer-supplied data. They must be
correct for the MP-3000 to protect the motor.
5.1.1 Setting P1L1, Full-Load Amperes (FLA)
Set to maximum stator continuous rms current in primary (actual
motor winding) amperes in each phase. Use motor nameplate or
manufacturer’s data.
NOTE: Do not vary the FLA setting from motor nameplate value even
if the motor has a service factor different from 1.0. See UTC,
P1L4 below for consideration of service factor.
 Loading...