Page 5-12
Effective 10/02For more information visit: www.cutler-hammer.eaton.comIL17562BH04
CAUTION
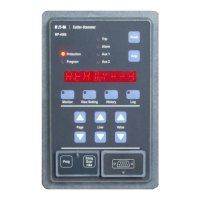
IN SERVICE, THE MP-3000 DISPLAYS READY—3 WHEN READY
TO START IN 3 PHASE MODE. IF IT DISPLAYS READY—1, THE
USER IS WARNED THAT THE RELAY IS IN THE 1 PHASE TEST
MODE, WHICH IS NOT SUITABLE FOR PROTECTION OF A REAL
THREE-PHASE MOTOR.
5.13.2 Setting P13L2, Trip Relay Test (TRP ENER or TRP DENR)
Lets the user directly energize or de-energize the trip relay for testing
purposes. To use this function:
• Stop the motor first. The test is blocked if the motor is running.
• Determine whether the MP-3000 trip relay is configured for MODE 1
or MODE 2 operation - see SYSTEM Page Setting P12L1.
• If MODE1, the trip relay is normally de-energized. Set up for the test
by selecting TRP ENER here.
• If MODE 2, the trip relay is normally energized. Set up for the test by
selecting TRP DENR here.
• Push the Reset button to test the relay. The Trip LED also lights.
Release the button to revert to the prior output state.
5.13.3 Setting P13L3, Alarm Relay Test (ALM ENER or ALM DENR)
Lets the user directly energize or de-energize the alarm relay for
testing purposes. Use it in the same way as the trip relay test. Check
the Alarm relay MODE Setting P12L2. Unlike the trip output, this
output can be tested with the motor running.
5.13.4 Setting P13L4, AUX1 Relay Test (AX1 ENER or AX1 DENR)
Lets the user directly energize or de-energize the AUX1 relay for
testing purposes. Use it in the same way as the trip relay test. Check
the AUX1 relay MODE Setting P12L3. Unlike the trip output, this
output can be tested with the motor running.
5.13.5 Setting P13L5, AUX2 Relay Test (AX2 ENER or AX2 DENR)
Lets the user directly energize or de-energize the AUX2 relay for
testing purposes. Use it in the same way as the trip relay test. Check
the AUX2 relay MODE Setting P12L4. Unlike the trip output, this
output can be tested with the motor running.
5.13.6 Setting P13L6, Force Analog Output Current Value (AOUT 4,
AOUT 12, or AOUT 20)
To test the analog output, first select the value to force—either 4, 12,
or 20 mA. When ready to test, push and hold the Reset button to
observe the forced output value. When the Reset button is released,
the analog output returns to normal operation.
5.13.7 Setting P13L7, State of Discrete Input 1 (DI1 ON or OFF)
Read-only—not a setting. Use to read if Discrete Input 1 is ON
(energized) or OFF.
5.13.8 Setting P13L8, State of Discrete Input 2 (DI2 ON or OFF)
Read-only—not a setting. Use to read if Discrete Input 2 is ON
(energized) or OFF.
5.14 Page 14, SP RESET, Settings P14L1 to P14L4
This page is used to reset or clear the accumulated history mode
statistics on each of the four History pages:
• Select the History page to clear using the Line pushbuttons.
• Push either Value button to get the PUSH RST display.
• Press the Reset pushbutton to clear the History page.
• To escape without clearing, don’t push Reset. Use a Value button
to change from PUSH RST back to [History Page Name] RST, then
navigate elsewhere or exit the Program Mode.
The four History pages are:
• 5.14.1 Setting P14L1, Motor History Reset (MTR RST)
• 5.14.2 Setting P14L2, Trip History Reset (TRIP RST)
• 5.14.3 Setting P14L3, Alarm History Reset (ALRM RST)
• 5.14.4 Setting P14L4, History Totals Reset (TOT RST)
See Section 4 for more information on the History Mode displays that
can be cleared.
 Loading...