SE Group Confidential (Related Staff Only)
Adjustment Details of Adjustments 60
SC-P600 Revision D
2.3.8.2 Adjusting Method of the Colorimetric Calibration
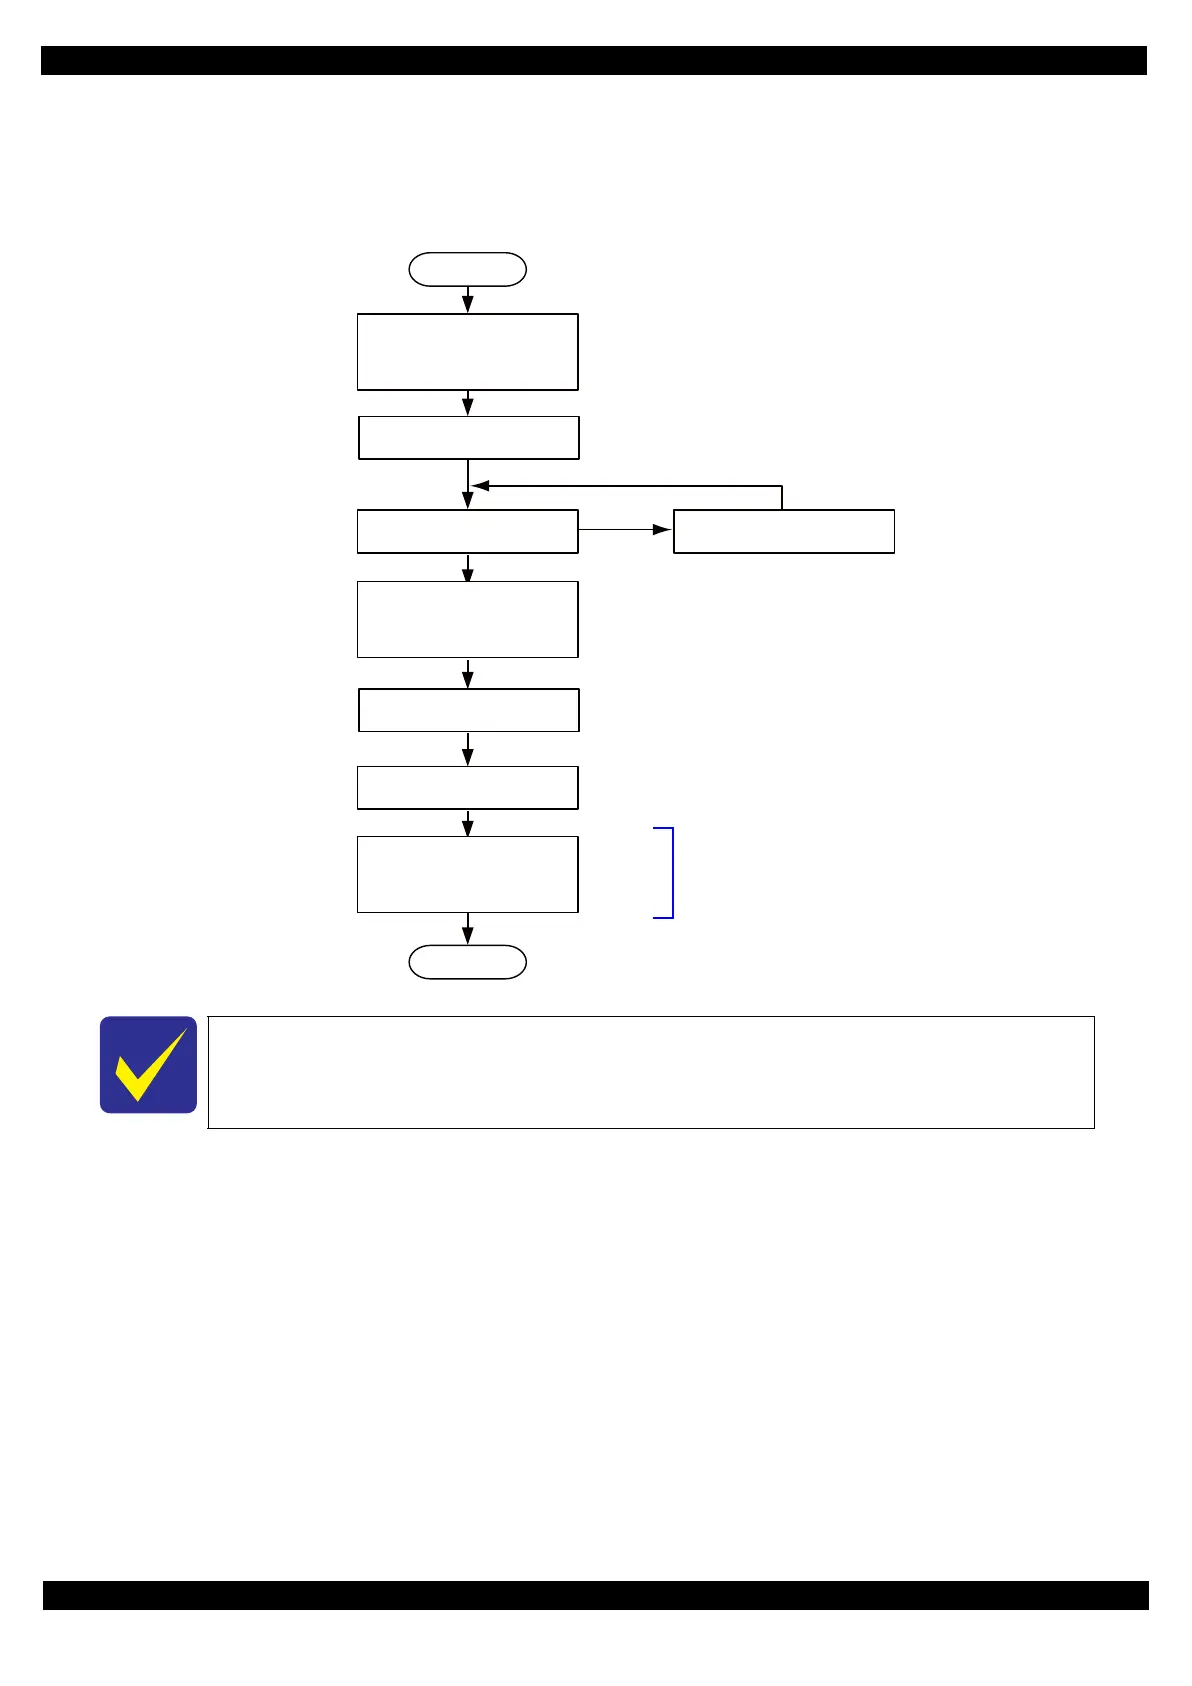
Adjusting workflow
The following illustrates the overall workflow.
Figure 2-27. Overall Workflow
Procedure
1. Connect the printer and the calibrator with the PC to which the ColorBase2 is installed using USB cables.
2. Turn the printer on.
3. Start up the ColorBase2.
4. Switch to Service Mode from the main menu screen: Click a point to show in “O” of the Figure 2-28 in the
pointer of the mouse in turn.
5. Input “7777” in the “enter password” cell, then click [OK] button (the password is fixed and cannot change).
To enhance the color accuracy, the ink churning is recommended before starting the
Colorimetric Calibration. Remove the ink cartridges, and shake them four or five times, then
reinstall them to the printer
START
Print a nozzle check pattern
Select the media / calibrator,
and print the Color Chart.
Dry the Color Chart (5 min.)
Measure the Color Chart.
End
OK
NG
Head cleaning
Switch to Service Mode
Connect the printer and
calibrator to the PC,
and start the ColorBase2
Convert the color measurement
data to Color ID, then write
Color ID to the printer.
The ColorBase2 performs this
process automatically by clicking
[Active] button.
 Loading...