SE Group Confidential (Related Staff Only)
Adjustment Details of Adjustments 68
SC-P600 Revision D
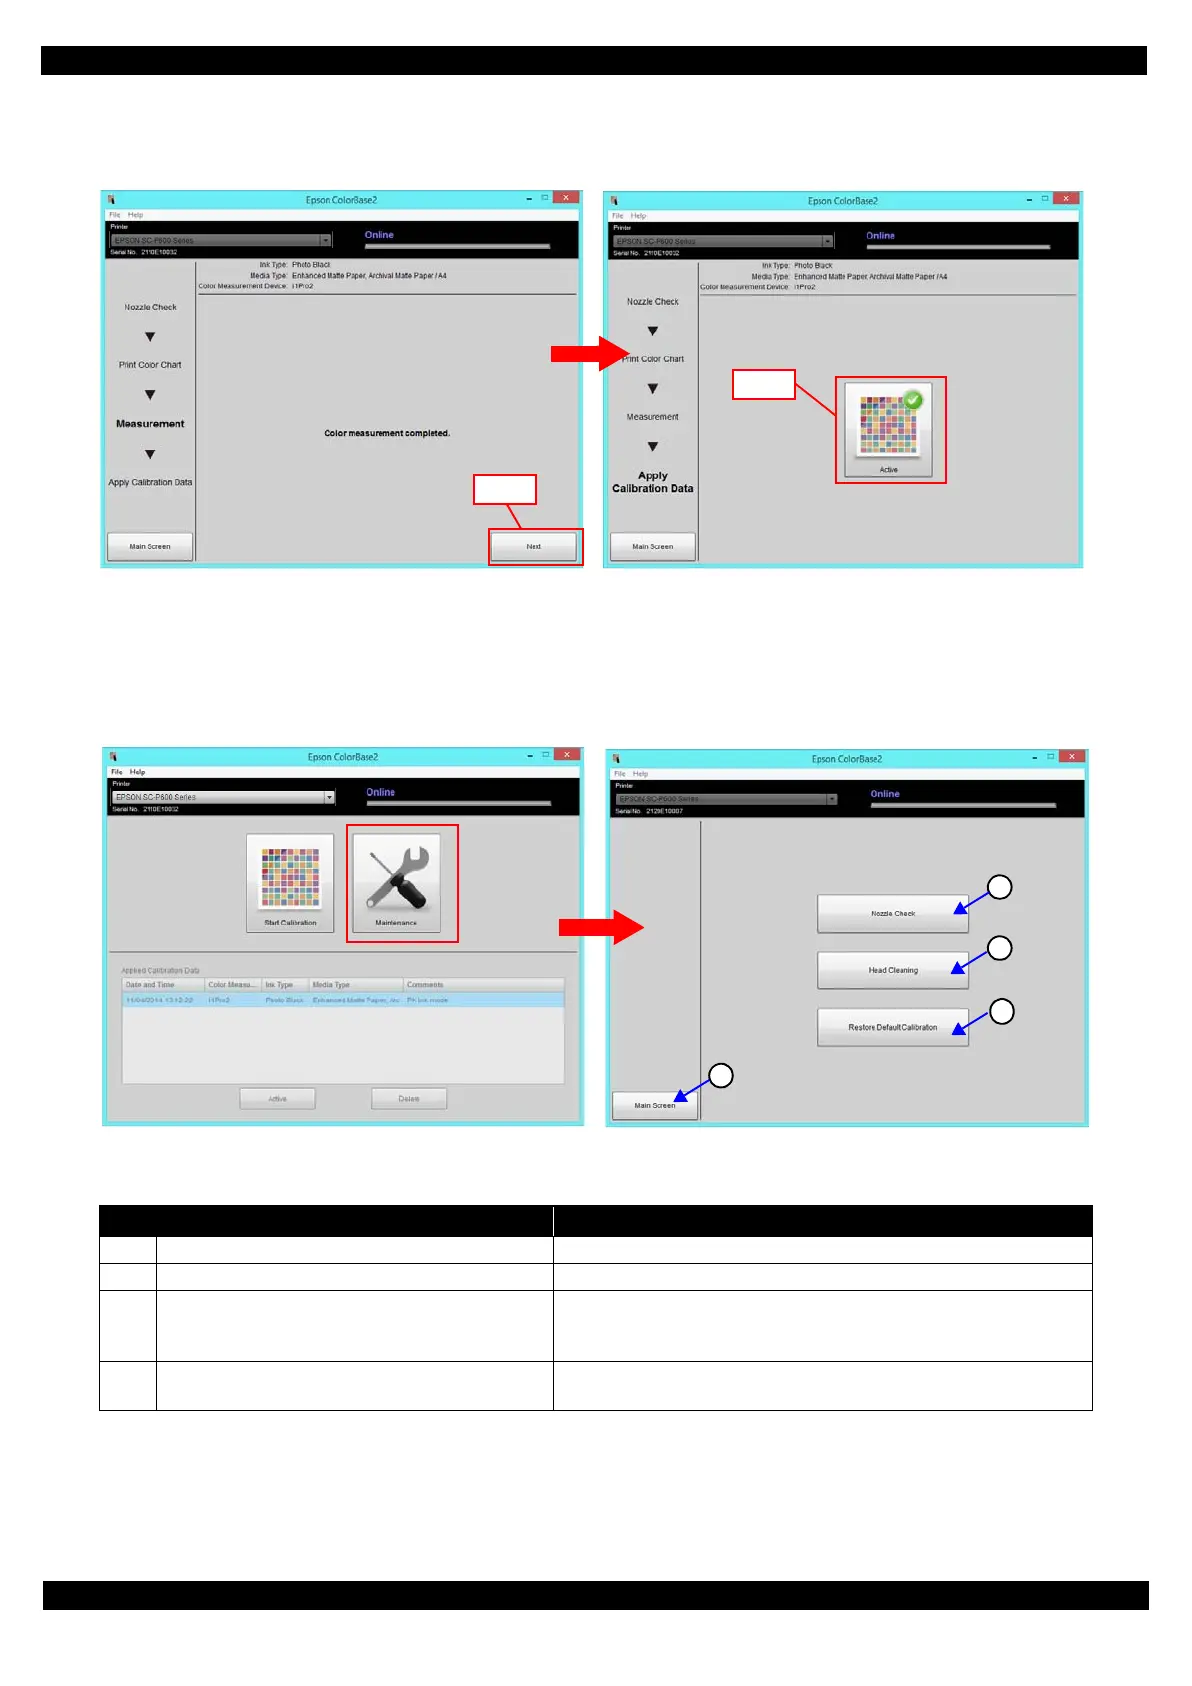
18. Click the Next button on the color measurement completed window.
19. On the apply calibration data window, click the Active button to write the calibration data to the printer.
Figure 2-39. Application of correction values
20. End the tool.
2.3.8.3 Maintenance menu
To display the maintenance menu, click the Maintenance button on the main screen.
Figure 2-40. Maintenance menu
x
Table 2-10. Details of the maintenance menu
Item Description
(1) Main screen button Goes back to the main screen.
(2) Nozzle check button Prints a nozzle check pattern.
(3) Head cleaning button
Select a cleaning level among CL1, CL2, CL3, and CL4 and run it.
(Level selection available only in the Service Mode. Basically use
CL1, and if not improved much, raise the level and try again.)
(4)
Restore Default Calibration button Overwrite the data in the User Color ID area back to the saved data in
the Production Color ID area.
 Loading...