EasyManuals Logo

Epson SCARA ROBOT User Manual

Epson SCARA ROBOT
216 pages
To Next Page IconTo Next Page
To Previous Page IconTo Previous Page
Page #128 background image
Maintenance 4. Cable
116 G6 Rev.21
(7)
Connect the connectors, air tubes, D-
sub cable, and connectors to the connector plate
(inner side).
Connector
D-sub
D-sub cable
Air tube
Nut
Ground terminal
Plain washer
Spring washer
Connector plate
(8
) Loosely mount the connector plate with two screws (M4).
For details, refer to Maintenance: 3.4 Connector Plate.
(9)
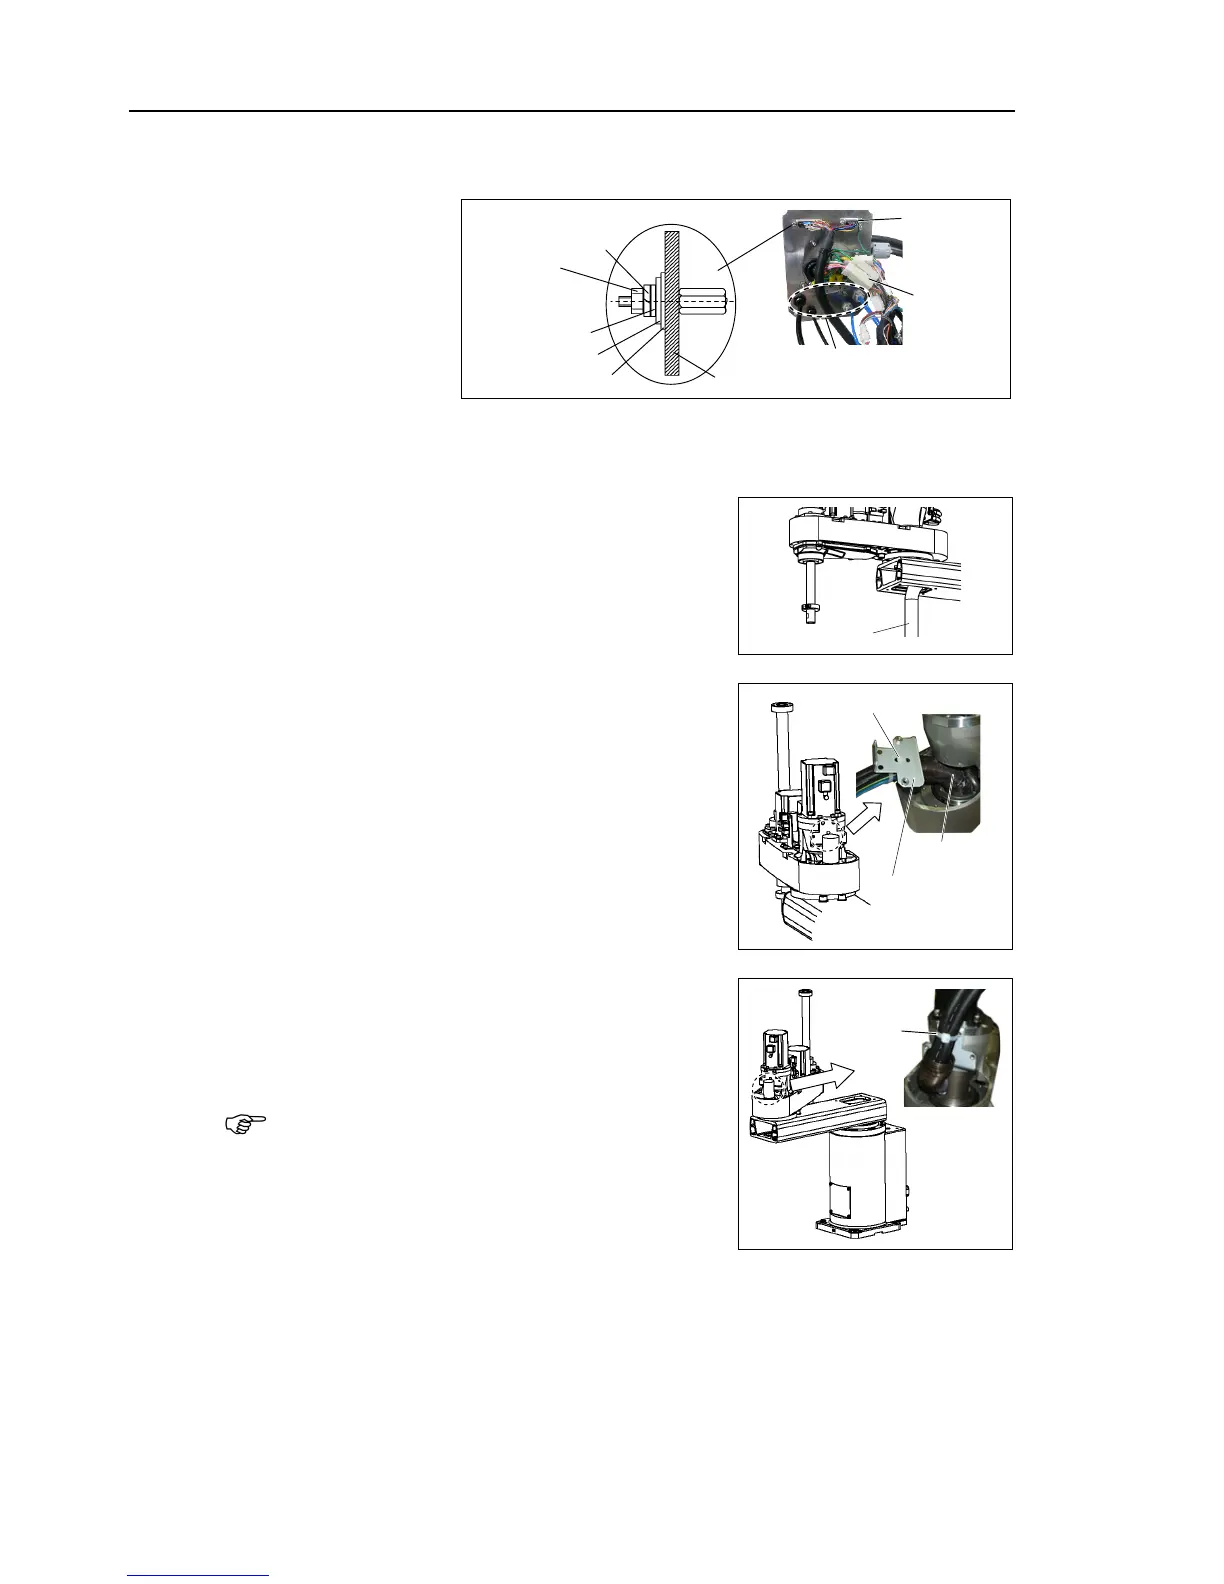
Disconnect the Arm #2 side cables to the lower
part of Arm #1 and pull the cables into Arm #2.
Cable
(10
)
Mount the spring for cable protection to the spring
plate with a wire tie.
Secure the spring plate to Arm 2.
Wire tie
Spring plate
Spring
(11)
Move Arm #2 until the arm touches the mechanical
stop to make allowance.
Then, band the cables and air tubes with a wire tie.
If you band the cables and tubes without
allowance, the cables are pulled and may be
disconnected during the robot operation. Make
sure to make allowance.
Wire tie
(12)
Remove the plastic bags on the Arm side applied in step (2).
NOTE

Table of Contents

Questions and Answers:

Question and Answer IconNeed help?

Do you have a question about the Epson SCARA ROBOT and is the answer not in the manual?

Epson SCARA ROBOT Specifications

General IconGeneral
TypeSCARA Robot
ApplicationsAssembly, Pick and Place, Dispensing, Packaging
MountingFloor, Wall, Ceiling
Communication InterfaceEthernet, RS-232, USB
Repeatability±0.01 mm to ±0.02 mm

Related product manuals